Everything Survox/CfMC
Anything and Everything related to the Survox/CfMC Systems running at MAXimum Research. "Chapters" are organized by department, for quick browsing. General/Common shared knowledge can be found under the "General/FAQs" chapter.
- I. Survox - Phone&Project Ops
- Sample Management - Sample Weighting (Markets & Timezones)
- RUNDATA - General Overview of What it Does, Where it Lives, How it is Run and Who Sets it Up
- Sample Management - Hiding/Revealing Sample (incl. Named)
- Quota Management - .T "Switches"
- Survox Dialer - Configuration Options
- Sample Management - Understanding the MPF Screen
- Suspends - How to View/Export Them - 5 Methods
- II. Survox - Tools Of The Trade
- III. Survox - IT/DP
- IV. Help/Support/Troubleshooting
- Troubleshooting - Locked QSS
- Troubleshooting - Out of Sample
- Troubleshooting - INTV Login Issues
- Troubleshooting - Server/Dialer Crash
- TroubleShooting - Fixing (Rebuilding) Active Project Fone Files
- V. Reference Documents
- Reference Material - Survox Dialer
- Reference Material - Standard Phone Disposition (Dispo) Codes
- Dashboard Overview - Shop Report
- Dashboard Overview - Dialer Dashboard Report
- Dashboard Overview - INTV Realtime Report
- Dashboard Overview - Production Report
- How To: Caller ID/LCP Settings & Call Interceptor Program
I. Survox - Phone&Project Ops
Anything and everything a phoneroom/project team member needs to know about using Survox. Articles in this book cover managing sample, super/boss commands, dialer settings, quota switches to control survey features, and more. These are NOT just for PDs/Supervisors though, as everyone that works with Survox regularly should know and understand these features.
Sample Management - Sample Weighting (Markets & Timezones)
Understanding Market & Timezone Weights in Survox
Market weights control how Survox distributes dialing across the markets built for a project. Timezone weights follow the same logic and are covered briefly at the end of this article. Markets themselves are "groupings" of similar sample records, for example gender combined with age ranges, or counties crossed by political party. They are used as a means to target specific sample types for dialing, or focusing on, by adjusting their weighted value.
The Basics
Each market in a project can be assigned a weight from 0 to 9.
A weight of 0 means the market will not be dialed at all. Survox will skip it entirely until the weight is changed.
Weights 1 through 9 are not true ratios. Think of them more as multipliers that influence what percentage of numbers Survox pulls from each market every time the dialer requests numbers, or when an agent requests a number in 1:1 mode.
How Weights Work When Sample Sizes Are Equal
When all markets have roughly the same number of records, the math is straightforward.
Five markets all set to weight 1 with similar record counts will each receive about 20% of every pull. Over 100 calls, you can expect roughly 20 numbers drawn from each market.
If you raise one of those markets to weight 2, Survox treats that market as if it has twice as many records in the pool. The result is that market receives approximately 40% of every pull, while the remaining four markets each drop to roughly 15%.
The table below shows a two-market equal-sample scenario where Market A stays at weight 1 and Market B is increased step by step:
| Market A Weight | Market B Weight | Market A calls per 100 | Market B calls per 100 |
|---|---|---|---|
| 1 | 1 | 50 | 50 |
| 1 | 2 | 33 | 67 |
| 1 | 3 | 25 | 75 |
| 1 | 4 | 20 | 80 |
| 1 | 5 | 17 | 83 |
| 1 | 6 | 14 | 86 |
| 1 | 7 | 13 | 87 |
| 1 | 8 | 11 | 89 |
| 1 | 9 | 10 | 90 |
How Weights Work When Sample Sizes Are Not Equal
This is where it gets more nuanced. When markets have significantly different record counts, the starting percentages are already unequal before weights even come into play.
For example, three markets with no special weighting and record counts of 1,000 / 500 / 100 will naturally pull at roughly 63 / 31 / 6 out of every 100 calls respectively. That is simply because the larger markets represent a larger share of the total pool.
When you apply a weight to one of those markets, you are multiplying its effective record count in the calculation. Increasing the smallest market from weight 1 to weight 2 doubles its effective count from 100 to 200, which shifts the percentages across all three markets. The larger markets do not stay fixed -- they all recalculate together.
This means that in unequal-sample projects, predicting exact pull percentages requires knowing both the record counts and the weights across all markets simultaneously.
The table below shows this same three-market scenario with A and B staying at weight 1 while Market C is increased:
| Market A Weight | Market B Weight | Market C Weight | Market A calls per 100 | Market B calls per 100 | Market C calls per 100 |
|---|---|---|---|---|---|
| 1 | 1 | 1 | 63 | 31 | 6 |
| 1 | 1 | 2 | 59 | 29 | 12 |
| 1 | 1 | 3 | 56 | 28 | 17 |
| 1 | 1 | 4 | 53 | 26 | 21 |
| 1 | 1 | 5 | 50 | 25 | 25 |
| 1 | 1 | 6 | 48 | 24 | 29 |
| 1 | 1 | 7 | 45 | 23 | 32 |
| 1 | 1 | 8 | 44 | 22 | 35 |
| 1 | 1 | 9 | 42 | 21 | 38 |
Notice that even at weight 9, Market C is still trailing both other markets because the 10:1 record count gap is too large for any weight to fully overcome. Weights adjust the ratio, but they cannot manufacture sample that does not exist.
Practical Ceiling: Weights Above 4
Because of the percentage-based math, raising a weight above 4 rarely produces a meaningful change in how aggressively that market is dialed relative to the others. The gains compress as the multiplier grows. In most real-world projects, weights between 1 and 4 are where the useful adjustments happen.
Timezone Weights
Timezone weights follow the exact same logic described above. The weight value acts as a multiplier on the effective record count for each timezone segment, and all the same rules around proportionality and diminishing returns above 4 apply.
There is one important distinction with timezone weights -- they are evaluated first, before market weights. When the dialer requests numbers, Survox checks timezone eligibility and weighting before it ever looks at market weighting.
This creates a scenario worth being aware of: if you weight the East Coast timezone heavier than Central, but then also weight a market that is primarily Central numbers higher, those two settings can partially cancel each other out. The timezone weight pulls the system toward East Coast numbers, while the market weight is trying to push it toward Central -- and the result may not be what was intended.
In practice this does not come up often, because geographic regions that are separated by timezone are usually not also separated into different markets on the same project. But it is always worth a quick check. If you are unsure how your timezone and market weights may be interacting, review the CfMC Info Sheet for the project or speak with the Project Director or Programmer before making changes.
Real World Example
The following example uses an actual project sample load to illustrate how weights behave in practice. The numbers shown represent expected calls out of every 10,000 dialed, which roughly mirrors what you might see over a single busy shift hour.
With all markets at their default weight of 1, Survox distributes calls purely based on the proportion of available records in each market. Females Over 65 dominates simply because it has the most records loaded, while Males Under 30 receives the fewest calls for the same reason.
Scenario 1 -- All weights at 1 (189,711 total records)
| Code | Market | Weight | Records | Calls per 10,000 |
|---|---|---|---|---|
| 11 | Males - Under 30 | 1 | 10,603 | 559 |
| 12 | Males - Under 50 | 1 | 19,279 | 1,016 |
| 13 | Males - Over 50 | 1 | 17,261 | 910 |
| 14 | Males - Over 65 | 1 | 27,470 | 1,448 |
| 21 | Females - Under 30 | 1 | 16,994 | 896 |
| 22 | Females - Under 50 | 1 | 29,043 | 1,531 |
| 23 | Females - Over 50 | 1 | 26,389 | 1,391 |
| 24 | Females - Over 65 | 1 | 42,672 | 2,249 |
Scenario 2 -- Adjusted weights (295,512 effective records)
Now suppose the project needs to push harder on overall younger and more specifically male respondents. Males Under 30 and Males Under 50 are raised to weight 3, and Females Under 30 and Females Under 50 are raised to weight 2. Everything else stays at 1.
Survox now multiplies those markets' record counts by their respective weights to calculate a new effective pool of 295,512 records. This is NOT the number of records you have, just the "effective" values after applying the weights, to calculate the calls per market... The call distribution shifts significantly, but notice that the markets left at weight 1 all drop -- even though nothing was done to them. That is the nature of percentage-based weighting. Boosting some markets always comes at the cost of the others.
| Code | Market | Records | Weight | Effective Records | Calls per 10,000 |
|---|---|---|---|---|---|
| 11 | Males - Under 30 | 10,603 | 3 | 31,809 | 1,076 |
| 12 | Males - Under 50 | 19,279 | 3 | 57,837 | 1,957 |
| 13 | Males - Over 50 | 17,261 | 1 | 17,261 | 584 |
| 14 | Males - Over 65 | 27,470 | 1 | 27,470 | 930 |
| 21 | Females - Under 30 | 16,994 | 2 | 33,988 | 1,150 |
| 22 | Females - Under 50 | 29,043 | 2 | 58,086 | 1,966 |
| 23 | Females - Over 50 | 26,389 | 1 | 26,389 | 893 |
| 24 | Females - Over 65 | 42,672 | 1 | 42,672 | 1,444 |
Males Under 30 nearly doubled from 559 to 1,076 calls per 10,000, and Males Under 50 went from 1,016 to 1,957. The tradeoff is visible across every market left at weight 1 -- Males Over 50 dropped from 910 to 584, and Females Over 65 dropped from 2,249 to 1,444. No records were added or removed. The weights simply changed how the existing pool was divided.
A Note on Sample Availability
All of the calculations above are based solely on numbers that are available at the exact moment the dialer requests them. The following are excluded from the math entirely: hidden sample, scheduled callbacks, numbers that have not yet aged to the minimum required call interval, and any numbers flagged as a special type. If a number cannot be dialed right now, it does not count toward the pool, and therefore does not influence the weighting ratios.
RUNDATA - General Overview of What it Does, Where it Lives, How it is Run and Who Sets it Up
Rundata
Rundata (English; from Run + Data) is the general term for MAXimum Research's nightly automated delivery system. It runs on a set schedule each night, and allows PDs and DP staff to attach specific projects to specific time slots for automatic processing and distribution.
What Is Rundata?
Rundata is not a single script -- it is a system. At its core, it is a scheduled automation framework that executes Survox-based tasks (reports, data conversions, data dumps, coding updates, data corrections, and more) at defined times each night. If Survox can run it, Rundata can run it.
When rundata executes for a project, it produces two output zip files:
- jobname_internal.zip -- Contains all reports the PD needs for project updates. This is the internal working package.
- jobname_data.zip -- Contains the datafile and any related client-facing items such as open ends, a topline marginal, or other deliverables.
Both files are emailed to the data@maxresinc.com group by default. If the client is receiving data, they receive only the _data.zip.
Schedule Time Slots
The following time slots are available. PDs and DP staff assign projects to the appropriate slot(s) based on project requirements.
| Time Slot | Mon | Tue | Wed | Thu | Fri | Sat | Sun |
|---|---|---|---|---|---|---|---|
| 5:45 PM | [Y] | [Y] | [Y] | [Y] | [Y] | -- | -- |
| 6:45 PM | -- | -- | -- | -- | -- | [Y] | -- |
| 7:45 PM | -- | -- | -- | -- | -- | [Y] | -- |
| 8:45 PM | -- | -- | -- | -- | -- | [Y] | -- |
| 9:45 PM | [Y] | [Y] | [Y] | [Y] | [Y] | [Y] | [Y] |
| 10:45 PM | [Y] | [Y] | [Y] | [Y] | [Y] | [Y] | [Y] |
| 11:45 PM | [Y] | [Y] | [Y] | [Y] | [Y] | -- | [Y] |
| 12:00 AM | [Y] | [Y] | [Y] | [Y] | [Y] | [Y] | [Y] |
| 1:00 AM | [Y] | [Y] | [Y] | [Y] | [Y] | [Y] | [Y] |
| 1:15 AM | [Y] | [Y] | [Y] | [Y] | [Y] | -- | -- |
| 2:15 AM | [Y] | [Y] | [Y] | [Y] | [Y] | -- | -- |
| Manual | Ad-hoc -- no set schedule, run by PD as needed | ||||||
Who Sets It Up?
Rundata is configured by programmers prior to project launch. Once in place, it can be adjusted, added to, removed, or paused at any time with minimal effort. It runs either via automatic scheduled script or manually by a PD or DP staff member.
Always confirm with the PD exactly what they need -- each project is different and every PD has specific reporting preferences.
The Scripts -- Where They Come From
A master rundata template script is maintained in the /specs folder. When a new study is created, this template is copied into the project's /DP folder twice -- once as rundata and once as runclientdata. At that point, they are identical.
The individual Survox scripts referenced inside rundata are also placed in the /DP folder. Each one requires adjustment for the specific study -- replacing placeholder values with the correct job name and enabling or disabling the appropriate options for the project.
Note: Script configuration details (define statements, job name substitution, etc.) are covered in the Setting Up a Project article.
rundata vs. runclientdata
Since both scripts start as identical copies, the difference comes down to what gets added to runclientdata after the initial setup:
- rundata -- Handles all internal processing and delivers both zip files to
data@maxresinc.com. Used as an on-demand alternative when output is needed immediately, without waiting for the next scheduled run. - runclientdata -- Everything rundata does, plus extra lines at the bottom that handle client file delivery. Because it covers both internal and client output, this is the version that gets added to the schedule -- not rundata.
- It is advised to setup rundata first, then copy it over to runclientdata, saving time from redoing all the settings within the file. simply type
cp rundata runclientdataor open in an editor and "save as" runclientdata. This is best done AFTER confirming rundata executes without any errors or missing files. - After runclientdata has been copied/updated, add client specific needs to the file.
Quick Rule: In the schedule, always userunclientdata. Userundataonly when a PD or DP needs to run output manually, right now.
Adding a Project to the Schedule
When DP sets a job live for dialing using the jobstart jobname command, that process opens the master schedule file as its final step. The master schedule file is located at:
/cfmc/systools/crons/clientdata.cshThe programmer scrolls to the time slot specified by the PD and adds a single line to execute runclientdata for that project. For example, to add a job to the 12:00 AM daily block:
cd jobname/dp ; runclientdataThat's the entire entry. One line per project, in the appropriate time slot block. If a job finishes early, and a PD wants it removed from automatic delivery, simply open the clientdata.csh file and remove the line(s) for the project*.
*Note: Some projects may appear in the file multiple times, if the PD wants files at a different time on the weekends than on weekdays. Always search for any/all references to the project name to confirm none exist when removing it.
If Something Goes Wrong
Rundata itself does not produce a log. However, each individual Survox script that executes during a run generates its own pass/fail output file, often referenced as "error_scriptname.spx". If a delivered zip file is missing content, partially populated, or empty, DP can trace the issue back to the specific script that failed using those output files.
Sample Management - Hiding/Revealing Sample (incl. Named)
Hiding and Revealing Sample
What Is It?
Hiding sample is a way to temporarily remove records from the dialing pool without deleting them. The server simply ignores hidden records when pulling numbers to dial. When you are ready, you can reveal them and they return to normal dialing rotation. This is useful when you need to pause certain records — for example closed quotas, low-performing segments, or to save sample for a later phase of a study. It is also the common practice when doing multimode projects, allowing a PD to hide records dedicated for SMS/Web, while the phone room dials the remaining sample.
The Two Types of Hidden Sample
Important: A record that is already standard hidden cannot be moved to named hidden. It must be revealed first, then re-hidden with a name.
Why Would You Hide Sample?
- A quota has closed and those records should stop dialing
- You want to focus dialing on a specific group (e.g., a particular state or age range)
- Certain record types are not performing (e.g., landlines for younger respondents, or cell phones for older age brackets)
- You want to hold sample in reserve for a later shift or phase
How to Hide or Reveal Sample
There are three ways to hide or reveal records. Each method requires a project name & select statement -- a select statement is code that tells the system which records to target. For example:
[51#1]targets landline records[5121.2$]="NY"targets all records coded as New York
You can also reveal hidden records without a select statement when you want to bring back all of them at once, using the "all" tag.
When doing NAMED HIDES/REVEALS, it is strongly recommended to use Method 3 -- Through the Console, as it is laid out in such a way as to not be as confusing for users, with clear input boxes to enter the various information needed. You can use the other 2 methods if you are comfortable enough with the syntax difference though.
Method 1 -- Via Foneutil (Job Not Active)
Used when the study is not loaded or actively dialing. This is the safest method when a project is still being configured, as it avoids accidentally affecting a job that DP may still be setting up. The below example code is executed via puTTY:
CfMC-phone10 /cfmc/phone10/active/fone>fone <enter>
CfMC-phone10 /cfmc/phone10/active/fone>foneutil <enter>
FONEUTIL ( 9May24) 10.4.2.1 Linux.x64 1004020001 20240509 (con,) - (C) Enghouse Interactive 2024
02 Mar 2026 10:53
List file--> <enter> ##if you put a name here, like hide.log it will save all the screen outputs to that file for later reference
Type study code, '$<fonefile name>' or 'quit'-->jobname1 <enter>
##EXAMPLE HIDE
'*' for HELP or 'Q' to quit (jobname1(rw)) -->hide [51#1] <enter>
(ascii) Enter SELECT statement or 'help'
control - y for status
Reading (1 dot per 100 records) ..................................................................................................................................................................................................................................................................................................................................................................................................................................................................................................................................................................................................................................................................................................
#READ(194466) #SELECTED(67669) #USED/CHANGED(581)
'*' for HELP or 'Q' to quit (jobname1(rw)) -->
##EXAMPLE NAMED HIDE
'*' for HELP or 'Q' to quit (jobname1(rw)) -->named_hide old [53#4] <enter>
(ascii) Enter SELECT statement or 'help'
control - y for status
Reading (1 dot per 100 records) ..................................................................................................................................................................................................................................................................................................................................................................................................................................................................................................................................................................................................................................................................................................
#READ(194466) #SELECTED(48453) #USED/CHANGED(48453)
'*' for HELP or 'Q' to quit (jobname1(rw)) -->
##EXAMPLE REVEAL
'*' for HELP or 'Q' to quit (jobname1(rw)) -->reveal all <enter>
(ascii) Enter SELECT statement or 'help' or 'ALL'
(136487) Record(s) in HIDDEN stack
Reading (1 dot per 100 records) ..................................................................................................................................................................................................................................................................................................................................................................................................................................................................................................................................................
#READ(136487) #SELECTED(136487) #USED/CHANGED(136487)
'*' for HELP or 'Q' to quit (jobname1(rw)) -->
##EXAMPLE NAMED REVEAL
'*' for HELP or 'Q' to quit (jobname1(rw)) -->named_reveal females all <enter>
(ascii) Enter SELECT statement or 'help' or 'ALL'
(136487) Record(s) in HIDDEN stack
Reading (1 dot per 100 records) ..................................................................................................................................................................................................................................................................................#READ(45570) #SELECTED(19253) #USED/CHANGED(19253)
(19253) Record(s) returned from NAMED_HIDE stack
replicates not being used; no repsorting done
'*' for HELP or 'Q' to quit (jobname1(rw)) -->
##TO EXIT
'*' for HELP or 'Q' to quit (jobname1(rw)) -->Q <enter>
Type study code, '$<fonefile name>' or 'quit'-->Q <enter>
In the above code, you can see that someone loaded the project jobname1 and it shows the (rw) prompt, meaning foneutil has the file open in Read/Write mode. If it shows (ro), then the file was loaded in Read Only mode, which means the hide/reveal will not work, as the study is actively open on the server.
After entering the study name, the user entered the hide command along with the select statement "[51#1]".
Progress is shown as "..." followed by the end result, reported as #READ() #SELECTED() #USED/CHANGED()
- #READ() will be the total number of records in the file in most cases, though when revealing, it only reads "hidden" records
- #SELECTED() is a count of how many numbers MATCHED the supplied select statement
- #USED/CHANGED() is how many records it ACTUALLY hid/revealed.
NOTE: IF SELECTED <> USED/CHANGED then either some of the records that match that select are either already hidden, resolved, or currently "at the dialer" or "on the floor" meaning they are actively being called or are connected with interviewers, and thus cannot be hidden. IN the above example, when hiding [51#1] there were 67.669 records that matched, but it only hid 581. The other ~62,000 were already hidden/resolved/named_hidden, so they couldn't be rehidden.
Method 2 -- Via Super/Boss (Interactive, Any Job State)
Commands are entered directly on the server. The job does not need to be inactive. You will enter the command, the job name, optionally a hidden name, and the select statement. using hide/reveal via a super/boss will load inactive jobs, so ensure that DP is not in the process of working on the sample behind the scenes, or you risk undoing their work, or possibly corrupting the files/locking the project. Similar to Methode 1, this method is also completed via puTTY:
##STARTING A super/boss session
CfMC-phone10 /cfmc/>super <enter>
*************************************************************************
**************************************************************************
***** MAXIMUM RESEARCH SURVSUPR CONFIRMATION SYSTEM V1.0 *****
***** -------------------------------------------------- *****
***** *****
***** YOU ARE ABOUT TO RUN A SURVSUPR SESSION WHICH DOES INTERACTIVE *****
***** THINGS WITH FILES & MAY LOCK THE JOB OUT AND PREVENT OTHERS *****
***** FROM ACCESSING IT, OR INTERVIEWERS FROM STARTING UP. *****
***** *****
***** YOU SHOULD BE USING THE SURVOX CONSOLE INSTEAD, SINCE IT WAS *****
***** MEANT FOR THIS VERSION OF CFMC SOFTWARE AND DOESN'T LOCKOUT! *****
***** *****
***** ARE YOU SURE YOU WANT TO DO THAT AND RISK LOCKING OUT THE *****
***** PROJECT AND POTENTIALLY CAUSING DOWNTIME? *****
**************************************************************************
**************************************************************************
IF YOU ARE SURE YOU WANT TO RUN A SURVSUPR SESSION, TYPE SUPER AGAIN: super <enter>
SURVSUPR ( 9May24) 10.4.2.1 Linux.x64 1004020001 20240509 (&?-/cfmc/phone10/support/suprinit,con) - (C) Enghouse Interactive 2024
02 Mar 2026 11:55
Log file /cfmc/phone10/logs/su260302115512.6976 opened as 6. Logging has begun
Test access to stations/studies files (in CfMCCFG on DOS/unix)... (done)
SUPERVISOR device #6976
connected to serverldev at 9901
SUPRINIT: (/cfmc/phone10/control/suprinit)
pause timeout/refresh set from 120 seconds to 300 seconds
Interviewer login timeout set to 0 minutes (was 30 minutes)
force_into_interview timeout/refresh set from 0 seconds to 60 seconds
##EXAMPLE HIDE
Enter a SUPERVISOR command-->hide jobname1 [53#2] <enter>
Starting 'hide/reveal/etc' of phone records or copy .tr ...
Enter a SUPERVISOR command--> <enter>
(HIDE-jobname1) 194376 cases read out of 194466. #SELECTED(100461) #USED(100461)
server done with Hide/Reveal/Change_owner/copy/phone_operation
Enter a SUPERVISOR command--> <enter>
##EXAMPLE REVEAL
Enter a SUPERVISOR command-->reveal jobname1 [54#3] <enter>
Starting 'hide/reveal/etc' of phone records or copy .tr ...
Enter a SUPERVISOR command--> <enter>
(REVEAL-jobname1) 100461 cases read out of 100461. #SELECTED(20003) #USED(20003)
server done with Hide/Reveal/Change_owner/copy/phone_operation
##Quitting out of Super/Boss
Enter a SUPERVISOR command--> qui <enter>
Close the log file /cfmc/phone10/logs/su260302115512.6976
*** That is All ***
SURVSUPR ( 9May24) running &?-/cfmc/phone10/support/suprinit to con at 02 MAR 2026 12:01.
total time: 360 seconds elapsed, 0.30 seconds CPU time
*Note: when in a super/boss, if you hit <enter> one too many times, it will go into "sleep mode" where it just "dots" on the screen. To get back to the supervisor command prompt, press control+c to bring it back up.
Just like with the foneutil method, you can see the progress, showing #READ, #SELECTED, & #USED. The only real difference is that the commands require the jobname as well as the select, since a super/boss has access to all projects, whereas foneutil only loads the project you specify at the prompt.
Named Hide/Reveal via Super/Boss
The steps to do a named hide/reveal are almost the same, you just need to add the name to use in the statement, at just the right place. For example:
- Normal Hide/Reveal:
hide/reveal jobname select <enter> - Named Hide:
named_hide jobname name_to_use select <enter>- Names must be <30 characters, cannot contain spaces, and must start with a letter. They can include uppercase, lowercase, numbers and underscores "_" only.
- Named Reveal:
named_reveal jobname name_to_use select (or all) <enter>- using "all" will reveal ALL records within that name hidden "bucket"
- using a "select statement" will reveal just a subset of the name hidden sample. For example, if ALL Females are name hidden as "females", and you want to reveal just the ones over 50, you would put in the select for over 50 in, with the name "females":
named_reveal jobname females [54#3]
Method 3 -- Via Survox Console (Interactive, Any Job State) *PREFERRED METHOD
Located under Manage > Manage Sample > Hide/Reveal in the Survox Console web interface. Like Method 2, this works whether the job is loaded or not. The console gives a nice visual set of boxes to fill in, which clearly explains what belongs in them. After navigating to the Hide or Reveal option, you must first select the project from the dropdown. After selecting the project, you will be presented with option to select Live or Test... Always pick "Live" and then click " Select Records " ... After that, one of two screens will appear depending on if you selected HIDE or REVEAL:
Hide Sample - Console Mode
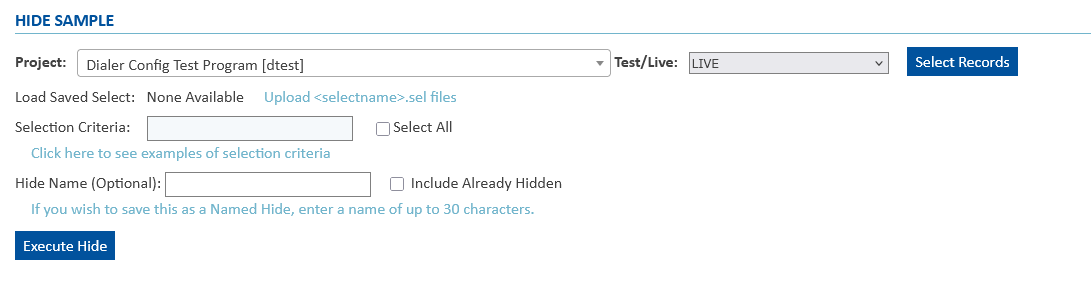
In the above image, you can see all the possible fields needed to fill out to execute the hide via the console:
- Selection Criteria: This is the "select statement/base" you want to use, i,e, [51#1] or [53#4] or [5121.2$]="NJ"
- Select All: Optionally, checking this INSTEAD of providing a select statement will do as it says, and hide ALL non-hidden sample
- Hide Name: If you want the hidden records to be "named_hidden" this is where you add the name you want. Names must be <30 characters, cannot contain spaces, and must start with a letter. They can include uppercase, lowercase, numbers and underscores "_" only.
- Include Already Hidden: This optional checkbox will MOVE other named_hidden records INTO the new name... see note below for more details
Once you have everything filled out, simply click " Execute Hide " to send the command to the server.
Reveal Sample - Console Mode
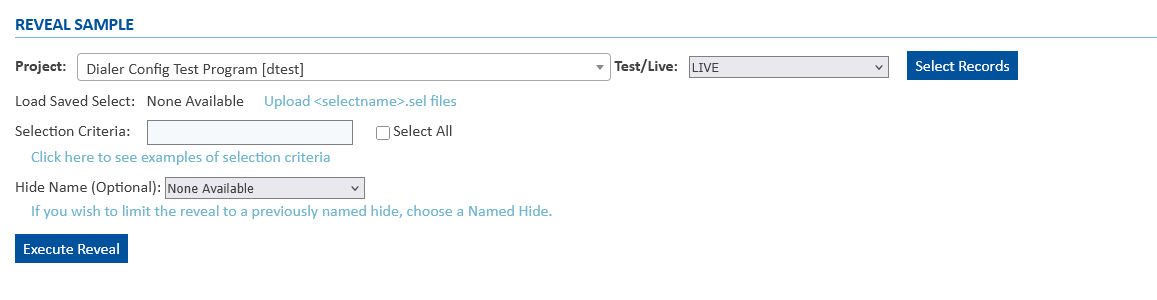
In the above image, you can see all the possible fields needed to fill out to execute the reveal via the console:
- Selection Criteria: This is the "select statement/base" you want to use, i,e, [51#1] or [53#4] or [5121.2$]="NJ"
- Select All: Optionally, checking this INSTEAD of providing a select statement will do as it says, and reveal ALL hidden sample
- Hide Name (Optiona): If you want name hidden records to be revealed, you can use this dropdown to select the specific name. There is a bug though, where a single name may appear hundreds of times. You can just select any one of them, and it encompasses all records that match that name. If you know the name you want, i.e. "Females", you can quickly jump to it by hitting "F" on your keyboard while the dropdown is open, and it will jump to the first one...
- When revealing named hidden records, typically the "Select All" box is checked too, but you can reveal just a subset of the hidden records... i.e. just reveal over50 from the "Females" name, and not all records in the "Females" bucket.
Once you have everything filled out, simply click " Execute Reveal " to send the command to the server.
Confirming Hide/Reveal -- Vial Console
Unlike foneutil and via a super/boss, the console will not immediately let you know how many records were affected. Instead, you need to navigate to the Sample Task Queue to view the status/result. Just like with the hide/reveal, first select the project and Live and then it will appear. It should look similar to the below image:

It will show you the command (Hide/Reveal), if it was named or normal, the #Read(), #Selected(), #Used() as well as WHO executed it (right hand side) and when. commands done via super/boss will just show a 4-digit number, while commands done in the console will show the username. Note: Because foneutil is not part of the console, it will not show any hides/reveals in the sample task queue done via foneutil.
Note: Using the "Include Already Hidden" option in the console will move named hidden records out of their current name and into a new one. This should be used with extreme caution, as it can make sample you don't want to come out, come out when revealed. Example: Females quota closed, so you name_hid them as "Females". later, you name_hide "Democrats" to help with other quotas. If you checked the "Include Already Hidden" box, all FEMALES that are also DEMOCRAT will move into the "Democrats" name now, so when you later reveal the "Democrat" name, all the females that were Democrat will also come back out.
Coordinate with DP Before Hiding on New Projects
Always confirm with DP when hiding sample before a project is launching, as they may not have set the job "fully live" and could undo your hides in the process. Once jobs are live, there is no risk in a programmer undoing them, unless they are rebuilding the files due to errors, or because more sample was being added. When in doubt, reach out.
Things to Know Before You Hide or Reveal
Records currently at the dialer or with an agent will not be hidden. If a number is actively in use on the floor, it will be skipped during the hide operation.
Error records can interrupt the process. Records flagged as errors get skipped, and in some cases they will cause hiding or revealing to stop entirely once the system reaches one. If a hide/reveal seems incomplete, error records may be the cause.
Sometimes it is easier to hide everything and reveal just what you want. If you are trying to isolate a small group of records to dial, it may be simpler to hide all sample first and then reveal only the specific subset -- rather than writing multiple select statements to exclude everything you do not want.
Replicates require special handling. If your project uses replicates (numbered groups of sample), revealing records can put the replicates out of sequence. Records that are out of order may not actually dial. To correct this, IT or DP must either bring the job down to fix the order, or hide all sample and reveal it back one replicate at a time. If you are working on a replicated study, coordinate with DP or IT before revealing sample.
Showing/Listing Names Used
There may be times where someone has to reveal a named hide, but doesn't know the name used, or they have the name, but it isn't revealing the sample. For this reason, IT has created a simple little command that can be run via puTTY that will show you all the names used, and how many records there are within it, for any job specified. To run the command, simply open puTTY and from any folder type the command list_hidden jobname <enter> and the system will run a little report for you, showing all names used, with a count by total and land and cell
CfMC-phone10 /cfmc/phone10/active/fone>list_hidden jobname1
MENTOR ( 9May24) 10.4.2.1 Linux.x64 1004020001 20240509 (get_nhd.spx,-error) - (C) Enghouse Interactive 2024
03 Mar 2026 17:37
System versions: lib=20240509,comp=1004020001,msg=10421,progver=2003,odbc=yes
File versions: qff=2023062101,var=32,quota=9508,db=12,fone=91,stations=1042
DB file /cfmc/phone10/support/phrpt.db opened in READ_ONLY mode
(WARN #9803) Running in >-allowindent mode is not recommended..............................................................................................................
(WARN #9802) Indented Meta/System command? Allowindent is not on, treated as text.
Note: one DOT per 100 cases read ................................................................................................................................................................................................................................................................................................................................................................................................................................................................................................................................................................................................................................................................................................................................................................................................................................................................................
Input data file /cfmc/phone10/active/fone/jobname1.fon closed with 194466 cases read
*** That is All ***
total time: 8 seconds elapsed, 8.37 seconds CPU time
Your name hidden report for jobname1 is ready. Here is what I found. To open the file, view/edit /cfmc/phone10/fone/name_hid.scn
SCAN of jobname1.fon - Page 1
TABLE 001
ROW: [5270.30$]
TOTAL LANDLINE CELLPHONE
--------- --------- ---------
Total 26317 4114 22203
blast1_f50p 10610 - 10610
loop2 24 7 17
loop3 32 9 23
postgrad 15651 4098 11553
As you can see in the above code, for the project jobname1 there are 26317 total Name Hidden records, spread across 4 different names, "blast1_f50p", "loop2", "loop3", and "postgrad" These are then the names you would use to reveal them, along with either "all" or a specific select statement. If you wanted to open the file in textpad after running, you can navigate to the cfmc\phone10\fone folder and look for a file called "name_hid.scn". Just note, if someone else runs the command after you, it will replace that file with their study's information.
Common Sample Select Statements Reference
These select statements will work in any utility that can access the sample. These are not specific to just hiding/revealing numbers. So you could in essence use the same selects below when zapping, exporting, or moving sample around.
*While every project is unique, there are quite a few common selects that work for most, if not all projects. Project specific selects can typically be found on the CfMC Info Sheet, or by asking DP if unsure.
| Common Name | Select Statement | Description |
| Phone Number | [1.10#xxxyyyzzzz] | Used to hide a specific phone number. You can technically type in about 5 or so numbers at once, separating each with a comma. |
| Area Code | [1.3#xxx] |
Used to target specific area code(s). you can enter up to 10 per select, separating each with commas, i.e. [1.3#856,609,267,215]
Useful if severe storms are hitting specific areas, and you want to limit calling into them. |
| Land/Cell Records | [51#1/2] /OR/ [75$]="L/C" | ALL jobs will use the L/C markers in 75. Most jobs should also have the 51#1/2 flag as well, but always confirm via the info sheet |
| Specific State | [5121.2$]="XX" | This is NOT the state listed in any address fields, but rather the state associated with the area code of the number. |
| FRESH Numbers | [6003.3^^b] | All numbers that have not yet been dialed |
| Live Numbers | [5111.3#0] /OR/ all |
ALL numbers that could be dialed, including Fresh. You could also just hide/reveal "all" since you cannot hide/reveal dead/resolved numbers. |
| Live Dialed Numbers | [6000.3#1-999] |
Live numbers that have been called 1+ times (so all live - fresh) |
| Number of Attempts | [6000.3#xx-yy] |
Live numbers that have between xx & yy attempts made. You can use a range, i.e. 3-9 to hide all numbers with between 3 and 9 calls, or just a single number i.e. 6 to hide numbers with 6 calls. |
| Date Last Called | [6012.6#yymmdd] |
Used to select numbers that were last dialed on a specific/range date, using yymmdd format. For a single date, just use 260101 for January 1st, 2026. For a range, use 260201-260205 for February 1st through 5th, 2026 |
| Suspends | [5047#1] |
Will hide all live suspends. Useful if programming changes "broke" them, so they do not come back up until the issue is fixed or they have been reentered. This is the general "all suspends" option. |
| Phone Suspends | [5047#1] and [6006#0-9] |
Will hide all live suspends that were dialed by interviewers. Useful if programming changes "broke" them, so they do not come back up until the issue is fixed or they have been reentered. |
| Web Suspends | [5047#1] and [6006.4$]="webs" |
Will hide all live suspends that were from Web/SMS respondents only. Useful if programming changes "broke" them, so they do not come back up until the issue is fixed or they have been reentered. |
| Specific Call Results | [6003.3#xxx] |
If needed to hide a specific call result, for example Callbacks. *refer to Standard Disposition Codes article for specific codes |
| Specific Interviewer Calls | [6006.4#intv] |
if it is needed to hide calls made by a specific interviewer (QC Reasons), you can supply their 4-digit ID to apply the hide for all numbers LAST dialed by them. |
|
|
||
|
Super/Boss Specific Selects The following selects ONLY work within a super/boss session, and are not often used, but worth documenting none the less. These all use @Text instead of [code]. |
||
| All Records | @all |
Used to select any/all live numbers |
| Fresh Numbers | @fresh |
Fresh, undialed numbers |
| Land/Cell Records | @land /OR/ @cell |
Records that are either flagged as Landline or Cellphone |
| Soft Refusals | @srf |
Records where the either the last or a previous call was a Soft Refusal. These are both "Hold Area" numbers on the SPI screen |
| Respondent Hung up @ Intro | @rhu |
Records where the last call was a Respondent Hung Up in the Intro. These are "Hold Area" numbers on the SPI screen, just like Soft Refusals |
| System Numbers | @sysnums |
System numbers are live numbers where the last call was a no answer or answering machine. These are like a subset of all live numbers, and exclude things like busy numbers, callbacks, etc. |
| Special Type Numbers | @sp# (#=1-9) |
Specifically used to target each special type number used in various projects. For example, to hide Spanish Language Speakers, you can use @sp1, since special type 1 is our default flag for those Spanish Speaking respondents |
| Phone-Based Suspends | @suspends |
Targets those records that are a suspend, and that was started via phone. |
| Web-Based Suspends | @webspns |
Targets those records that are a suspend, and that was started via Web/SMS. |
| Census Regions (Northeast, Midwest, South, West) | @c4ne, @c4mw, @c4so, @c4wc |
Uses the standard 4 Census Regions, to select all records in states within the provided region. Helpful for weather events, and other similar issues that affect large areas of the country all at once. |
| Census Divisions (9 total) | @c9ne1, @c9ne2, @c9so1, @c9so2, @c9so3, @c9mw1, @c9mw2, @c9wc1, @c9wc2 |
Smaller, more localized versions of the 4 main Census Regions. These divisions cover the continental 48 states. |
Quota Management - .T "Switches"
Quota-Controlled Switches
Most projects are programmed with special quota entries in the QSS that act as on/off controls -- or value-based triggers -- for specific behaviors within the survey program. These are commonly referred to as "switches." Unlike standard quotas that track completes toward a target, or act as counters for various call results, switches are quota cells whose sole purpose is to signal the program to behave differently based on the value currently set. The program checks the switch value and responds accordingly -- enabling or disabling features, changing what interviewers see, or altering how the dialer and sample interact with the job. All switches are controlled via their .T (target) value.
Who Changes Them
Anyone with QSS access can modify a switch value, but changes should only be made at the direction of the PhoneOps Manager or the Project Director. Making an unauthorized or incorrect change can immediately affect interviewer behavior, dialer operation, or quota logic across the entire project.
How They Work
A switch is a named quota cell whose target value (.T) the program actively monitors at runtime. When the value is changed, the program responds by altering its behavior accordingly. Some switches use a simple two-state value where each number triggers a distinct behavior. Others accept a numeric value that sets a specific threshold or count. Each switch's behavior is defined by the programmer -- the value itself has no universal meaning across all switches.
Important: Not Every Quota Is a Switch
Because of how Survox handles quota tracking, every quota entry in the QSS -- regardless of its purpose -- automatically gets three columns: a running total counter on the left, a resettable daily counter (.R) in the middle, and a target value (.T) on the right. This means every quota has a .T field, whether or not that field actually does anything meaningful.
For standard tracking quotas -- such as complete counts by demographic group -- changing the .T value simply adjusts the target threshold. It does not trigger any special program behavior.
Switches are a specific subset of quotas that have been programmed to watch their own .T value and act on it. If a quota is not programmed to respond to its .T value, changing it will have no effect on program behavior beyond the quota counter itself.
When in doubt about whether a quota entry is a switch or a standard tracking quota, consult the programmer or the PhoneOps Manager before making any changes.
Changing a Switch Value
Switch values can be changed through any of the following methods:
QuotaMod (via PuTTY) -- Available when the job is not actively running. Connect to the server via PuTTY and run the QuotaMod utility to directly edit quota values for the job.
Super/Boss Command Line -- While connected to the server via a super/boss session, the command qss jobname mod can be used to open and modify the QSS for the specified job directly from the super or boss environment.
Survox Console -- From the Console, navigate to Manage, then Quotas, then Named, and select the project from the list. This method is available whether or not the job is active and is the most accessible option for supervisors who do not work directly in the server environment.
Switch changes take effect immediately, though interviewers in the process of conducting an interview may not see them until their next call is attempted, as most quotas are only read at the start of the call. Some quotas, like TQ logic and the ASK_UP questions are real-time however.
Standard Switches
The following switches are present in all standard jobs and appear in the QSS in the order listed below.
JOBLIVE.T
Controls whether the job is open for interviewing.
- 1 = Job is active; interviewers can log in
- 0 = Job is offline; no interviewer logins are permitted
Use this to prevent early logins before a shift begins, or to close the job at the end of the night.
QVERSION.T
Tracks the current version of the survey program.
- 1 = Initial study version
- Any value greater than 1 = A subsequent updated version
When the programmer makes a live change to the survey (via the .qff file), incrementing this value signals interviewers that a new version is available. Interviewers will be prompted to log out and back in to load the updated survey. This switch should only be changed after the .qff file has already been updated on the server.
FORCE_LOGOFF.T
Forces interviewers out of the survey after their current call completes.
- 0 = Interviewers may remain logged in between calls
- 1 = Interviewers are logged off automatically after their next call finishes
This switch works in tandem with JOBLIVE.T. Setting JOBLIVE.T to 0 closes the job, and setting FORCE_LOGOFF.T to 1 ensures interviewers who are still active are properly logged out after completing their current call -- including those who may not be monitoring Slack for end-of-shift notices.
TESTING.T
Controls whether the survey is running in live or testing mode.
- 0 = Survey is in live mode; normal interviewing rules apply
- 1 = Survey is in testing mode; Ops staff and clients can back up through the survey in places a live interviewer could not
Testing mode makes it easier to verify skip logic, terminate conditions, and quota routing without interfering with production interviewing.
DAILYQUOTA.T
Sets a daily complete goal for the project.
- 999 = No daily limit is in effect
- Any other value = Interviewers are notified that the daily quota has been met when DAILYQUOTA.R reaches this number
Leave at 999 when no daily cap is needed.
NO_SUCH_PERS.T
Controls visibility of the "No Such Person" disposition code on the intro and disposition screen.
- 0 = The "No Such Person" code is visible and available to interviewers
- Any non-zero value = The code is hidden from the screen entirely
Use this when the "No Such Person" option is not applicable for a particular study or sample type.
TQ_NAMEFILE.T
Controls whether the survey will allow someone other than the listed contact name to complete the interview.
- 0 = Only the person whose name is on the record may complete the survey; anyone else receives a message that we can only speak with the listed individual
- Any non-zero value = Other household members or respondents are permitted to continue past the name check
TQ_*.T
A family of switches used to disable specific terminate questions on a per-question basis. The asterisk represents the label of the question being controlled -- for example, TQ_Q5.T or TQ_INCOME.T.
- 0 = The question follows its normal programmed terminate logic
- 1 = The terminate condition at that question is bypassed; the interview continues past what would otherwise be a disqualifying answer
These switches are used when a client requests that one or more terminating questions be disabled -- typically to improve incidence rates or to allow a broader range of respondents to complete the survey. Each TQ_*.T switch controls only the specific question referenced in its name.
DLR_GETSPEC.T
Controls whether interviewers on the predictive dialer can search for a specific phone number before it is dialed -- referred to internally as "putting the box up."
- 0 = Interviewers in predictive dialer mode receive calls as normal; no number search option is available
- 1 = Interviewers can search for and request a specific phone number prior to dialing
This switch acts as a bridge for dialer-based interviewers who would not otherwise have access to the number search function.
ALLOW_RSLV.T / ALLOW_SPCL.T / ALLOW_HDDN.T
Three separate switches that control whether interviewers can pull up Resolved, Special Type, or Hidden sample records during a number search.
- 0 = That record type is not accessible during a search
- 1 = Interviewers may retrieve that record type during a search
All three of these switches require DLR_GETSPEC.T to also be set to 1. The number search option must be active before these controls have any effect.
WEB_LASTQ.T
Used in SMS and web-based jobs only. Controls whether the final survey question -- asking respondents if they are willing to provide their name -- is displayed.
- 0 = The question is skipped; the survey ends without it
- 1 = The final name-request question is shown to the respondent
WEB_ALLOWBKUP.T
Used in SMS and web-based jobs only. Controls whether respondents can back up to a previous question.
- 0 = No backup option is available; respondents move forward only
- 1 = Respondents may back up between questions
Demographic Move-Up Switches (ASKXYZUP.T)
Some jobs include additional switches named in the format ASKXYZUP.T, where XYZ represents a specific demographic question -- for example, ASKRACEUP.T or ASKAGEUP.T.
- 0 = The question appears in its normal position in the demographic section
- 1 = The question is moved forward into the screener section
Moving a demographic question into the screener allows the system to apply quota controls on that characteristic earlier in the interview, before a full complete is recorded. This is used when tighter demographic quota management is needed on a particular study.
Conclusion
Switches are powerful tools when used correctly. A single value change can alter the experience for every interviewer on a live job, so always confirm with the PhoneOps Manager or Project Director before making any modifications. As projects grow in complexity, the number of switches present in the QSS may expand beyond those listed here. When encountering an unfamiliar switch, always consult the programmer or project documentation before changing its value. Understanding what each switch does -- and equally important, what it does not do -- is key to managing a job effectively without introducing unintended behavior mid-shift.
Survox Dialer - Configuration Options
All projects running in Survox, on the dialer, have 3 main areas of control, that can be modified to meet the study's needs. Each one works in slightly different ways, so understanding each gives users full insight into how the dialer works in terms of the project requirements. The 3 areas are Dialer Configuration, Dialer Parameters & Dialer Control. All 3 are located within the Manage > Study Control menu in the Survox Console. This is the ONLY place these settings can be adjusted.
Dialer Configuration
The Dialer Configuration section of Survox allows you to control how the dialer behaves when a study is started. These settings determine everything from how aggressively the dialer places calls, to what phone number respondents see when they receive a call.
Dialer Configuration is found at: Manage > Study Control > Dialer Configuration > Study Selection & Go
Understanding Shopwide vs. Project Settings
The Dialer Configuration screen displays two columns of settings: Shopwide and Project.
Shopwide represents the default dialer settings for the entire call center. If no project-specific value is entered, Survox will use the Shopwide setting automatically.
Project allows you to override any Shopwide default for a specific study. When a value is set in the Project column, it takes priority over the Shopwide setting for that study only. If a Project field is left blank or set to "---", the Shopwide default remains in effect.
Think of Shopwide as the standard operating baseline, and Project as a study-specific exception to that baseline.
Basic Dialing Options
Abandonment Rate
This setting controls the maximum number of calls the dialer is allowed to drop per 10,000 connects. A setting of 350 equals a 3.5% drop rate.
A dropped call occurs when the dialer detects that all agents have become occupied mid-dial, and hangs up the outbound call after 1-3 rings -- before the respondent ever answers. This prevents a respondent from picking up with no agent available to speak with them.
The dialer continuously monitors its own drop rate and attempts to stay just below this threshold. If drops are occurring, the dialer will use this setting to regulate how aggressively it dials. If the dialer is not currently dropping any calls, raising this number will not speed up dialing -- the setting only comes into play when drops are actually happening.
Drop rate is one of several factors that influence overall dialer speed and performance.
Number of Rings to Set "No Answer"
The maximum number of rings the dialer will wait before classifying an unanswered call as a No Answer and moving on.
One important distinction: a "ring" in this context is not tied to the actual ring sound a respondent hears. Instead, the dialer counts each 6.25-second interval after the call connects between the dialer and the telephone carrier as one ring. The audible ringing a respondent hears may not align exactly with what the dialer is counting.
At MAXimum Research, this is typically set to 4 rings (25 seconds). This keeps the dialer from waiting long enough to trigger voicemail and answering machine pickups, which commonly activate around the 30-second mark.
Answering Machine Detection (AM Detection)
This setting tells the dialer how to handle a call when it determines an answering machine or voicemail system has picked up. The available options are:
Detect and Hangup (default) -- The dialer identifies the call as an answering machine or voicemail, codes it accordingly, and ends the call automatically without involving an agent.
Do Not Detect -- AM Detection is disabled. All answered calls are passed directly to an agent, who handles the answering machine or voicemail manually.
Detect and Play Recording -- The dialer identifies the call as an answering machine or voicemail and plays a pre-recorded message before ending the call.
Detect and Pass to IVR -- Routes detected answering machines to an IVR system. This option is not supported at MAXimum Research.
One important limitation to understand: AM Detection is not 100% accurate. It works by listening to the sounds and pauses that occur after a call is answered and uses those timing patterns to determine whether it is most likely speaking with a real person or an automated system. It can and does occasionally misclassify calls.
Additionally, AM Detection is ignored entirely when the dialer is operating in Power or Preview mode. It only functions in Predictive mode.
Predictive Dialing
A Yes/No setting that controls whether the dialer operates in predictive mode.
When set to Yes (default), the dialer uses its built-in algorithm to manage outbound calling automatically -- analyzing agent availability, call patterns, and other factors to dial ahead of demand and keep agents as productive as possible.
When set to No, predictive dialing is disabled. The dialer operates as a basic auto-dialer, placing one call at a time per agent only when that agent is ready and requests the next call.
Targeted Mode
This setting only applies when Predictive Dialing is set to No. It determines how the dialer behaves in non-predictive operation. The two options are:
Power -- The dialer still handles call progress automatically in the background. Non-productive outcomes such as no answers, busy signals, and disconnects are coded by the dialer without agent involvement. Agents only receive calls that have connected, including answering machine/voicemails/auto-attendants.
Preview -- The agent hears the full call progress in real time, including ringing. The agent remains in control throughout, manually coding the call as a no answer, disconnect, answering machine, or other outcome as appropriate. This is true auto-dialer mode, with the agent making the judgement calls at every step.
Record Whole / Separate Audio / Billing Code / Phone Number Prefix / Phone Number Suffix
These settings are intended for organizations that use Survox strictly as a dialer without conducting interviews through the Survox platform. They are not applicable to MAXimum Research's setup and should not be modified.
Caller ID Type
This setting determines what type of caller ID the dialer will present to respondents when placing outbound calls. The available options are:
File : Uses a pre-defined file containing a list of phone numbers. The dialer cycles through the numbers in the file in round robin order, rotating through each number evenly.
Round Robin / Random : Allows users to enter phone numbers directly into individual fields within the console. The dialer then uses those numbers in either round robin or random order depending on the selection.
"--" : Allows a single static phone number to be entered manually in the Caller ID field below, which will be used for every outbound call on the project.
Caller ID
The behavior of this field changes based on the Caller ID Type selected above.
When File is selected, this field displays a dropdown list of all pre-defined caller ID files available on the system. Simply select the appropriate file for the project.
When Round Robin, Random, or -- is selected, this field becomes an entry area where phone numbers are entered manually.
Call Path
Not used at MAXimum Research. Leave blank.
Dialer Parameters
Located at Manage > Study Control > Dialer Parameters > Study Selection & Go, this screen allows limited dialer adjustments while a study is actively running on the dialer. The settings available here are Abandonment Rate, Number of Rings, and Answering Machine Detection.
These changes take effect immediately for the current dialing session only. They are temporary -- the next time the study is loaded onto the dialer, all values will revert back to whatever is saved in Dialer Configuration. If a change needs to be permanent, it must also be updated in Dialer Configuration.
Dialer Control
Located at Manage > Study Control > Dialer Control > Study Selection & Go, this screen allows supervisors to control the dialing state of a running study. There are three commands available:
Pause -- Stops the dialer from placing any new outbound calls. Agents who are already at the waiting screen will not receive any notification that the dialer has been paused -- they will simply continue waiting as if between calls. This is useful when a project is nearing its close, or when a large sample hide or reveal needs to be performed without disrupting agents currently on the waiting screen.
Resume -- Restores normal dialing after a pause. The dialer picks back up where it left off.
Stop -- Ends the study's session on the dialer entirely. Unlike a pause, a stopped study cannot be resumed. The only way to get the study back on the dialer after a Stop is to clear it completely and reload it from scratch.
Saving Changes
Once all settings have been reviewed and adjusted, click Save Changes to store the configuration.
Important: changes made to Dialer Configuration do not take effect immediately. If the study is currently running, the new settings will not apply until the study is fully shut down, cleared from the dialer, and reloaded. Any changes made mid-shift will not be reflected until the next time the study is brought up on the dialer. Changes made to Dialer Parameters/Control ARE instant.
Sample Management - Understanding the MPF Screen
The Modify Parameters screen (MPF) is where you control the availability and scheduling of a project's sample -- things like whether fresh or live records are being dialed, callback windows, office hours, timezone restrictions, daypart settings, and more. There are three ways to reach it, and all three display the same settings in the same order.
ACCESSING THE MODIFY PARAMETERS SCREEN
Via Foneutil
Open Foneutil, load the project, then press M to open the Modify screen. The project must not be actively running on the server -- it needs to be in a read/write state before you can make changes. Use the arrow keys to move between settings, and press Escape when finished. Changes take effect immediately upon exit.
Via Super/Boss Command
From a super or boss session, type: mpf jobname
If the project is not currently loaded on the server, this command will load it automatically. Use the arrow keys to navigate between settings and press Escape when finished. Unlike the other methods, this one will prompt you to confirm before saving your changes.
Via Survox Console
In the Survox Console, go to: Manage > Manage Sample > Modify Parameters, then select your project. Click on any setting to change it, then click the blue Modify Parameters button at the bottom to save. Changes take effect immediately.
The Console version has one advantage over the other methods: each setting label is clickable and opens a small pop-up with a plain-language description of what that setting does. This makes the Console a good starting point if you are unfamiliar with a particular option.
WHAT CAN BE CHANGED
The MPF screen displays a lot of information, but not everything shown can be edited -- and some items that technically can be changed should not be, as doing so would conflict with MAXimum Research standard procedures. Settings such as Ownership Mode, Zero Weight Status, and Out of Number Delay fall into this category and should be left alone. If you are unsure whether a particular setting is safe to change, contact PhoneOps or IT before making any adjustments.
The following are the settings that are regularly used and safe to modify:
Replicates:
If the project uses replicates, this is where you increase or decrease how many are available for dialing.
Maximum Attempts:
The absolute ceiling on how many times any single phone number can be called. Note that scheduled callbacks will continue to be dialed past this limit, as long as they keep getting coded as a callback. This setting can also be overridden if the Timed Use MaxATT option is set to Yes.
Time Zone Weight:
Adjusts the calling weight assigned to each timezone. Timezones are listed as numeric codes: 05 = Eastern, 06 = Central, 07 = Mountain, 08 = Pacific, 09 = Alaska, 10 = Hawaii. For a full explanation of how weights work, refer to the Understanding Market/Timezone Weights article.
Dayparts (DP1-DP4):
Dayparts define time windows that control when numbers are available for dialing. MAXimum Research typically only uses DP1 and DP2, which keeps all numbers available throughout the day. Projects that benefit from time-targeted calling -- such as daytime-only jobs -- can use additional daypart windows to shift call attempts across different parts of the day.
Four weekday times create three calling windows: Window 1 runs between DP1 and DP2, Window 2 runs between DP2 and DP3, and Window 3 runs between DP3 and DP4. Separate Saturday and Sunday times also exist, though MAX does not use weekend-specific dialing in most cases. All daypart times are in respondent local time, not MAXimum Research time.
DP Attempts:
The number of calls to make per daypart window. Once a number has used up its allotted attempts across all windows, it moves into the "All Targeted" bucket and will not receive additional calls unless released.
Time Period Option (DP Opt):
Controls how daypart windows are applied. The default is Option 2.
0 or 1 -- Follow all windows including weekend-specific times
2 (default) -- Treat weekends the same as weekdays; ignore Saturday/Sunday daypart settings
3 -- Use only Windows 1 and 2 on weekdays, and force a call attempt during weekend times (either day)
4 -- Weekday dialing only; no calls made on weekends
5 -- Weekend dialing only; no calls made on weekdays
New Numbers First:
Yes/No setting that controls whether fresh numbers are dialed before making a second pass on previously attempted numbers. If set to Yes, the system dials all fresh numbers once before revisiting others -- though scheduled callbacks will still come up during their scheduled window regardless. If set to No, the system works through numbers that already have at least one attempt before dipping into the fresh pool.
New Numbers Release/Available:
Controls the availability of new (never called) numbers. The allowable range is -1 to 1,000,000. The default is -1, which means this setting is ignored and an unlimited number of fresh numbers are made available to the system. If set to a value greater than 0, each time a new number is delivered for dialing it decrements that count by 1 -- when the count reaches 0, no additional fresh numbers will be called. This allows you to release a controlled batch of new numbers, let the system work through them, then release another batch by setting the value again. If set to 0, no fresh numbers will be used at all, forcing the system to work only with previously attempted numbers and scheduled callbacks.
Minimum System Callback Time:
How long the system waits before retrying a number that received no answer, hit an answering machine, or received another system result. The value is in minutes -- so a setting of 300 means the number will not be retried for 5 hours. If that retry window would fall outside the daypart schedule, the call is pushed to the next available calling window.
Busies Before No Answer:
A busy signal is not counted as a full call attempt until this number of consecutive busies is reached. For example, a setting of 2 means the first busy triggers a retry after the busy retry delay. If the second attempt also returns busy, the number is marked as BZ2NA and treated as a regular system result from that point forward.
Release System:
Only relevant when multiple daypart windows are in use. When enabled, this tells the system not to wait for the current daypart window -- if numbers in other windows have aged long enough to be retried, make them available now.
Release All Targeted:
Numbers that have been dialed through all their daypart attempts but have not yet reached Maximum Attempts are placed in the "All Targeted" bucket. Setting this to Yes allows those numbers to continue receiving calls until they hit the Maximum Attempts limit.
Release Hold Area:
The hold area contains numbers coded as Soft Refusals or Respondent Hung Up during an intro. Setting this to Yes releases those numbers back into the dialing pool.
Hold Area Options:
Defaults to 0. Other options exist but are not used by MAXimum Research.
Open/Shut Times:
The hours that the office (or the project) is considered open. This controls when callbacks can be scheduled by interviewers -- it does not affect regular outbound dialing, which is governed by the daypart settings.
Release Timed:
When enabled, this dumps all scheduled callbacks into the immediate dialing queue, regardless of when they were originally scheduled -- even if the callback was set weeks into the future.
Max Timed Age:
When a scheduled callback's time is missed -- for example, because no agents were available -- the system will continue attempting to deliver that call for this amount of time before giving up. If the window expires without a successful delivery, the callback is automatically rescheduled for the same time the following day during the overnight process.
Retry Busy In:
How long the system waits before retrying a number that returned a busy signal.
Last Scheduled / Last Delivered:
A date and time can be entered here to set a hard cutoff. No callbacks will be scheduled after the Last Scheduled date, and no numbers will be delivered for dialing after the Last Delivered date. Both fields use the format: DD MMM YYYY HH:MM -- for example, 31 Dec 2026 11:59pm.
In Conclusion
The MPF screen is a powerful tool for controlling how and when a project's sample is used, but it is important to approach it carefully. Not every setting is meant to be changed, and some can have significant impact on call flow, number availability, and project outcomes if adjusted incorrectly. When in doubt about what a setting does or whether it is safe to change, always reach out to PhoneOps, Data Processing, or IT before making any adjustments. A quick question before a change is far easier to deal with than unintended results after one.
Suspends - How to View/Export Them - 5 Methods
Overview
Suspend data is a snapshot of a respondent's progress through a survey at the point they were interrupted -- either by a system event, an interviewer action, or a scheduled break. When a call is suspended, Survox preserves the respondent's answers and current position in the questionnaire so the interview can be resumed later without starting over.
Being able to view suspend data is an important diagnostic and operational skill. There are several reasons you may need to access it:
- Troubleshooting -- verifying that a suspend saved correctly, or diagnosing a problem respondent record
- Suspend Hitting -- isolating respondents who are near the end of the survey so trained interviewers can prioritize completing those calls
- Programming Recovery -- if a programming change breaks existing suspends, viewing and listing them provides a path to data-entering them back in so they resume correctly when called
- Script Analysis -- identifying trends in where suspends are clustering in the survey, which can be brought back to the client for possible script adjustments
- Raw Data Pulls -- extracting suspend data for analysis or reporting purposes
There are five methods available for viewing suspend data, each suited to different access levels and use cases.
Method 1: Via FoneUtil
FoneUtil is a built-in Survox utility accessed through a PuTTY terminal session. It provides a quick way to list all live suspends for a study directly from the Survox environment.
Why Use This Method?
While the output is limited compared to other methods, FoneUtil gives you an immediate count of live suspends and lets you spot trends at a glance -- such as which question numbers are clustering or which interviewers have a high volume of suspends. It requires no additional tools and works from any PuTTY prompt.
Steps
fone <enter>Launch the FoneUtil utility:
foneutil <enter>When prompted for a filename, enter something descriptive so you can locate it later. For example:
jobname_suspends.txt <enter>When prompted for a study name, enter the study name for the project you are working with.
Once the study is loaded, type the following to list suspends:
@ <enter>When prompted for a base, type a specific base to filter by sample markers, or type the following to return all suspends:
all <enter>Refer to the Sample Selects article for available bases you can use here.
After pressing Enter, FoneUtil will process the file and return you to the prompt with a summary line showing record counts. For example:
#READ(194466) #SELECTED(194466) #USED/CHANGED(179)The third value -- 179 in this example -- is the number of live suspends currently on the project.
To exit FoneUtil, press Q <enter> twice to return to the normal PuTTY prompt.
To view your output file, browse to the following folder from Windows and open the file in TextPad or Notepad:
\cfmc\phone10\active\foneWhat the Output Shows
The FoneUtil output is a plain text table. Below is an example with two phone suspends and two web suspends:
Suspend Suspend Call-Back
Phone Number Filename <- Date/time -> INTID Question Label Password/2nd Index <- Date/time -> Recnum Qstnum <Interviewer Comment>
609-864-3164 x5iaabxx 24FEB26 07:54 pm 1165 REFAVAC 293686 12 am 158254 QQ40.83 his phone died call back in 5 minutes............................
609-351-5040 auv6abxx 28FEB26 10:10 am webs CFM02101 166968 26FEB26 06:00 pm 161049 QQ18.18 .........
609-475-2194 hducabxx 25FEB26 02:21 pm 1004 TRAITAC25 272377 12 am 161931 QQ40.14 was at work asked to be called back after 5 2-25......................................
732-832-5208 cts3abxx 26FEB26 05:30 pm webs FAV_INTRO 105710 12 am 165793 QQ39.64 ..
848-459-9299 vy7fafxx 26FEB26 08:19 pm 1242 FAV9 189410 27FEB26 08:19 pm 165982 QQ39.70 resp had to go bc the cat got out...The key columns to focus on are:
- Phone Number -- the respondent's number, or "webs" for online respondents
- Suspend Date/Time -- when the suspend occurred
- INTID -- the interviewer ID, or "webs" for web respondents
- Question Label -- the last question answered before the suspend
- Password/2nd Index -- the respondent's web password
- Call-Back Date/Time -- scheduled callback if one was set
- Interviewer Comment -- notes entered by the interviewer at the time of the suspend
Note: This method does not display quota information. It is Survox's native output only.
Method 2: Via the Survox Console
The Survox Console provides a GUI-based version of the same suspend report generated by FoneUtil. It requires no terminal access and is the most straightforward method for viewing suspends.
Why Use This Method?
Fewer steps than FoneUtil, and the output is displayed as a sortable HTML table -- making it easy to sort by question label, interviewer, date, or any other column without needing to scan through a flat text file. A download option is also available for sharing with the team.
Steps
Log into the Survox Console.
Manage > Manage Sample > List Suspends
Select your project from the dropdown if it is not already selected, then click Go.
The suspend list will display as a sortable HTML table. Click any column header to sort by that field.
Note: This method does not support base filtering -- it always returns all suspends for the selected project.
list_suspends_jobname.prtThis file can be opened with TextPad or Notepad.
Method 3: Via Custom Command (run_suspends)
run_suspends is a custom-built script that produces the most comprehensive suspend report available. Unlike the previous methods, it outputs a fully formatted Excel file with quota and hide status data included. By default, this mode only provides suspends that were called, and will exclude any web/sms suspends. This can be adjusted though, in the steps listed below.
Why Use This Method?
This is the most informative method available. The Excel output includes quota assignments per suspend, allowing you to target records where specific quotas are still open while ignoring closed ones. It also flags whether a record is named/hidden -- meaning the phone room cannot retrieve it without a supervisor revealing it first. The Excel format allows full sorting and filtering for targeted suspend hitting or script analysis.
Steps
fone <enter>Launch the script:
run_suspends <enter>This will open a configuration file. Locate the jobname line and replace the placeholder with your project name:
>define @jobname jobname1On the next line, you will see the base definition. Survox uses '' at the start of a line as a comment (similar to # in Linux), so the base line is "ticked out" by default.
- To filter by a specific base, remove the
''from the front of the line:>Define @base your_base_here - To return all suspends, leave the line ticked out as-is.
Refer to the Select Statements article for available bases.
Below the base line is a switch called ''>define @INCLWEB. This is OFF by default. If you remove the '' at the front though, the suspend list WILL include web suspends, as well as phone suspends.
Save the file when done:
Control+X, then Y to confirm, then <enter> to keep the same filenameThe script will run and process the project. Processing time will vary based on project size -- roughly 2-3 seconds per 100,000 records.
When complete, an Excel file will be available in the fone folder:
jobname_suspends.xlsBrowse to \cfmc\phone10\active\fone in Windows and open the file in Excel.
What the Output Shows
The Excel file contains one row per suspend, with the following columns:
- Phone Number
- Suspend File Name
- Market
- Named Hide -- if applicable; indicates the record is hidden and must be revealed by a supervisor before the phone room can retrieve it
- Suspended @ Question -- the last question answered before the suspend
- Call Notes -- interviewer comments entered at time of suspend
- Date Last Called
- Number of Attempts
- IntvID -- the interviewer who last dialed or suspended the record
- All Assigned Quotas -- shows quota status per record, allowing you to filter for open quotas and ignore closed ones
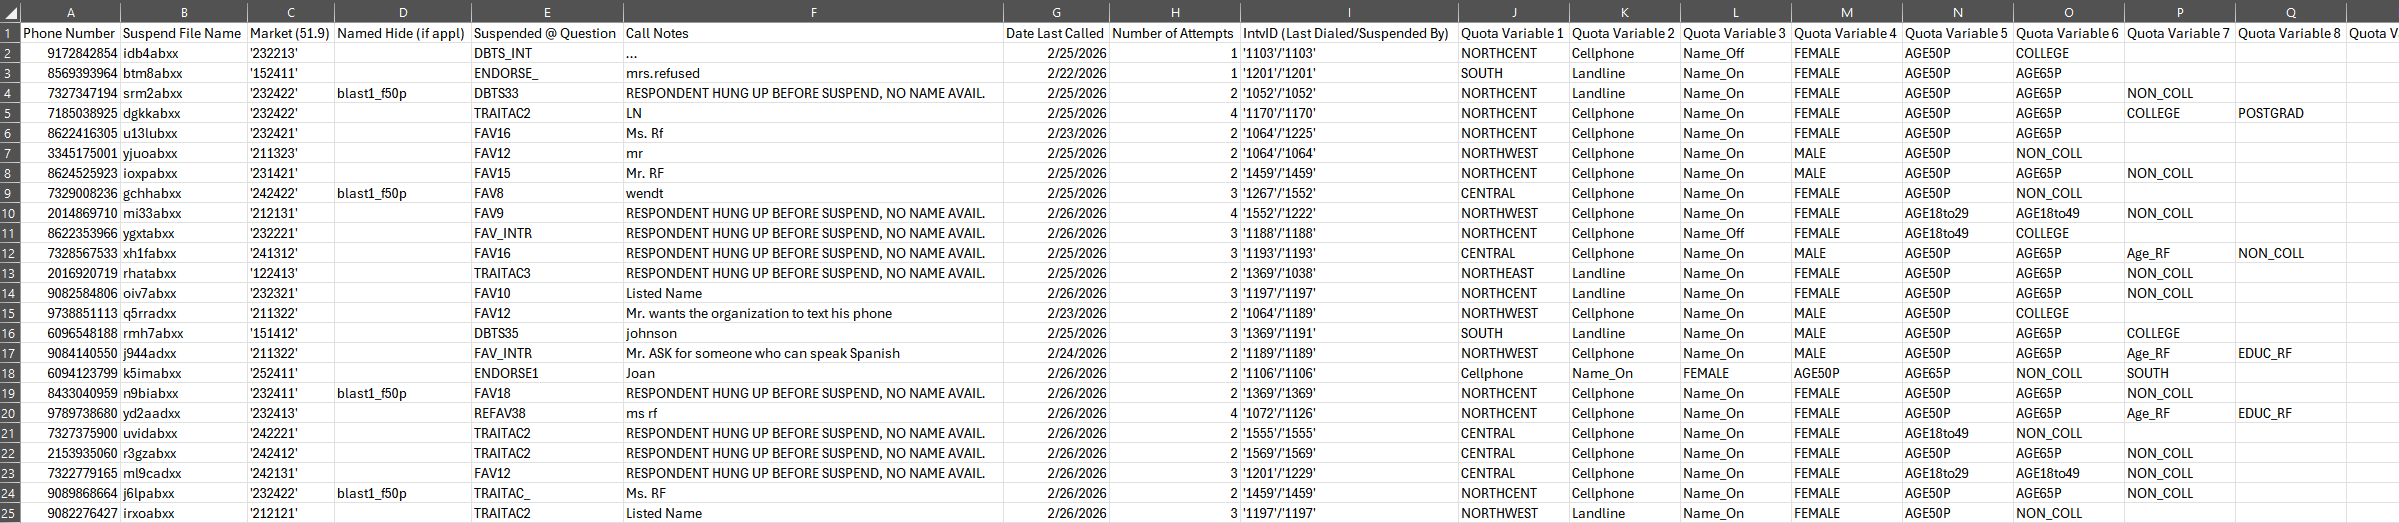
Method 4: Via Rundata
The Rundata method delivers suspend data automatically as part of the project's nightly data output. Unlike the other methods, this is not something you run on demand -- it is a one-time setup completed by the Programmer at the request of the Project Director.
Why Use This Method?
This is the only method that includes the full data record for each suspend -- every sample variable and every answer the respondent provided up to the point of suspension. This makes it particularly valuable when suspends need to be data entered, as you have the complete picture of the path the respondent took through the survey.
Setup
This method requires a one-time programming change. The PD should request this from the Programmer assigned to the project. There are two options:
- Combined -- suspend records are included alongside the other data files (completes, terminates, over-quotas, etc.) in the nightly output
- Separate File -- suspend records are delivered as their own dedicated file
In either case, the suspend data will be included in the nightly jobname_internal.zip file delivered as part of the rundata system.
Important Note: Suspend data is not removed from the datafile once a respondent completes the survey. This means the file may contain duplicate records -- one for the suspend and one for the eventual complete. Use Excel sorting, filtering, or formulas to identify and remove those duplicate cases before analysis.
Method 5: Full Data Via Console
This method is the console-based equivalent of the Rundata method, but can be run on demand without involving a Programmer. It is a two-part process -- the data must be assembled first, then output. Both parts must always be run together, or the output will not reflect current suspend status.
Why Use This Method?
Unlike Method 4, this method automatically excludes records where a suspend was later resolved by the respondent completing, terminating, or going over quota. It will not, however, exclude suspends that were resolved via sample dispositions such as Refusals, DNC, Disconnected, or Max Attempts -- only records where the respondent actually resumed the survey will be excluded, as this method reads the resume file during the Assembly phase.
Part 1 -- Assemble Suspends
Log into the Survox Console and navigate to:
Data Analysis > Data Utilities > Assemble Suspends
Select your project name from the dropdown.
A filename field will appear below. Enter a descriptive name for the output:
jobname_suspendsClick Go.
The process may take a few seconds. Once you see the "SELECT FILES TO DOWNLOAD" notice, Part 1 is complete. You do not need to download anything at this stage.
Part 2 -- Delimited Conversion
Without leaving the console, navigate to:
Data Analysis > Data Utilities > Delimited Conversion
Select the same project you just assembled if it is not already selected. Leave the Live/Test setting as Live.
For the Data Source selector, locate the following file in the list:
jobname_suspends.trIt will appear twice -- once under
tables\and once underreports\. Either entry is the same file.
For the Variable Source selector, choose the option listed under reports or tables -- typically:
reports\jobname.dbor
tables\jobname.dbLeave the output name as-is.
For Output Data Type, select Delimited.
Under Additional Output Options, check the box labeled "Output response text instead of response code" -- this displays answers as readable text (e.g. Yes/No) rather than numeric codes (e.g. 1/2).
Click Convert Data.
Three files will be presented. Click jobname.csv to download and open it.
Optional: Save Settings
To save time on future runs, check the Save Settings box and provide a short name such as:
spnsOn future runs, select this saved spec from the selector at the top of the page and steps 4 through 7 above can be skipped.
In Conclusion
Each of the five methods serves a different purpose, and knowing which one to reach for will save you time and get you better information. As a general rule of thumb:
- If you just need a quick count of live suspends, use Method 1 or 2
- If you need quota and hide status for targeted suspend hitting, use Method 3
- If you need the full data picture for data entry or deep analysis, use Method 4 or 5
- If you need something on demand without programmer involvement, Methods 1, 2, 3, and 5 all fit that bill
When in doubt, Method 3 is the go-to for day-to-day suspend management, and Method 5 is the go-to when you need the full record without waiting for the nightly data run.
II. Survox - Tools Of The Trade
A dedicated section that touches on all the various "built-in features" Survox has to offer. This does NOT include customizations or other home-brew systems created for MAXimum, and is solely information on items provided DIRECTLY by CfMC/Survox/Enghouse.
How To - Survox LIST Utility
Overview
LIST is a built-in Survox utility used to view and extract data directly from the command line via PuTTY. It allows staff to inspect data files, fone files, subset files, and coded files at any point during a project -- without needing to generate a formal report or run a full data dump.
LIST can be run from any directory that contains data in a record-based format -- meaning CaseIDs in a data file, or sample records in a fone file. While LIST can technically be run against other file types, common practice limits its use to data files (.tr) and fone files (.fon).
LIST produces output in one of two formats:
- By Variable -- Groups all records together and displays them one variable at a time. Think of it like a normal column in a spreadsheet -- all respondents' answers to Q1 together, then all answers to Q2, etc.
- By Record -- Displays one record at a time, showing all selected variables for that case before moving to the next. This is the most common format. Think of it like transposing a spreadsheet so each case is its own column. Useful for drilling into a single respondent's full record.
To launch LIST, open a PuTTY session, navigate to the appropriate directory, and type:
list <enter>The utility will walk you through a series of screens to configure your output. It works like a survey, so how you answer each screen, dictates what screen shows up next.
Step-by-Step Process
Step 1 -- Specify the Data File
The first screen asks for a datafile name. By default, LIST looks in the $CFMC/data folder for whatever filename you enter here.
- If you want the main data file for the project (located in
$CFMC/data), type the jobname/datafile name and press <Enter>. - If you want any other file (a subset file, coded file, fone file, etc.) -- or if you are already in a different directory -- leave this screen blank and press <Enter>. This will take you to Steps 1B and 1C.
Step 1B -- Specify an Alternate File (if Step 1 was left blank)
If you left Step 1 blank, this screen asks you to provide the full filename of the file you want to list. Unlike Step 1, you must include the file extension here.
Examples:
jobname1.tr
jobname1.fon
jobname1_subset.trImportant: If the file is not located in the directory you are currently in, you must either provide the full path to the file, or abort (Ctrl+C), navigate to the correct directory, and relaunch LIST.
Step 1C -- Specify the File Type (if Step 1 was left blank)
If the file you specified in Step 1B is not a .tr datafile, this screen will appear and ask you to identify the file type so the software knows how to load it.
The two most commonly used options are:
- Option 2 -- ASCII file (use for subset files, coded files, etc.)
- Option 8 -- Fone file (use for
.fonsample files)
Note: This screen does not appear if the file you entered in Step 1B is a .tr file.
Step 2 -- Use a DB File?
This screen asks whether you want to use a .db file. A .db file contains the variable definitions for the study -- without it, you cannot reference variables by name (like statcode, date, intv, q1, etc.) and would need to know the exact data locations instead.
Important: If you are listing an ASCII or fone file, answer N and press <Enter>. These file types cannot easily use a .db file.
If you specified a study name at Step 1, you will see three options:
- Y) Yes, use the .db file found at the default location for this study
- N) No -- do not use a .db file (variable names will not be available)
- O) Yes, but load the .db file from a different location
If you loaded a file from Step 1B instead, the Y) option will not appear -- only N) and O) will be shown.
To use a .db file from a non-default location, select O and press <Enter>. This will take you to Step 2B.
Step 2B -- Specify the DB File Location (if O was selected)
Enter the full path to the .db file you want to use. Do not include the .db extension -- the utility appends it automatically.
Example:
/cfmc/studies/phone/jobname1/jobname1
Step 3 -- Title
This screen allows you to enter a title that will appear at the top of each page of output. In most cases, leave this blank and press <Enter>.
Step 4 -- List Options
This screen presents up to 6 optional settings you can apply to your list. You can select none, one, or several. The four most commonly used are:
- B -- Base: Subsets the list to only include records matching a condition you specify. For example, only completed interviews, or only records from a specific region.
- V -- Extra Variable: Adds a single additional data label to every record in the output. Useful when listing open ends and you also want to see the interviewer ID or phone number alongside each response.
- P -- New Page: Starts a new page for each variable in the output. No additional screens are required for this option. This is a useful option if the lists will be printed, as it creates a natural page break after either each case/record or variable listed.
- L -- Blank Lines: This will prompt you near the end of the run for how many blank lines to add between variables, 0, 1 or 2.
Step 4B -- Base Entry (if B was selected)
Enter the base (select condition) you want to apply. Only records matching this condition will appear in your list output. For guidance on building base conditions, refer to:
- LINK: Data Variable Bases article (coming soon)
- LINK: Sample Variable Bases / Select Statements article (coming soon)
Step 4C -- Extra Variable Entry (if V was selected)
Enter a single variable label or data location to include as an extra column alongside your list output. Only one extra variable can be specified.
Example use case: You are listing all open end responses, but you also want to see the interviewer ID (intv) attached to each response for QC purposes.
Step 5 -- What to List
This screen asks what variables you want included in your list. This screen only appears if you are using a .db file. If no .db file is in use, you will only be able to specify raw data locations.
The two options used in practice are:
- Option 1 -- All or Some Pre-Named Variables: Lists all variables, or a filtered subset by type (open ends only, closed ends only, etc.). Takes you to Steps 5B and 5D.
- Option 2 -- Specific Variables: Allows you to manually specify up to 10 individual variable labels or data locations. Takes you to Step 5C.
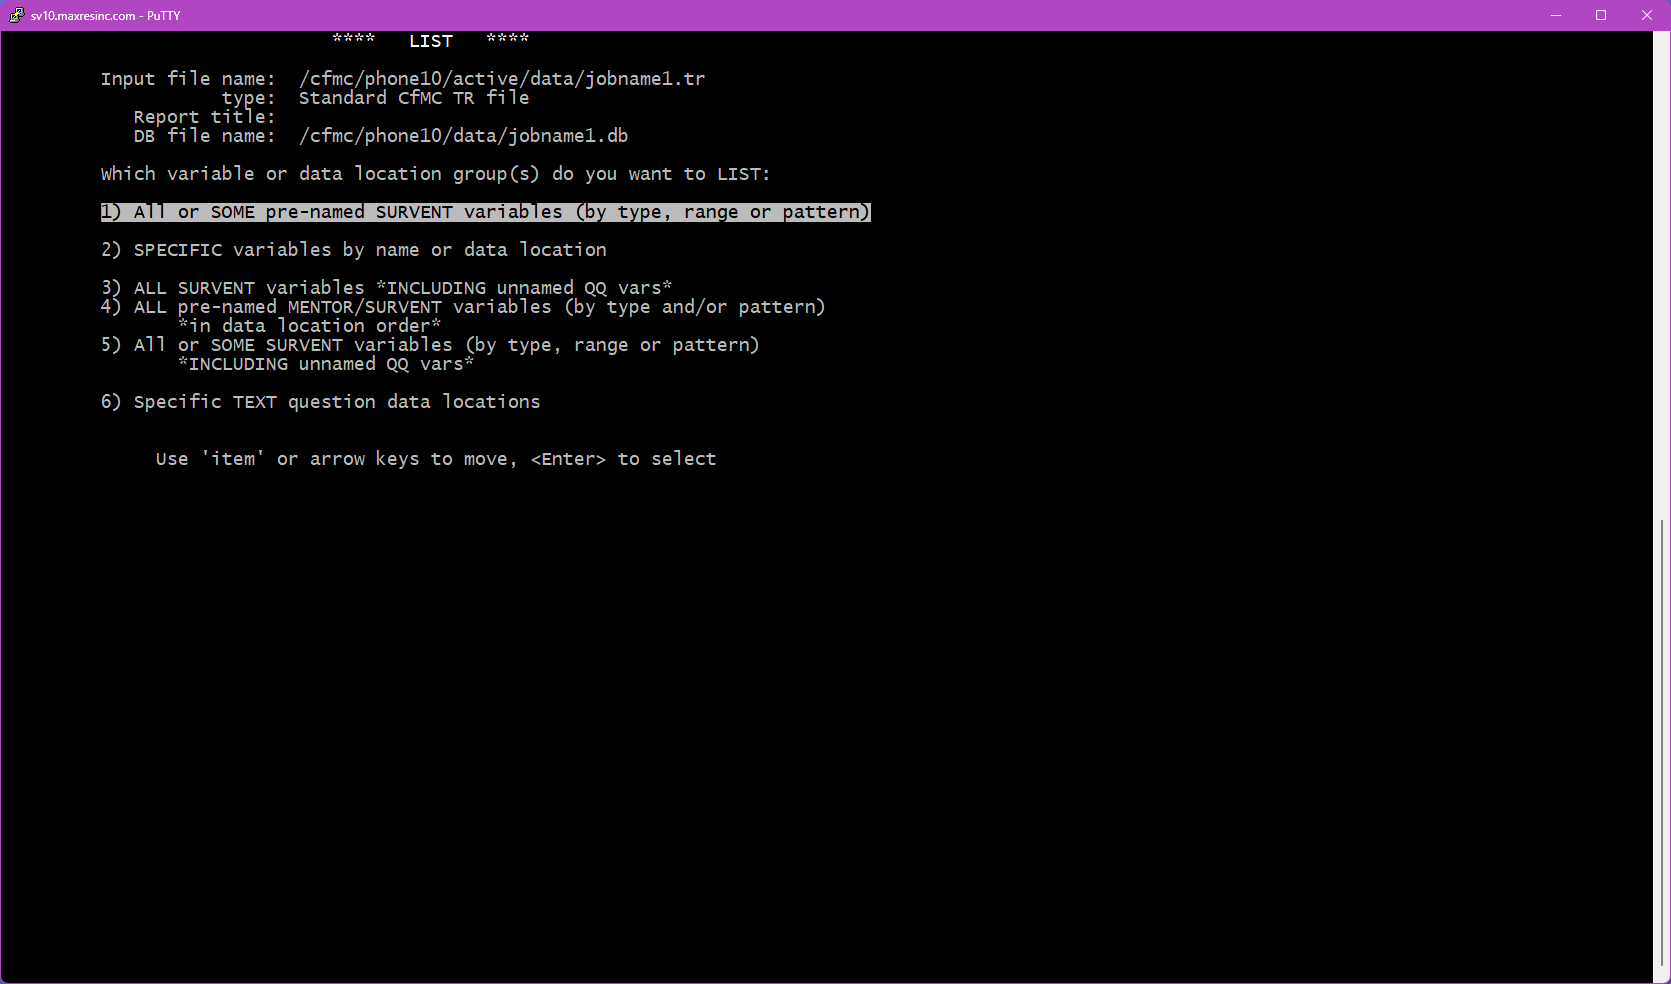
Step 5B -- Select Variable Types (if Option 1 was selected)
Press <Enter> without entering a code to return all available variables. Or enter one or more codes to filter by type:
- 1 -- CAT: No longer used in Survox 10. Selecting this will return no data.
- 2 -- List/Closed End: Single-response questions -- gender, yes/no, rating scales, hospital lists, etc.
- 3 -- Numeric: Numeric answer fields -- age, date of birth, percentage scales, etc.
- 4 -- Short Text / Variables: Short text fields -- name, address, sample data, and system variables like
date,intv,ipaddress. - 5 -- Open End: Long-form verbatim responses.
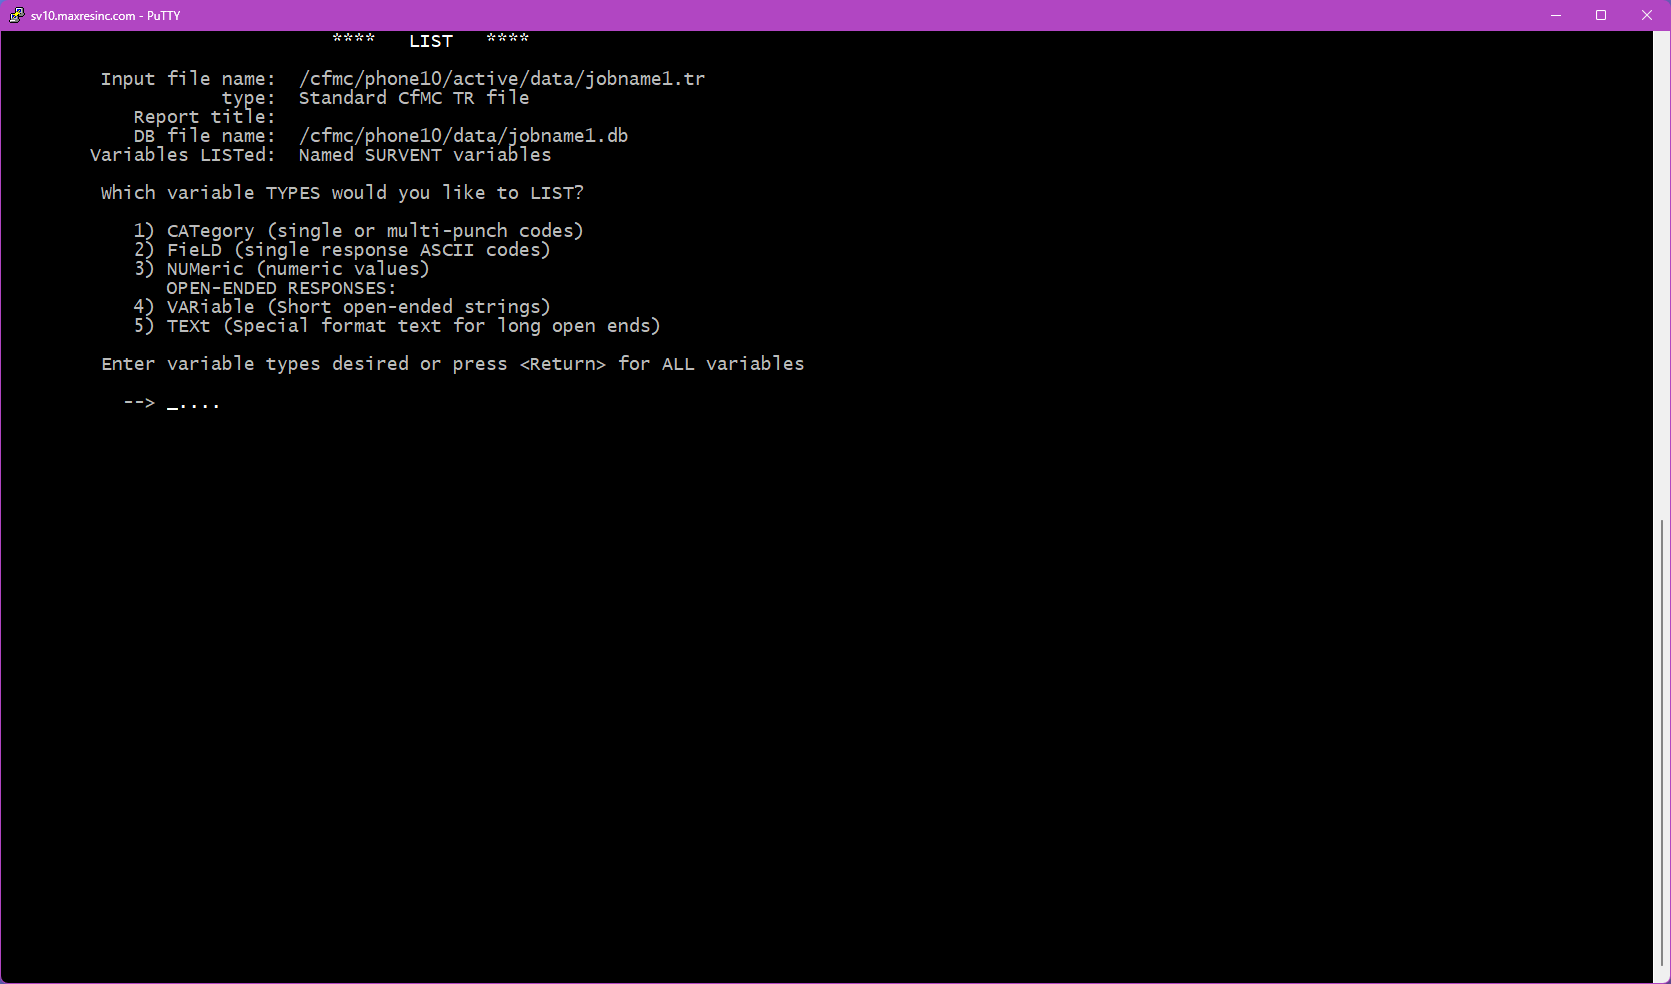
Step 5C -- Specific Variable Entry (if Option 2 was selected)
You will be prompted to enter variables one at a time, up to 10. After entering the second variable, an additional prompt will appear asking if you want to apply a secondary base specifically for that variable. Press <Enter> to skip and use the main base from Step 4. Each variable can have its own independent base, though this is rarely needed for list output.
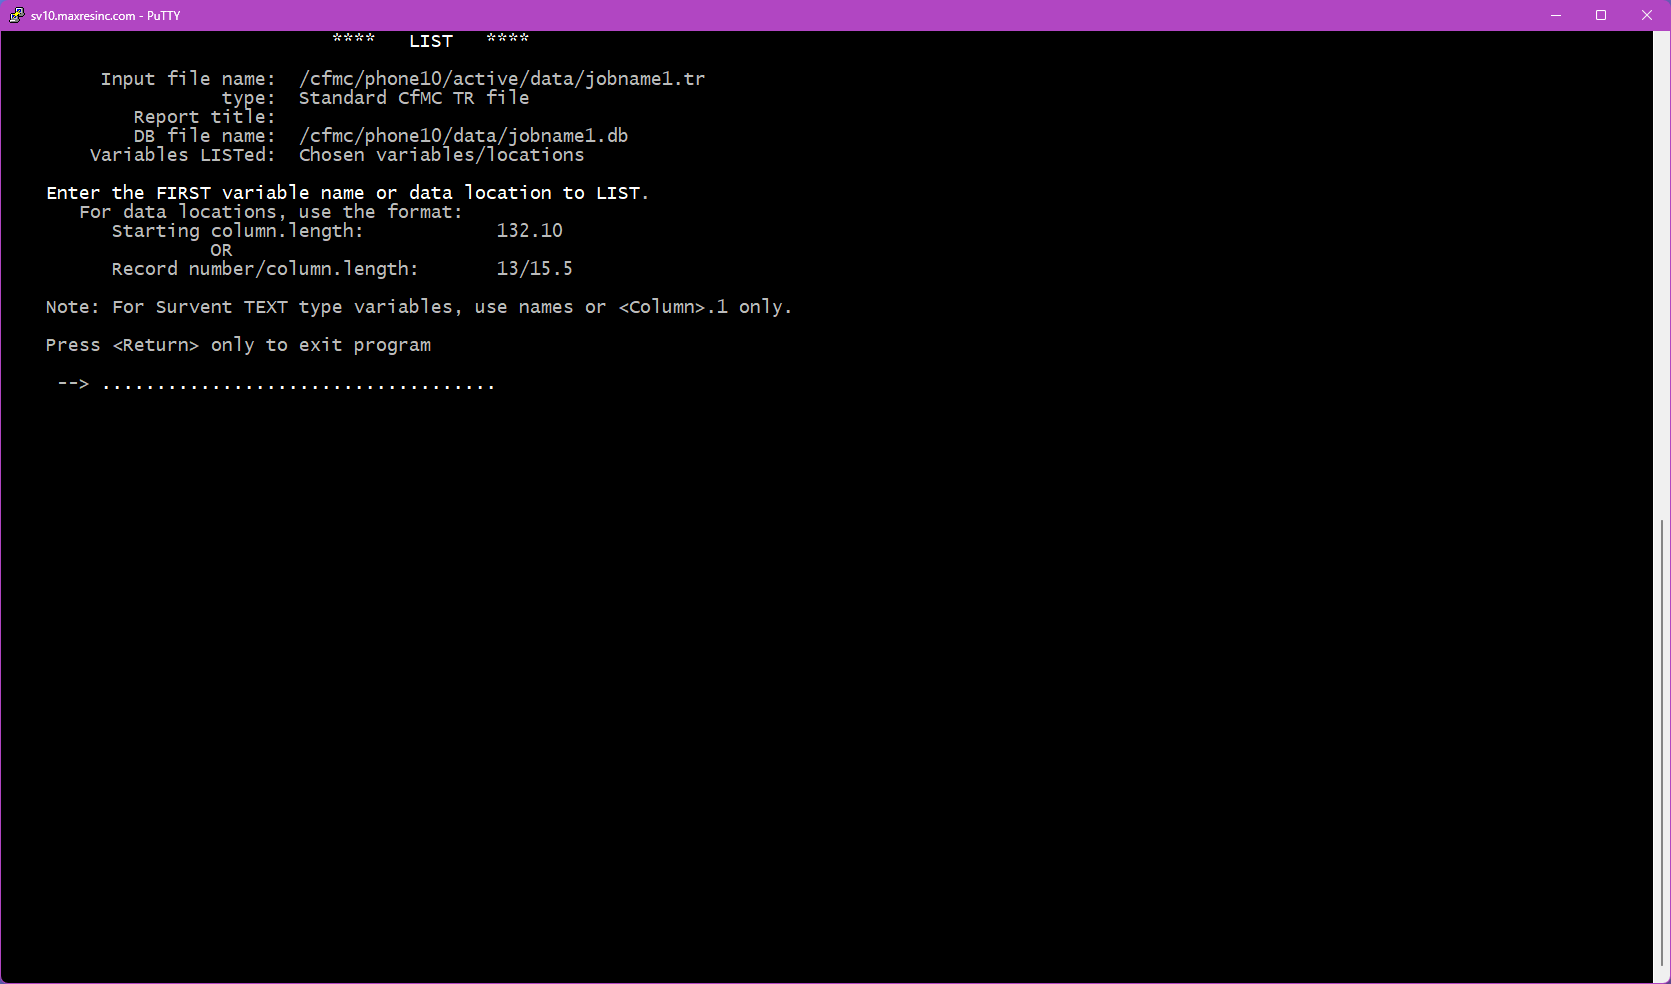
Step 5D -- Subset the Variable List (if Option 1 was selected)
This screen asks if you want to narrow down which variables are included in the output. Three options are available:
- <Enter> -- All: Returns all variables of the selected type(s). No further filtering.
- Option 2 -- Range: Specify a starting and stopping variable. You can use the built-in markers
FirstQandLastQto limit output to actual survey questions only, omitting sample and system variables. - Option 3 -- Pattern Match: Filter by a naming pattern using the
*wildcard. Examples:*_os-- returns only Other Specify fieldss_*-- returns only sample variables
*wildcard is required when using this option.
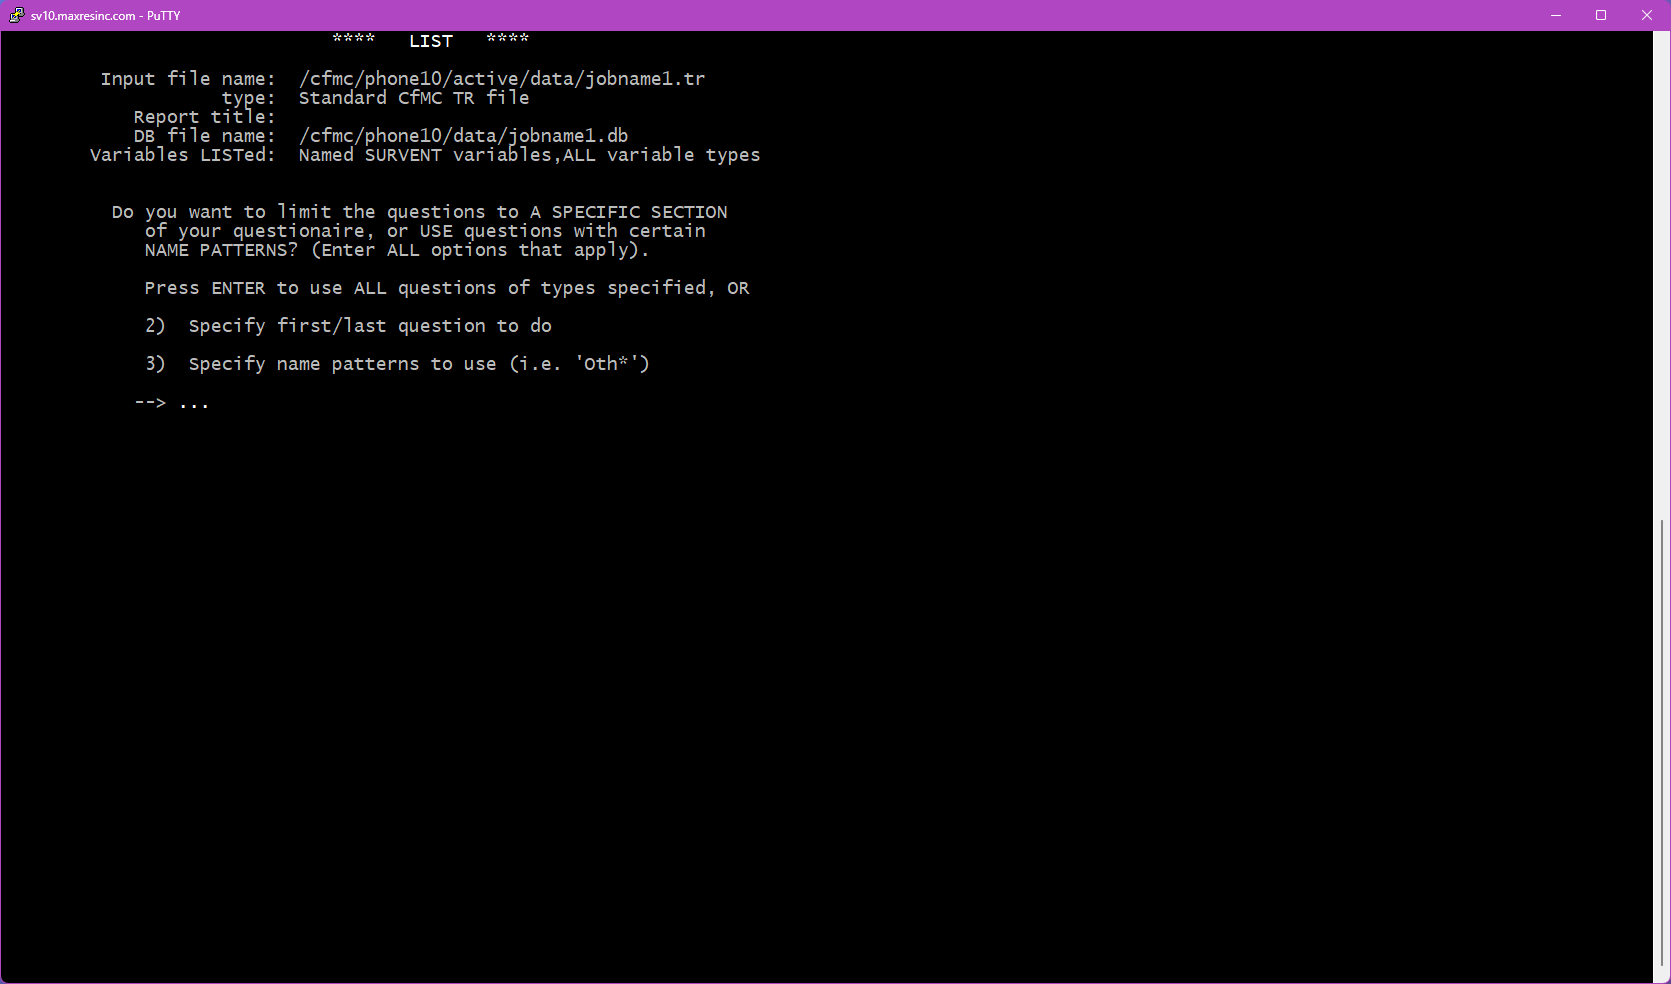
Step 6 -- By Variable or By Record?
This screen asks how you want the output organized:
- Option 1 -- By Variable: All records grouped together under each variable, one variable at a time. Best used when reviewing open end responses, or stepping through a set of questions one at a time for QC or coding work.
- Option 2 -- By Record: All selected variables shown for one case at a time before moving to the next. Best used when you need to view a full survey record question by question -- for example, reviewing a specific respondent's complete interview. Note that if you need this data in spreadsheet form, pulling it from rundata or a reformatting tool is generally more efficient.
Step 7 -- Output Format
This screen controls how much detail is shown for each item in the output:
- Option 1 -- Label and Response Only: The standard format. Shows the variable name and the recorded response. Use this in most situations.
- Option 2 -- Question Text, Label, and Response: Also includes the full question text above each variable. Most useful when listing open ends by variable (Option 1 from Step 6), as it provides visual context for QC and coding review.
Step 8 -- Output File Name
Enter a name for the output file, or press <Enter> to accept the default (jobname1.lst). The output file will be saved in the directory you are currently in.
Step 9 -- Final Confirmation and Run
This screen displays a summary of everything you have configured -- the file being read, whether a .db file is in use, the base (if any), the variables or types selected, and the output format. Review the summary, then press <Enter> to run the list.
Saving Your Settings for Later (SPX File)
Before pressing <Enter> to run, you have the option to save all of your current settings as a reusable file. Instead of just pressing Enter, type a filename with an .spx extension -- for example:
jobname1_openends.spxThis saves all your LIST configuration options to that file. To rerun the exact same list in the future, navigate to the same directory and run:
m2 jobname1_openends.spxThis is especially useful for lists that are complex to configure, or that will be run repeatedly throughout the life of a project.
Video Demonstrations
The following short demos walk through two common LIST use cases from start to finish.
Demo 1 -- All Completes, By Case ID, Survey Data Only
This demo shows how to run a list of all completed interviews, outputting only the actual survey questions (using FirstQ / LastQ to exclude sample and system variables), organized by record (By Case ID).
Demo 2 -- All Sample Variables, By Variable, No Base
This demo shows how to run a list of all sample variables across all records, with no base applied, organized by variable.
Demo 3 -- Open Ends Grouped by Question, with INTV shown
This demo shows how to run a list of all open ends, by caseID, with an Extra Variable of the INTV. It will show two methods, one is raw and the other is a cleaned up version.
Troubleshooting / Common Issues
Output file is empty or contains no records
The most common cause is a base (Step 4B) that returned zero matching records. Double-check your select condition for typos or logic errors. Also verify that the data file you specified actually contains records -- running LIST against an empty or partially built file will produce no output.
Confirm that you are using the * wildcard in your pattern. Without it, the system looks for an exact match rather than a pattern. For example, use *_os not _os.
Variable names are not recognized
This means LIST is running without a .db file, or the wrong .db file was specified. Return to Step 2 and confirm the correct .db file path. Remember -- do not include the .db extension when entering the path in Step 2B.
File not found error at Step 1B
The file path or filename entered is incorrect, or the file does not exist in the current directory. Verify the exact filename and extension, and confirm your current working directory with pwd. If the file is in a different location, provide the full path or navigate there first.
No data returned when selecting CAT (Option 1) in Step 5B
CAT-type questions no longer exist in Survox 10. Selecting this option will always return no data. Use the appropriate question type instead (closed end, open end, etc.).
Data values look incorrect or misaligned
If the data in your list output does not appear to match what you expect -- wrong values, shifted responses, or variables that don't line up -- the most likely cause is an outdated .db file. If the study's questionnaire has been modified since the .db file was last generated, the variable definitions will be out of sync with the actual data. Regenerate the .db file for the study and rerun the list.
How To - Survox SCAN Utility
Overview
SCAN is a built-in Survox utility used to generate frequency tables from survey data, directly from the command line via PuTTY. Think of it as Survox's equivalent of an Excel pivot table -- it counts how many respondents gave each answer to a question, and can break those counts down across groups (called banners), such as party affiliation by gender.
SCAN reads data files or fone files and produces frequency tables showing the count (and optionally, percentage) of responses for each answer in a question. Results can be presented overall, or broken out by a banner variable for cross-tabulation. Additional options allow for weighting, statistics, and customized formatting.
SCAN is run from the PuTTY command line:
scan <enter>Step-by-Step Instructions
Step 1 -- Specify the Data File
The first screen asks for a datafile name. By default, SCAN looks in the $CFMC/data folder for whatever filename you enter here.
- If you want the main data file for the project (located in
$CFMC/data), type the jobname / datafile name and press Enter. - If you want any other file (a subset file, coded file, fone file, etc.) -- or if you are already in a different directory -- leave this screen blank and press Enter. This will take you to Steps 1B and 1C.
Step 1B -- Specify an Alternate File (if Step 1 was left blank)
If you left Step 1 blank, this screen asks you to provide the full filename of the file you want to scan. Unlike Step 1, you must include the file extension here.
jobname1.tr
jobname1.fon
jobname1_subset.tr
Important: If the file is not located in the directory you are currently in, you must either provide the full path to the file, or press Enter again at the next prompt to quit out, navigate to the correct directory, and relaunch SCAN.
Step 1C -- Specify the File Type (if Step 1 was left blank)
If the file you specified in Step 1B is not a .tr datafile, this screen will appear and ask you to identify the file type so the software knows how to load it. The two most commonly used options are:
- Option 2 -- ASCII file (use for subset files, coded files, etc.)
- Option 8 -- Fone file (use for
.fonsample files)
Note: This screen does not appear if the file entered in Step 1B is a .tr file.
Step 2 -- Use a DB File?
This screen asks whether you want to use a .db file. A .db file contains the variable definitions for the study -- without it, you cannot reference variables by name (like statcode, date, intv, q1, etc.) and would need to know the exact data locations instead.
Important: If you are scanning an ASCII or fone file, answer N and press Enter. These file types cannot easily use a .db file.
If you specified a study name at Step 1, you will see three options:
- Y) Yes, use the
.dbfile found at the default location for this study. - N) No -- do not use a
.dbfile (variable names will not be available). - O) Yes, but load the
.dbfile from a different location.
If you loaded a file from Step 1B instead, the Y) option will not appear -- only N) and O) will be shown.
Step 2B -- Specify the DB File Location (if O was selected)
Enter the full path to the .db file you want to use. Do not include the .db extension -- the utility appends it automatically.
/cfmc/studies/phone/jobname1/jobname1

Step 3 -- SCAN Options
This is the main options screen -- the "guts" of the setup. From here you can configure how your tables will look and what additional data will be included. Each option you select will bring up its own sub-screen. You can select as many or as few options as needed.
Note: Selecting the FREQ option (3h) cannot be combined with most other options -- the one exception is the Base option (3c), which can be used together with FREQ.
3a -- Add Header / Footer
Allows you to add a custom text header and/or footer to the output. Useful for labeling the output with the study name, date, or run description.
3b -- Create a Banner
After providing a banner, you will be presented with 2 extra screens asking you to adjust/set the column width and "stub" width. The stub is the lefthand side that shows the codes/text. most times, you can just leave the defaults in there and the system will adjust as needed.
3c -- Base the Tables
Sets a base (filter) to limit which records are included in the counts. Works the same as the base option in LIST. For example, you could base on completes only, or on a specific region or quota group.
3d -- Weight the Data
Applies a statistical weight to the data, which adjusts counts to reflect a target distribution rather than what was actually collected. For example, if your sample skewed male, weighting can bring the gender balance in line with the general population.
Note: Weighting in SCAN is rarely needed for day-to-day use -- it is primarily applied during final data deliverables using dedicated tabulation tools. However, if a weight value exists in the study data, SCAN's weight option can be used as a quick spot-check. Full weighting procedures will be covered in a dedicated KB article.
3e -- Print Options
Sets formatting preferences for the output, including:
- Page, column, and row size
- Show / hide table of contents
- Show / hide percentages and / or frequencies (raw counts)
- Show / hide summary rows: TOTAL, No Answer, and Any Response
*Options listed should all be elected at once. Anything listed as Yes/No, putting in that code will flip it to the opposite. Items like #1, 3, & A will all prompt for values on their own screen.
*After making your selections, the screen will refresh showing the new values. Press <ENTER> to commit, or "R" to go back to the default settings.
3f -- Rank Tables
When selected, answers within each table will be sorted from highest mention to lowest, rather than appearing in the order they were coded in the survey. Useful for quickly identifying top responses on list-style questions. *You CANNOT combine RANK with STATS
3g -- Get Stats
Adds statistical calculations to the output. Stats are most useful on numeric questions (age, percentages, etc.) and scaled list questions (e.g., a 1-5 rating scale), where a mean or median has practical meaning.
Stats can be applied to any list question, but the results may be meaningless depending on how the answers are coded. For example, a mean of 1.5 on a gender question (1=Male, 2=Female) only tells you the responses landed halfway between the two codes -- it does not describe the data in any useful way. Use your judgment about whether stats make sense for the question type being scanned. *You CANNOT combine RANK with STATS
Important: When stats are enabled, they are applied to all questions being processed in that run -- you cannot selectively enable stats for individual questions. If you need stats on only certain variables, run those as a separate SCAN using Option 2 (Specific Variables) in Step 5.
Available stats include:
- Mean -- The average value across all responses.
- Median -- The middle value when all responses are sorted in order. Less affected by extreme outliers than the mean.
- Standard Deviation -- How spread out the responses are from the mean. A low number means most answers were close together; a high number means they were spread wide.
- Standard Error -- An estimate of how much the mean might vary if the survey were run again with a different sample. Smaller is more reliable.
- Min / Max -- The lowest and highest values recorded.
- Sum -- The total of all values added together.
- Variance -- Similar to standard deviation, but expressed as a squared value. Used in more advanced statistical analysis; standard deviation is more human-readable for everyday use.
3h -- FREQ Tables
A streamlined, no-frills frequency table output. Limited options and no formatting controls. Cannot be combined with other Step 3 options, with the exception of Base (3c). Best used for a quick, raw count when formatting is not needed.
Step 4 -- Name the Output File
You will be prompted to provide a name for the output file. This step comes earlier in SCAN than in LIST -- it appears here, before variable selection.
If you provided a studyname on the FIRST screen, this will default to jobname.scn and you can provide a diferent name if you wish. If you however specified a filename on the second screen, pressing Enter without entering a name will output the tables directly to the screen only. Note that skipping a filename will also trigger an error beep -- this is expected behavior, not a crash.
Output files are typically saved with a .scn extension (e.g., jobname1.scn).
Step 5 -- Select Variables
Choose which questions / variables you want to include in the scan. There are three options on this screen, though Option 3 is not used in practice.
Option 1 -- All or Specific Question Types
Select all variables, or filter by question type. Follow-up screens will appear:
Step 5b -- Select Question Types
Press Enter to include all available question types, or enter codes to filter:
- Option 1 (CAT) -- No longer exists in Survox 10. Selecting this will return no data.
- Option 2 (FIELD) -- Closed-ended questions: yes/no, gender, rating scales, lists, etc.
- Option 3 (NUMERIC) -- Numeric answers: age, date of birth, percentage scales, etc.
- Option 4 (VAR/SHORT TEXT) -- Short text fields: name, address, sample info, system data (date, interviewer, IP address, etc.)
- Option 5 (OPEN END) -- Long-form open-ended text responses.
Note on text-based questions (Options 4 and 5): SCAN will not meaningfully tabulate free-text responses unless the entries are identical. For example, ZIP codes would calculate correctly since they are consistent values, but name fields would not produce useful output since every entry is likely unique. In most cases, running a SCAN on open ends or address fields will only return a count of how many records had something entered.
Step 5c -- Include / Exclude System Variables
Choose whether to include system and unnamed variables. The default is named variables only, which is the correct choice in most cases.
Step 5d -- Stats Handling for Numeric Questions
If your selected question types include numeric questions, stats may be generated automatically -- even if you did not select stats in Step 3. If this is the case, you will be prompted to choose:
- Show all answers only
- Show all answers + stats
- Show stats only
Step 5e -- Subset the Variables
Optionally narrow down which variables are included. Three options:
- Press Enter -- Include all variables of the selected type(s).
- Start / Stop -- Specify a starting and ending question label. You can use the built-in
FirstQandLastQmarkers to include only actual survey questions, excluding sample and system variables. - Pattern Match (wildcard) -- Use the
*wildcard to match variable names. For example,q*to include all survey questions that begin with Q (e.g., Q1, Q15, QD6), ors_*for all sample variables. The*wildcard is required -- partial names without it will not match.
Option 2 -- Specific Variables
Step 5f -- Frequency Counts or Use Variables as Defined in Survey Specs
Two display options:
- Frequency Counts -- Attempts to break down responses by matching identical values. Required when using data locations instead of label names.
- Use Variables as Defined in Survey Specs -- Shows actual answer text (e.g., Yes / No) based on the predefined codes in the survey. This is the preferred option for standard closed-ended questions.
Important: If you are specifying variables using data locations (e.g., column positions rather than label names), you must use Frequency Counts.
Note on text / variable fields: If the variables selected in Step 5b include short text or open end question types, Use Variables as Defined in Survey Specs will only return a total count of answered records -- there are no predefined codes to load and display. Use Frequency Counts if you want SCAN to attempt to match and tally identical text entries.
Step 5g -- Enter Variable Names
Enter the variables you want to scan, one at a time, up to 10.
Important -- [$] Notation (SCAN only): For question types that are not standard list / closed-ended questions -- including numeric questions, short variable fields, and open ends -- the variable label must be wrapped in [$] notation, or SCAN will return an error. For example:
[age$]
[51.2$]
This applies to sample info fields specified by data location as well (e.g., [51.2$]).
Step 5h -- Per-Variable Base (Optional)
After entering the second variable, you will be prompted to specify a base for that variable, or press Enter to use the same base set in Step 3c, or enter none for no base. Each variable can have its own independent base if needed, though this is less commonly used in SCAN than in LIST.
Step 5i -- Cross Variable (FREQ tables only)
When running FREQ tables, after each variable entry you will be given the option to cross it by another variable. Crossing combines two questions into a single table showing all possible combinations of their answers. For example, crossing gender by race would produce output showing Male-White, Male-Asian, Female-Black, and so on -- for every combination present in the data. This option only appears when FREQ (3h) is the selected output type.
Step 6 -- Confirm and Save Spec
The final screen shows a summary of everything you have configured -- the file being read, the DB file in use, the base, banner, output file name, selected variables, and any options chosen in Step 3. Review this carefully before running.
Press Enter to run the scan as configured.
Saving as a Spec File: Before pressing Enter, you can type a filename with a .spx extension (e.g., jobname1_scan.spx) and press Enter. This saves all current settings as a reusable spec file. To rerun it later from the same directory:
m2 jobname1_scan.spx
This is particularly useful for complex scans with banners, stats, and custom bases that you plan to run regularly or update as data comes in.
Video Demonstrations
The following short demos walk through three common SCAN use cases from start to finish.
Demo 1 -- Simple Scan, Completes Only, No Banner
Shows how to run a basic frequency scan on survey questions with no banner applied -- just overall counts for each variable, output to screen.
[
Demo 2 -- Frequency with Banner
Shows how to set up a banner (e.g., quotavar(01/02/03/04) for sample type) and run a scan that breaks out frequency counts across banner points.
Demo 3 -- Print and Stat Options, Using Frequency Counts, Not Variable Counts
Shows how to configure Step 3 options including print formatting (show/hide percentages, totals) and stats (mean, median, min/max) for a numeric question.
Troubleshooting / Common Issues
Error beep with no output file specified
Expected behavior when pressing Enter through the filename prompt in Step 4. The scan will still run and output to screen. If you need a saved file, rerun and provide a filename.
Variable returns an error or no data
If a variable label is not a standard closed-ended (FIELD) question -- such as a numeric, open end, or short variable field -- it must be wrapped in [$] notation (e.g., [age$]). Entering the label without this wrapper will cause an error. The same applies to data location references (e.g., [51.2$]).
FREQ option warning when combined with other options
FREQ tables cannot be combined with most other Step 3 options -- the one exception is the Base option (3c). If you attempt to select FREQ along with any incompatible option, SCAN will not allow you to proceed -- it will display a message that the options cannot be combined and return you to the options screen automatically.
Numeric question generates stats you did not request
This is normal. Certain numeric question types automatically trigger stats generation in SCAN regardless of whether you selected stats in Step 3. You will be given the option at Step 5d to control how those stats are displayed.
Banner or base logic not working as expected
DB file out of sync with data
If the study questionnaire has been modified since the .db file was last generated, variable definitions will be out of sync with the actual data. Regenerate the .db file for the study and rerun the scan.
III. Survox - IT/DP
Technical information for the technical users, programmers, IT and DP assistants resides here.
IV. Help/Support/Troubleshooting
Something broken, not loading, or not working as expected? The answer is probably in here.
Troubleshooting - Locked QSS
Problem: When you need to modify quotas but the quota screen (QSS) is locked or inaccessible, this guide will help you diagnose the problem and resolve it.
Accessing the QSS
There are three ways to access the QSS, if one specific method doesn't work, try the others first before attempting to "correct" the issue:
- Survox Console - Web interface under Manage > Manage Quotas > Named
- Super/Boss Command Line - Type
qss <jobname>from a super or boss session - QuotaMod - Direct access via the QuotaMod application in putty, by typing
quotamod <enter> and providing the jobname
Why the QSS Gets Locked
The QSS becomes locked or inaccessible for three main reasons:
- Another user has it open - Someone is viewing/editing the quota file in QuotaMod in Read/Write mode
- Server load failure - Programming changes affecting quotas prevented the study server from loading the file properly (super/boss only)
- Active or hung surveys - Interviewer sessions or stuck processes are keeping the quota file open on the study server
Diagnosing the Lock
Follow these steps to determine what's causing the lock:
Step 1: Check QuotaMod Access
Try opening the job in QuotaMod. Check if it opens in:
- Read/Write mode (rw) - You can edit (no lock)
- Read-Only mode (ro) - File is locked by another process
If the file shows a Read Only, someone else has it open, so skip to step 3 below, otherwise continue to step 2.
Step 2: Test Loading from Super/Boss
Open a super or boss session and try:
qss <jobname>Look for specific error messages that indicate programming issues or file conflicts. You will typically see 2 different errors... "crc qff <-> quo mismatch" or "can't open quota file, failed to load jobname". If you get crc mismatch errors, this will require IT/DP to fix so contact them and await further instructions. if you get "Can't Open" messages then continue to step 3.
Step 3: Check File Ownership
From Survox CLI (PuTTY), run the following:
whylock jobname <enter>It should return something similar to below:
Here are the files listed as open for Jobname
Anything besides STDYSRVR can be cleared without
risking crashing the server.
If NO programs are listed, you need to check with a
programmer to investigate the issue further
COMMAND PID USER FILENAME
======== ====== ==== ============================================
stdysrvr 4087502 cfmc /cfmc/phone10/active/data/jobname.tr
stdysrvr 4087502 cfmc /cfmc/phone10/active/fone/jobname.fon
survent 345139 cfmc /cfmc/phone10/active/quota/jobname.quo
survent 369242 cfmc /cfmc/phone10/active/quota/jobname.quo
stdysrvr 4087502 cfmc /cfmc/phone10/active/quota/jobname.quo
survent 345139 cfmc /cfmc/phone10/active/qff/jobname.qff
survent 369242 cfmc /cfmc/phone10/active/qff/jobname.qff
Those are all the files we found open...
This shows which processes or users have all study files open. "survent" are interviewer sessions and "stdysrvr" is the actual study server. if someone has the file open in quotamod, it will be shown there too... If nothing is shown, then the problem requires deeper investigation, and should be handled by IT/DP.
Fixing the Lock
Based on your diagnosis, use the appropriate fix:
If QuotaMod Has the File Open
- Email the team to ask if anyone is actively using QuotaMod for this job
- If no one is using it, the process is likely hung
- Contact IT to issue a
killcommand to terminate the stuck QuotaMod process
If Study Server (stdysrvr) Owns the Lock
- Confirm no active interviewing is happening on the study
- From super/boss, run:
server:clearstudy (@sc for short) <jobname>- This releases the server's hold on the study and all of the associated files, including the quota file.
- It is possible that hung survent processes do not release the files, even when the study clears them. If you issue a server:clear and the problem persists, you will need IT/DP to issue a kill command on them.
Retesting After Fix
After attempting a fix, verify the QSS is now accessible:
- From super/boss, activate the job:
activate <jobname>
qss <jobname>- If the QSS loads successfully, the problem is resolved
- If it still fails to load, repeat the diagnosis and fix steps
Alternative: Modify Quotas While Locked
If the QSS is locked by the study server but the job must remain active (interviewing cannot stop), you can modify quotas directly from the command line:
- From super/boss, type:
mq <jobname>- When prompted, enter the quota you want to change (example:
completes.t) - Enter the adjustment using
+or-followed by the amount:+5adds 5 to the current value-10subtracts 10 from the current value
- The server will confirm the change was applied
Note: This method only works for adjusting existing quotas. You cannot add new quota cells or make structural changes using mq.
Troubleshooting - Out of Sample
Is your project out of sample…?
So, you think you are out of sample, because interviewers are getting “Out Of Numbers” screens. Well, you may be, however if the SPI screen shows numbers available in the various buckets, the following steps can be used to see what is really going on. The key is, there is no magic “I am out of sample, give me more.” button. You have to understand the information presented on the SPI screens, what they REALLY mean, and how to work with them in your favor.
Prerequisite Information - There are few key bits of information that are important to understand, before figure out why you do not have numbers...
First, it is important to know that the first SPI screen is just a total of all numbers not dead/hidden. It doesn’t account for zeroed out time zones, markets, etc. To truly see where your AVAILABLE numbers are, you need to look at the SPI G screen (from a boss/super, type “spi g <jobname>” to go right to it). This screen will tell you where you have numbers, if any, and why you don’t have numbers in some of the spots. Most commonly, the market is zero, the time zone is zero, it isn’t the right time of day, the reps are high enough, or the minimum system time hasn’t been reached yet.
Regarding dayparts, typically, MAXimum Research only uses DP Time 1, and it is set to 9am/5pm-10pm, allowing us to call respondents anytime, between 9am/5pm and 10pm THEIR TIME. Occasionally a job may have more than 1 time set, something like 5pm-6:30pm/6:30pm-8pm/8pm-10pm. Day jobs may also use Dayparts, so that B2B respondents get attempts at different times of day, for example 9am-12pm, 12pm-2pm, 2pm-5pm. When jobs are set like this, the system will move numbers between these 3 DP times, to allow numbers to be called at different times during the shift. Each one of these DP Times will have their own # of attempts. When numbers have been dialed the maximum number of attempts per daypart, they move into the “All Targeted” bucket, and are held there until released.
You also need to understand what the “Minimum System Time” setting means. All live numbers, besides a busy and a specified callback will come back up AFTER the minimum system time has elapsed, ASSUMING the number hasn’t been called the maximum # times for all applicable dayparts. When we have more than 1 daypart, numbers will move between them as calls are made. This is so we don’t call the same number during the same time of day for every call. Our default MINSYSTIME is 360 minutes (6 hours), meaning numbers will be redialed 6 hours after their last call. Since most shifts do not run for 6 hours, except maybe the weekends, numbers very rarely get called more than 1 time per shift. When using more than 1 daypart, that MINSYSTIME will decide which DP time the number will move to next.
So, here is what to do to get sample, IN ORDER, all of which is accomplished from the MPF Screen in a Super/Boss or under Modify Sample Parameters in the Console:
- First and foremost, make sure the current BUILDING TIME is INSIDE the current daypart time. If it is 10am here, but DP Time 1 starts at 5pm, you will not get any numbers. Adjust the DP Time 1 so it is BEFORE the building time. But remember, this DP time is RESPONDENT TIME. If the job is west coast for example, the DP TIME 1 needs to be 3 hours EARLIER than our building time (if it is 5pm here, DP Time 1 needs to be 2pm)
- If you have 2 or more dayparts:
- You can set “Release System” to yes. This only works if you have more than 1 daypart though. What this will do is allow numbers in other dayparts, that are old enough, to still be dialed, even though we are not currently in their assigned daypart window.
- Increase the # of attempts per Daypart by 1 each and Release System Numbers. What this does is dump all numbers, greater than the minimum system time setting, from all dayparts. This should let you dial EVERYTHING, that wasn’t already dialed today. Numbers younger than the minimum system time will not come out until that # of minutes has passed.
- If you still need sample, lower the “minimum system callback time” by 15 minutes. Check the SPI G again to see if you have numbers, and how many. If you need more, then repeat the process, 15 minutes at a time.
- Release Timed Numbers. (Scheduled Callbacks)
- Release HoldArea (Soft Refusals/Resp. Hung Up in Intro) Numbers
- Release All Targeted Numbers (though they would have been called 3+ times already) This will allow numbers to be continuously dialed until they reach the MAX_ATTEMPTS value (12 by default). Numbers are still bound to the minimum system time though, even when this setting is turned on.
If after following all these steps, you still do not have sample, there are either closed markets, hidden sample, or errors preventing the sample from coming out. In any of these situations, it is best to ask a PD/Programmer/PhoneOps Manager what to do.
Troubleshooting - INTV Login Issues
INTVS Cannot Login...? Here is what to check:
At times, interviewers may experience various issues when logging in, that prevents the process from completing. The below list covers the "most common" causes but doesn't include everything. If nothing below seems to fix the issue, DP/IT should be involved to further diagnose the problem... The documentation below covers: "White Screens", "Cannot Initialize Dialer", & "Booth Not Authorized" issues.
I. Interviewers See "Booth Not Authorized" Message:
When this "booth not authorized" message appears, it simply means that the booth/ID they are using has not been granted access to the project they are trying to access. This is a simple fix, accomplished via the Survox Console located under Manage -> Monitoring & Stations -> Authorize Station. To fill out the form, first confirm if the booth(s) in question have already been authorized for the study in a different mode "Practice" vs "Live" & "Dialer" vs "No Dialer". If the booth(s) are not shown in the list, the steps to authorize them are straight forward, using the prompts at the top of the Console screen:
- In the "Booths from" section, add the starting and stopping range of booths/IDs. For ALL BOOTHS, use 1001 - 1650. For a specific booth, put that same number in both boxes. Note: booth 1001-1650 are INTV IDs, 1700-1750 are for clients and/or non-dialer access/testing.
- Under "Available Projects" box, click in the white area to see a list of know projects. Either scroll down to the project or start typing the study code and it will appear. Be sure to actually "click" the study you want, so it shows up in the "Available Projects" box.
- Select Live for "Interviewer Mode"
- 9 times out of 10 the "Start With" will be dialer. As soon as you click Dialer/No Dialer, the booth(s) will be added to the list below of Authorized Studies.
- The Agent(s)/Booth(s) should now be able to login
NOTE: For Client Testing/Data Entry/Suspend Entering, use booths "1701-1750", "Live" and "No Dialer" options. Because of our "wctran" way of testing, booths do NOT need to be authorized for testing mode.
II. Interviewers receive "Dialer Can't Initialize Study XYZ" Message:
If interviewers login and receive this message, it typically means there is something wrong with the study's "Dialer Configuration" page, most commonly something wrong in the callerID File (extra blank lines, non-phone number text, changing CID from list to specific numbers, or "DOS" formatted files.) Most times, this requires DP/IT to resolve, however there a few things that can be checked before engaging them...
- The first step in diagnosing the issue is to isolate what mode the dialer is using, by checking the Study's Dialer Config Page.
- Navigate to the dialer config page in the console, Manage -> Study Control -> Dialer Configuration and then selecting the study from the dropdown
- Take note of the CallerID information at the bottom of the screen

- It should be shown as either:
- File & a specific filename
- --- and a specific number in the "CallerID" Box
- Blank (meaning it uses the "Shopwide" column
- If the study is using a file, we need to check that it is properly formatted. To do this, in putty navigate to the CID File folder, which is located in
/cfmc/phone10/control/dialer/callerids/here is where all the callerID lists that show up in the file dropdown are read. once you are in the folder, there are 2 things to check with the file:- Make sure the file is named with all lowercase letters. Survox has strange behavior when dealing with files that are a mix of UPPERCASE and lowercase letters. Linux allows for mixed case file, but survox always "looks" for all lowercase names, which causes confusion. If the file is all lowercase, proceed to the next step. If the filename is mixed case, have the PD/DP/IT change it to be all lowercase, and correct the filename in the dialer config before testing access again.
- If you confirmed the filename is labeled correctly, the next step is to ensure it is properly readable by linux. Files created in textpad/notpad/excel and saved to the survox drive typically get saved as DOS format, and do not read properly. To fix the formatting of the file, simply open putty, go into the callerID folder and type the following command.
dos2unix filename <enter>This will convert the file to unix/linux format, so the dialer can read it properly. The whole process should look like below:CfMC-phone10 /cfmc>cd /cfmc/phone10/control/dialer/callerids/ CfMC-phone10 /cfmc/phone10/control/dialer/callerids>dos2unix missdelta.txt dos2unix: converting file missdelta.txt to Unix format... CfMC-phone10 /cfmc/phone10/control/dialer/callerids> - Once you confirm the file formatted in UNIX format, by no errors showing up on-screen, retest dialer access. If intvs still cannot login and get "Can't Initialize..." error, proceed to the next step.
- Lastly, sometimes an extra line or text can creep into the callerid files. You can check this by opening the file in textpad, and ensure it is nothing but 10-digit phone numbers, and there are no blank rows at the bottom. The file should look similar to this:

- If you notice more than one blank line below the last phone number, delete them, so there is just a single blank line under the last file. Save and attempt accessing the dialer with the study again. Sometimes a
server:clearstudycommand is needed from a boss/super to ensure the updated file gets read. If intvs still cannot login and get "Can't Initialize..." error, proceed to the next step.
- The next step to check the dialer settings is to look directly at the study's ".dial" file, which is the text version of the console window. While they should be a match, sometimes the .dial can get corrupted, especially if a PD switches a job from list to specific number, or vice versa.
- To check the .dial settings, browse to the
/cfmc/phone10/control/dialerfolder and look for the .dial for your study. Viewing it in textpad/notepad is acceptable for this check. The file should resemble one of the two shown below. The image on the left is a study using a list, and the one on the right is using specific numbers:
- However, if a PD changes a project's settings, the file can sometime be corrupted, and have both settings, as shown below:

- If the file looks like above, confirm with the PD which setting is correct, and REMOVE the line that should not be there, either the caller_id_type: or callerid: line, and remove the one that shouldn't be there. Reset dialer access after saving the file. Sometimes a
server:clearstudycommand is needed from a boss/super to ensure the updated file gets read.
- To check the .dial settings, browse to the
- If all above checks have been completed, and everything is correct, but the study still will not, the only other basic test would be to clear the study from the server completely and reload it. By executing a
server:clearstudycommand from a boss/super, and then doing a qss/spi immediately after, ensures the updated file gets read by the server. - Last option... Contact DP/IT for help.
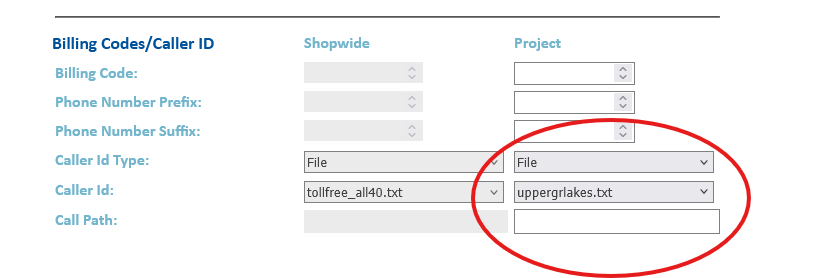
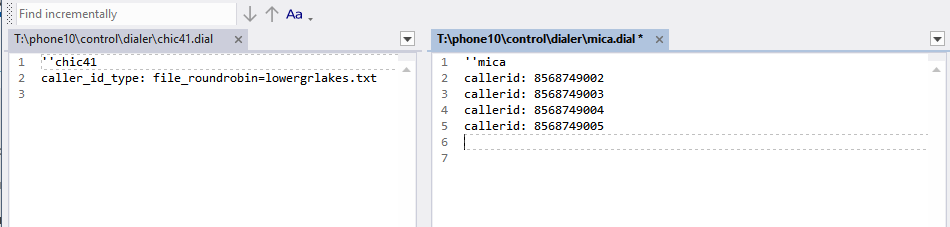
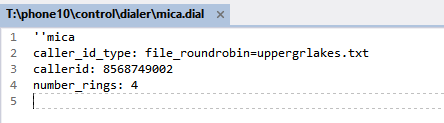
III. Interviewers Report "White Screens" when logging in:
An interviewer "White Screen" is typically reported as they try to login, and the study simply cannot load. If there was a file mismatch error, or read/write access error, they would make it through login process, and then immediately logout, while white screens don't even make it that far. The 2 most common cause of white screens are:
- Something being set wrong in the study's .wc file.
- The server's access to files changed after loading.
Each of the 2 issues above are relatively simple to check/fix.
- Errors in study.wc File - whenever a study is created, there is a .wc file created, located in
/cfmc/phone10/wc_files/called jobname_mode.wc where mode is either ws (websurvent - ONLINE mode) or wc (webcati - INTERVIEWER mode). We create a linked version simply called jobname.wc that links to the _wc version. This is done so when logging into the training/practice/testing mode, we do not have to specify the _wc on the studycode name. To diagnose an issue with the .wc file, the following steps should be followed:- You can view the file via puTTY or Windows Explorer. Simply browse to
/cfmc/phone10/wc_files/and you will see the files for all the current studies listed. - Open the study file in question, and it should look similar to this:

- The two lines of importance are marked above:
- STUDYCODE= should always be the actual studycode, as set when creating the project.
- QFFNAME= This is the currently loaded qff (questionnaire formatted file) for the study. If programmers made changes to a project after it starts, this field will be updated when those changes get loaded.
- If either file is missing or mislabeled, it will prevent intvs from logging in, and typically give a white screen or a "no study named <jobname> exists" error.
- To fix, ensure the STUDYCODE= matches the actual study name and that the QFFNAME= is correct.
- To check the studycode, it should be the same as the filename itself... so if you open mica_wc.wc it should say mica in the STUDYCODE= line. If not, that is the issue, and correct the STUDYCODE= line to match.
- Fixing the QFFNAME= requires confirmation from the programmer on what the QFFNAME= should be... one thing that anyone can look for though is if someone left .qff extension on the end of the file. That should NOT be part of the line, and should be removed:
QFFFILE=mica_wcthis is CORRECT!QFFFILE=mica_wc.qffthis is INCORRECT!
- If the issue was related to the .wc file being setup wrong, after correcting have the interviewers try accessing the study again. If it works, congrats! If it doesn't work, proceed to the next step.
- You can view the file via puTTY or Windows Explorer. Simply browse to
- File Ownership/Permissions/Version Issues - Often times studies get loaded early in the day, but someone accessing the study, or viewing the qss/spi etc. Once loaded by the server, it stays loaded. This can cause issues if a programmer updates file while the study has them... When an interviewer tries to login, the server basically says to them "I have the files you need, but I can't give them to you because I don't own them anymore." This happens because the datestamp of the file updated outside of the server doing something to them, it sees that change of ownership as a reason to not reload the files, and just hangs on whitescreens for the interviewer.
- This fix this, the following steps should be run via a super/boss:
server:clearstudy jobname <enter> then 2-character confirm code- This clears the study from the server & dialer, also aborts all active sessions.server:deactivate jobname <enter> then 2-character confirm code- This prevents the server from automatically reloading the studyactivate jobname <enter>- This command has the server attempt to read and lock all the files for the study.qss/mpf jobname <enter>- This will test/load the files, like the quota screen, sample, data, etc.
- Once the above 4 commands are executed, and if there were no errors, the job should no longer whitescreen for the interviewers.
- If you get errors during any of those 4 commands, or the problem still persists, contact DP/IT for help as the problem is more complex.
- This fix this, the following steps should be run via a super/boss:
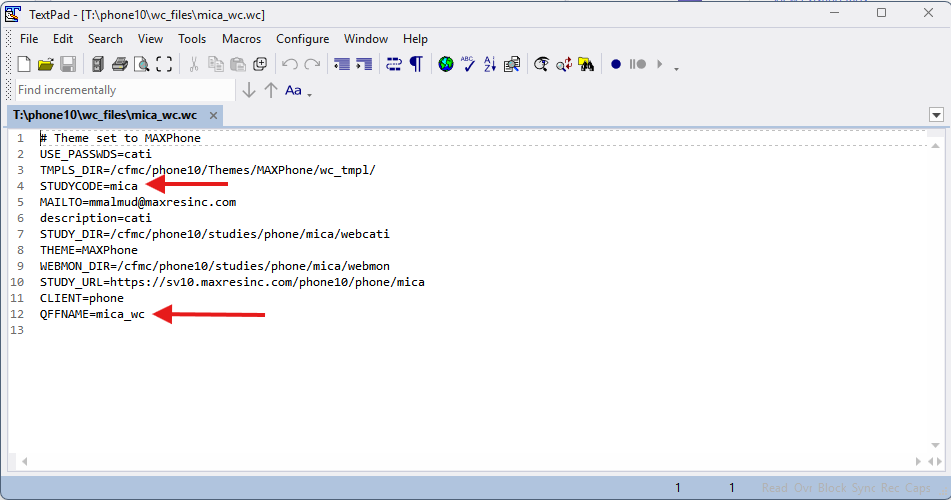
IV. "Study is not in the list of Active Studies" Messages
Similar to INTV white screens, if someone tries to access a study via boss/super and receive a message that "the study is not in the server's list of active studies" means most likely files changed after the study was loaded, so the server deactivated it to prevent potential damage to the files/project. The steps to correct this follow the same as #2 in the "White Screens" section above. To fix this, the following steps should be run via a super/boss:
server:clearstudy jobname <enter> then 2-character confirm code- This clears the study from the server & dialer, also aborts all active sessions.server:deactivate jobname <enter> then 2-character confirm code- This prevents the server from automatically reloading the studyactivate jobname <enter>- This command has the server attempt to read and lock all the files for the study.qss/mpf jobname <enter>- This will test/load the files, like the quota screen, sample, data, etc.
Once the above 4 commands are executed, and if there were no errors, the job should no longer give the error and will load. If you get errors during any of those 4 commands, or the problem still persists, contact DP/IT for help as the problem is more complex.
V. Conclusion - INTVs Still Cannot Login
If, even with doing everything above, intvs cannot login, contact DP/IT for help, as it is something more complicated/complex for simple troubleshooting to solve.
It could a large variety of issues, including:
- Server Frozen
- Storage Space Issue
- Network Issues
- Project stuck "shutting down"
- IPCFile corruption
- ...and many others
Troubleshooting - Server/Dialer Crash
Problem: Server/Dialer Crashes... What's Next?
There are many reasons why the Dialer and/or Study Server can crash, but those are for DP/IT to figure out**. This guide is more of a "what to do to get things running again" step-by-step list. Depending on the severity of the crash, various steps may be required. Following along in order helps diagnose the extent of the crash and the best steps to follow. Other times, it may be needed to "Bounce" the dialer or Study Server between shifts, to clear errors, locked files, or free up resources that hung. If this is a planned "Bounce" you can proceed directly to Sections B & C to follow the steps for listed there for "Bouncing". Bouncing steps are the exact same as restarting after a crash, so just follow along in order...
Section A - What actually crashed...?
The first, and most important step is to isolate what actually crashed... the Dialer, Study Server, both, building internet/power, the physical machine, etc. This is accomplished with a few simple steps/tests:
- Step 1 - Is it the power/internet at the building?
- Try opening the Survox Console/Putty
- if it loads, it is NOT Internet, so continue to the next step.
- If the Console/Putty doesn't load, check if other servers work, like the web server or VPN. If they too DO NOT load, it is 100% an internet/building issue. Contact DP/IT to investigate and await further instructions
- Ironically, if you are viewing this document live, it is NOT power/internet, as MAXWell sits on a server IN the building.
- Try opening the Survox Console/Putty
- Step 2 - Check Survox Access
- Once you have confirmed there is power/internet at the building, the next step is to confirm that the Survox Server is operational...
- Putty is your best test here. If you can access the server via puTTY, it means the physical server is running, and accessible, so proceed to step 3.
- If you cannot access the server via puTTY, most likely the physical machine crashed/rebooted. This has to be checked from within the building, by someone with security clearance to access the server room. Contact IT and have them investigate.
- Once you have confirmed there is power/internet at the building, the next step is to confirm that the Survox Server is operational...
- Step 3 - Check if the study server actually running
- Once you have confirmed that the physical server is running and there is power/internet at the building, the next step is to check the actual interviewing server, called the "study server".
- There are 2 ways to quickly check if the study server is running:
- From the Survox Console, navigate to Manage -> Shop and Server -> Start
- If the study server is running, you will see a message similar to below:

- The other option to check the server status is in puTTY, via a super/boss. If it type in super from putty and it loads, meaning you get the
Enter a SUPERVISOR Command -->prompt, the server is running.
- If either option shows the study server is running, proceed to the next step to further isolate what else may have crashed.
- If after testing the server, it is determined the study server is NOT running, process to Section B to attempt a restart.
- Step 4 - Check Dialer Status
- If you have gotten this far, there is most likely only one thing left that could have crashed, the Dialer. Again, just like with the study server, there are 2 ways to check the Dialer's status...
- From the Survox Console, navigate to Manage -> Shop & Server -> Dialer Control and simply click the blue "Go" button to see the dialer's current status
- This will show you if the dialer is running or not.

- The Console will either show RUNNING or NOT RUNNING in the highlighted image above. If the dialer is RUNNING it may just need to be activated on the server, to proceed to Section C, Step 3 to enable dialer control on the study server. If the dialer is NOT RUNNING it needs to be started and initialized on the study server, so proceed to Section C, Step 1 to do a full dialer reset.
- The second way to test the dialer is again via a boss/super. by typing
@testdialer <enter>you will either be met with a dialer not running message or a successful ping response, similar to this:ping command RETURNED (PING 1 2998 11:23:55.547 9901 11:23:55.54 11:23:55.547 ast:20260225112355 11:23:55.588)
- If you have gotten this far, there is most likely only one thing left that could have crashed, the Dialer. Again, just like with the study server, there are 2 ways to check the Dialer's status...
- Step 5 - Other Issues
- If you made it this far and still have not isolated what the issue is, it is most likely something more complex, that requires IT/Survox to diagnose.
- Contact the IT team and explain the issues and what steps you already attempted
- It could be hung apache services, full storage, certificate errors or other issues they are trained to diagnose.
- If you made it this far and still have not isolated what the issue is, it is most likely something more complex, that requires IT/Survox to diagnose.
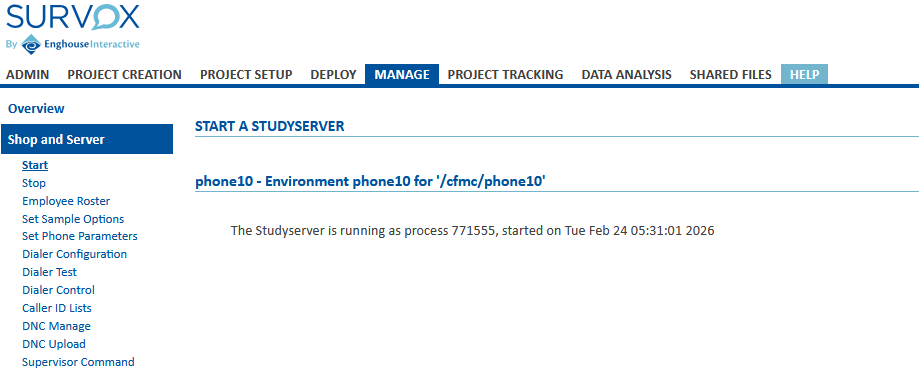
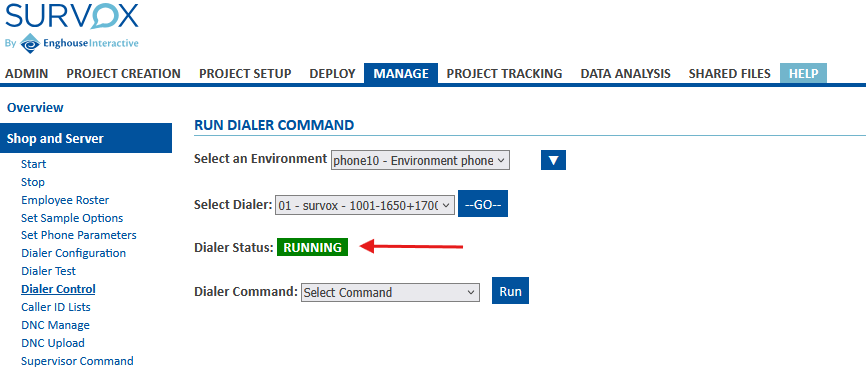
Section B - Restoring Survox Study Server
More often than not, the study server has crashed from either an error record on a project, a corrupt file being accessed, or an accidental clearing from someone in DP/IT. The process to restart the study server is relatively simple, and can usually be doing via the Console, unless it is "hung/frozen" in which case puTTY is required. Below are the steps to take via the Console. Below those are the additional steps should the Console method fail.
These steps can also be followed if someone requested "bouncing" the server. Bouncing is essentially a planned shutdown & restart of the study server and/or dialer.
Note: Anytime the study server is restarted, it is advised to also restart the dialer, following the steps in Section C. Doing this ensures a clean connection state between the two processes.
- Option 1 - Restart Via the Survox Console
- Once logged in, navigate to Manage -> Shop & Server -> Stop - This is a safety check to make sure the Console doesn't think it is still running. If you see a Process ID showing, with a date/timestamp and "Stop Phone10" like below, that means the Console thinks the study server is still running, so only proceed if you are 100% sure the server is crashed or needs to be "bounced".

-
If the screen shows No Studt Server loaded, you can proceed with starting the server up. Just click on the "Start" option under Shop & Server. - This screen will give you the option to "Start phone10" if it is not already running. Simply click that button and wait for the Console to confirm back if the server started properly or not.
- If there are errors when restarting, proceed to the "Advanced" option of restarting via putty below.
- If the server loaded properly, the next step it to reinitialize the Dialer, so proceed to Section C.
- Once logged in, navigate to Manage -> Shop & Server -> Stop - This is a safety check to make sure the Console doesn't think it is still running. If you see a Process ID showing, with a date/timestamp and "Stop Phone10" like below, that means the Console thinks the study server is still running, so only proceed if you are 100% sure the server is crashed or needs to be "bounced".
- Option 2- Restart via PuTTY (Advanced Mode)
- Restarting the study server via putty is more informative on what is happening but takes a little more understanding of puTTY and linux. Below should give you all the information you need though. If this is a scheduled "bounce" it is recommended to cleanly shut down the server, via the console and only follow the below steps for "hung/frozen" study servers
- First, connect the study server via puTTY, as the normal cfmc user.
- Second - Check for an active/hung study server process by typing the following into puTTY:
srvrchk <enter>- This will either show you nothing, or a stdysrvr process running.
- If nothing is shown, proceed to the next step
- If a process id is shown, we need to clear it first, using the linux command "kill" which will IMMEDIATELY kill the study server process, disconnecting all intv sessions, super/boss sessions, and anything else running interactively.
- Note: the process ID is randomly assigned each time a process starts, so it will NOT be the same each time you start/restart a server
- To kill the process is simple... type
kill -9 process_id <enter>and it will immediately stop the study server process. - The full identify/clear/check process is shown in the below example, where the server's process ID is listed as 771555:
## ===== Check for Active study server CfMC-phone10 /cfmc>srvrchk Checking for active STDYSRVR process ID... If nothing appears below, there is no server active. However, if there is information shown, take note of the process ID listed PROCID ------ VvVvVv 771555 cfmc 20 0 336308 83852 10032 S 0.0 0.1 0:35.49 stdysrvr ## ===== FORCE CLEAR the study server CfMC-phone10 /cfmc> kill -9 771555 <-- immediately kills the process ID of the study server ## ===== RECHECK for active Study Server CfMC-phone10 /cfmc>srvrchk Checking for active STDYSRVR process ID... If nothing appears below, there is no server active. However, if there is information shown, take note of the process ID listed PROCID ------ VvVvVv <-- nothing shown this time, confirms server is down CfMC-phone10 /cfmc> - Once you have confirmed the "stdysrvr" process is not running, you can start the server back up. This is done with a single command in puTTY:
server_start.pl ALL <enter>and it can take 30-60 seconds to start. Hitting <enter> 2-3 more times helps speed it up, but when done, it should echo back that the server is started and running on a new PID. If not, there is something more complex going on and IT needs to step in. This process also attempts to restart the dialer as well, but it is always advised to still manually restart the dialer separately, following the steps in Section C. - After puTTY shows the server has successfully been restarted, you can again confirm if the stdysrvr process started, but running the
srvrchk <enter>command again and making sure it shows a new Process ID. - The final test that the server loaded properly is to try to access a super/boss. If that loads cleanly, the server has been started/restarted/bounced and you are good to resume operations... assuming you do not also need to bounce the dialer, in which case read on below...
- This will either show you nothing, or a stdysrvr process running.
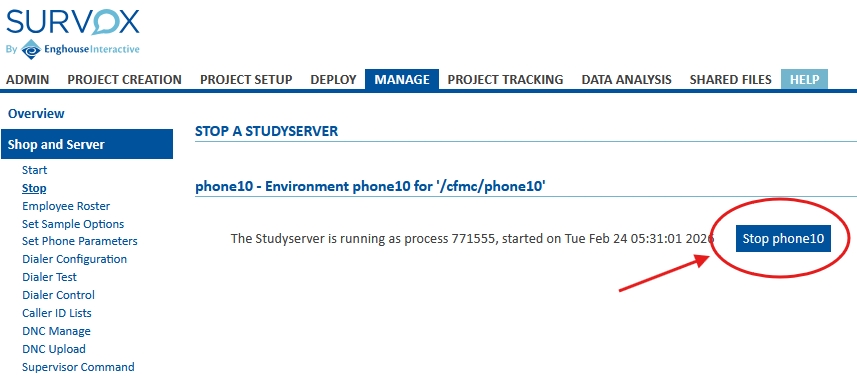
Section C - (Re)Starting the Survox Dialer
Just like with the study server, the dialer can crash for various reasons. Most commonly it has to do with either changes made to the system or storage related problems. DP/IT can diagnose why it crashed later, the main goal of this section is to get the dialer up and running again. Unlike the study server though, the dialer can ONLY be stopped/started/bounced via the console. However, puTTY is useful to check the status prior to doing anything, and again afterwards to ensure it is running properly.
- Step 1 - Shutdown Dialer on Study Server
- From the Console, navigate to Manage -> Shop & Server -> Dialer Control
- Click the blue "--Go--" button to load the dialer
- If the Dialer status shows as RUNNING then follow the below steps to clear it. However if it shows as NOT RUNNING then the dialer is already shutdown and you can proceed to step 2 to restart it.
- Under Dialer Command, pick the option to "CLOSE DIALER" and click RUN it should then respond back if the command was successful or not.
- Under Dialer Command, pick the option to "WIPEOUT DIALER" and click RUN it should then respond back if the command was successful or not.
- NOTE: These 2 commands, while similar, do different things. CLOSE just tells the study server it is not using the dialer anymore, while WIPEOUT actually shuts the dialer process down.
- After you have issued both CLOSE & WIPEOUT, you need to refresh the dialer status the console sees. Simply click the --Go-- button again to refresh, and now the dialer should show as NOT RUNNING
- Step 2 - Start Dialer
- Once confirmed that the dialer shows as NOT RUNNING you can start it back up. Just like with shutting it down, you use the Dialer Command options.
- The first step is to select "INITIALIZE DIALER" and then clicking RUN
- Second, assuming you get a "Dialer Initialized OK" or similar message, pick the second option the list, "HANDSHAKE DIALER" and again click RUN
- These commands are the same as the super/boss command @startdialer (initialize) and @testdialer (handshake).
- If either the INITIALIZE or HANDSHAKE commands fail, it doesn't necessarily mean the dialer didn't start... there can sometimes be a few second delay after the command runs, that makes the console think it didn't load. To test, click the --Go-- button again. If it shows as RUNNING then just proceed to the last step. But... If it still shows as NOT RUNNING, then you need to engage with DP/IT to investigate further.
- Once confirmed that the dialer shows as NOT RUNNING you can start it back up. Just like with shutting it down, you use the Dialer Command options.
- Step 3 - Final Confirmation
- While not entirely needed, if the INITIALIZE and HANDSHAKE commands worked, and the screen shows as RUNNING, it is always best to do one last check via a super/boss in puTTY.
- Open putty and launch a super/boss
- type
@startdialer <enter>and then put in the 2-digit confirmation code. If the dialer is properly initialized, the super/boss should respond backinit command SUCCEEDED. if not, try doing another@cleardialerand then a second@startdialer - Once you get a successful initialize command response, do one last
@testdialer <enter>and enter the 2-digit code to issue the handshake one last time. This should echo back something similar toping command RETURNED (PING 1 2998 11:23:55.547 9901 11:23:55.54 11:23:55.547 ast:20260225112355 11:23:55.588)
- While not entirely needed, if the INITIALIZE and HANDSHAKE commands worked, and the screen shows as RUNNING, it is always best to do one last check via a super/boss in puTTY.
Conclusion
If following all the steps listed above, you are still unable to get the study server, dialer or both systems back up and running, something is gravely wrong, and you should IMMEDIATELY contact IT for help. There are a lot of moving parts behind the scenes, that while may not seem connected, actually are, and IT is trained to identify them quickly.
In most cases though, the above steps are the exact same thing IT would do if you contacted them and said the server crashed.
**IMPORTANT FOOTNOTE - If you ever do these steps on your own, it is still important to let IT know there was a crash, so they can investigate the initial cause, to hopefully prevent it from happening again, or at the very least make sure Survox is aware it happened, so they can isolate the issue and prevent it in future software releases.
TroubleShooting - Fixing (Rebuilding) Active Project Fone Files
Overview
Over the course of a project's life, the fone file can develop errors that affect dialing performance or sample integrity. Common causes include:
- Error records that need to be corrected before dialing can resume normally.
- Fresh numbers not being released because the stacks fell out of order.
- Excessive hide/reveal operations that corrupted the record number order -- since records are processed sequentially, a record numbered 1001 appearing after record 2432 in the file will never be reached.
- UITA (Up in the Air) and OTF (On the Floor) numbers left unresolved after a connection loss, survey blow, or dialer/server crash.
- Missed callbacks that need to be reassigned for the current day.
When any of these conditions are present, the fone file needs to be repaired or rebuilt before the project goes back into production. This article covers three processes for doing so, in order of escalating complexity:
- Process 1 -- VUXIS via FoneUtil: The fastest option. Runs the sample through five sequential steps that verify, clean, and reorder the fone file. Handles most routine issues and should always be attempted first.
- Process 2 -- fonerun rebuild: An automated rebuild that converts the fone file to ASCII and reconstructs it, then runs VUXIS automatically on completion. Handles more serious issues that Process 1 cannot fix, but can fail silently if it encounters an error mid-rebuild.
- Process 3 -- Manual Rebuild: A step-by-step manual replica of the fonerun rebuild, giving the programmer full control at each stage. Errors are surfaced explicitly and can be corrected before continuing. This is the most reliable option for serious fone file problems.
In practice, most situations are resolved by running Process 1 first. If the results are not clean, the typical path is to skip Process 2 and proceed directly to Process 3. Process 2 is documented here as a middle option, but its silent failure behavior makes Process 3 the safer choice when Process 1 is not enough.
Prerequisites & Backup
Before performing any fone file repair or rebuild operation, the following steps must be completed in order. Do not skip or reorder these steps.
Allow a minimum of 20-30 minutes before the project's next scheduled start time. Starting any repair process too close to shift start risks agent downtime if the process runs long.
Step 1 — Confirm the Job is Not Active
From a super/boss session in PuTTY, type:
daiwc jobname <enter>If agents are shown, the job is live and no repair work can be performed. Stop here and coordinate with Phone Ops before proceeding. If no agents are shown, continue.
Step 2 — Shut Down the Job and Clear Open Files
From the super/boss session, type:
server:clearstudy jobname <enter>You will be prompted for a 2-digit confirmation code. Enter it to close the study and clear any open files.
Step 3 — Confirm No Files Are Still Open
From PuTTY, type:
whylock jobname <enter>If nothing is returned, proceed. If files are still showing as open, resolve accordingly before continuing.
Step 4 — Navigate to the Fone Folder
From PuTTY, type:
fone <enter>Step 5 — Back Up the Fone File and Index Files
Copy the project's fone file and all associated index files into the backup directory by typing:
cp jobname.f* backup/. <enter>Once the backup is confirmed, you are ready to proceed with the appropriate repair process below.
Process 1 — VUXIS via FoneUtil
VUXIS is the fastest repair option and should always be attempted first. It runs the sample through five sequential steps that verify, clean, and reorder the fone file back to its proper state. It is most effective for minor issues and routine maintenance, but may not resolve more serious fone file errors.
The recommended default sequence is VUXISV — the trailing V acts as a safety net to catch any UITA records that the initial VU pass may have missed. Note that V and U are interchangeable in order; running UV instead of VU will sometimes recover more records than VU alone. Use your judgment based on what the initial V screen is showing.
NOTE: This process runs automatically each night during the overnight processing window around 5am. These steps should only be needed if the job is running across shifts, and something happened during dayshift that warrants the repair.
Step 1 — Launch FoneUtil
From the /cfmc/phone10/phone directory in PuTTY, type:
foneutil <enter>At the first prompt, you will be asked for a list file name. You have two options:
- Press
<enter>to skip — output will display directly on screen in real time. - Type a filename and press
<enter>— output will be written to that file instead of the screen, and you will need to read the list file afterward to review what changed.
Step 2 — Load the Project
At the next prompt, type the project name and press <enter>:
jobname <enter>FoneUtil will confirm whether the project loaded in Read-Write (R/W) or Read-Only (RO) mode. If the project loads as Read-Only, stop here and return to the Prerequisites section to resolve the issue before continuing.
Step 3 — V (Verify)
Type:
V <enter>Verify checks that all records are in their proper stacks and performs low-level adjustments where needed. The steps that follow are more capable of correcting deeper issues, but Verify establishes the baseline for the process.
Step 4 — U (UITA / OTF Return)
Type:
U <enter>When prompted for a select statement, type:
all <enter>This returns "Up in the Air" (UITA) and "On the Floor" (OTF) records back to their originating stacks. Because no status code was ever assigned to these records, they are treated as if the call never happened. For example, a fresh number that was UITA will be returned to the fresh stack.
Step 5 — X (fiX)
Type:
X <enter>This relinks records that are in the wrong stacks and restores them to their proper record number order within the correct stack.
Step 6 — I (Integrate)
Type:
I <enter>Integrate reassigns missed callbacks so they can be rescheduled for the current day. For example, a callback that was set for 12:00 PM yesterday but was never attempted will be reassigned for 12:00 PM today.
Step 7 — S (Sort Specials)
Type:
S <enter>When prompted for a select statement, type:
all <enter>This re-sorts all special numbers back into their designated special stacks, so agents configured as the associated special interviewer type can access those numbers when they start up.
Step 8 — V (Verify — Second Pass)
Type:
V <enter>This second Verify pass acts as a safety net, catching any UITA records that the initial VU sequence may have missed.
Step 9 — Review Phone Screens
Before exiting, verify the results by typing:
P <enter>This cycles through the 5-6 phone screens, equivalent to running SPI from a super/boss session. On the first screen, confirm that the UITA and OTF fields show zero. Any remaining values in those fields indicate the issue was not fully resolved by VUXIS alone, and Process 2 or Process 3 may be required.
Step 10 — Exit FoneUtil
Type:
q <enter>Then type:
q <enter>FoneUtil will close. If the phone screens confirmed clean results, no further action is needed. If UITA or OTF numbers were still present, proceed to Process 2.
Process 2 — fonerun rebuild
The fonerun jobname rebuild command automates the fone file rebuild process in a single step. It outputs the fone file as ASCII, attempts to rebuild it, and then runs VUXIS on the records automatically upon completion. This will resolve most issues that Process 1 alone could not fix.
Important: fonerun jobname rebuild can fail silently — meaning it may encounter an error mid-rebuild, halt the process, and not make that obvious. As a rule of thumb, any errors reported during the run should be treated as a reason to abandon the result and proceed to Process 3, even if the run appeared to complete successfully.
Note: Running
fonerun jobnamewithout therebuildargument will automatically execute the VUXIS sequence from Process 1. This is documented here for awareness only — Process 1 should always be run manually so the programmer can observe and interpret each step's output firsthand.
Step 1 — Run the Rebuild Command
From the /cfmc/phone10/fone directory in PuTTY, type:
fonerun jobname rebuild <enter>The process will run automatically. Watch the screen output as it progresses.
Step 2 — Evaluate the Result
When the process completes, review the output for any error indicators. A hard abort will be clearly signaled with an error block similar to:
**********************************
Program fonebuld ended with 11 errors!
**********************************
Whether the run aborted or completed with reported errors, the recommended course of action is the same — do not trust the result. Restore the backup and proceed to Process 3.
Step 3 — If Errors Were Encountered: Restore the Backup
cp backup/jobname.f* . <enter>Once restored, proceed to Process 3 to complete the rebuild manually.
Step 4 — If No Errors Were Reported: Verify the Result
If the run completed cleanly with no errors, verify the result the same way as Process 1 — launch FoneUtil, load the project in R/W mode, and use the P command to review the phone screens. Confirm that UITA and OTF fields on the first screen show zero before considering the job ready.
Verification — After Process Completed
you can edit and view the jobname.fnr file in the /fone folder to see the output of all the steps. This is helpful if there were errors that were missed while it was running.
If any UITA or OTF numbers remain, proceed to Process 3.
Process 3 — Manual Rebuild
The manual rebuild is a step-by-step replica of what fonerun rebuild does automatically, but with full control at each stage. This allows the programmer to identify and correct errors that would otherwise cause an automated rebuild to abort or fail silently. This process should be used when Process 2 encountered errors, or when the fone file condition warrants a controlled rebuild from the start.
Step 1 — Launch FoneUtil and Load the Project
From the /cfmc/phone10/phone directory in PuTTY, launch FoneUtil and load the project the same way as Process 1. Confirm the project loads in Read-Write (R/W) mode before continuing. If it loads Read-Only, return to the Prerequisites section.
Step 2 — Convert the Sample to ASCII
Type:
C <enter>C is short for Convert -- this outputs the entire sample as a readable ASCII file that will be used as the source for the rebuild. When prompted for a select statement, type:
all <enter>When prompted for a filename, type:
jobname.asc <enter>Step 3 — Dump the Header File
Type:
header jobname_hed.spx <enter>This dumps the project's SPI/MPF/Market settings into a header file that will be read back in during the rebuild, preserving all study configuration.
Step 4 — Exit FoneUtil
Type:
q <enter>Then type:
q <enter>Step 5 — Back Up Again Before Deleting
Before deleting the live fone files, take a second backup as a safety net. From the /cfmc/phone10/fone directory, type:
cp jobname.f* backup/. <enter>This ensures you have a clean restore point before the next step. Do not skip this.
Step 6 — Delete the Live Fone Files
Type:
rm jobname.f* <enter>This clears the active fone files from the directory so the rebuild can create fresh copies in their place.
Step 7 — Run fonebuld
Type:
fonebuld <enter>Then follow the prompts in sequence:
ascii <enter>&jobname_hed.spx <enter>The & prefix tells fonebuld to load the header from that file.
go <enter>jobname <enter>jobname.asc <enter>Press <enter> two to three more times as prompted until the process completes and exits automatically.
Step 8 — If fonebuld Reported Errors
If errors are shown during the rebuild, do not copy the partially-built files to the backup folder — this would overwrite your good backup copy. Instead:
- Delete the partially-created fone files from the active directory:
rm jobname.f* <enter> - Open the
jobname.ascfile and correct the errors that were reported. - Re-run
fonebuldfrom the top using the exact same command sequence in Step 7.
Repeat until the rebuild completes cleanly with no errors.
Step 9 — Verify the Result
Once fonebuld completes cleanly, the rebuilt fone file is considered sorted, verified, and fixed as part of the rebuild process itself. As an optional but recommended final check, run VUXIS via FoneUtil (Process 1) to confirm everything is in order before handing off to Phone Ops for reactivation.
V. Reference Documents
A section dedicated more to "how things work" and not necessarily how to use/fix things. Think of these are technical manuals for the various Survox Systems/Tools
Reference Material - Survox Dialer
How the Survox Predictive Dialer Works
Overview
The Survox dialer is not a simple "ratio dialer" where you set a fixed number like "dial 3 calls per agent." It is a predictive dialer driven by a live, dynamic algorithm that constantly adjusts how aggressively it dials based on what is happening on the floor in real time. Understanding how it works helps explain why contact rates change throughout a shift, why adding more agents does not always mean more dials, and why some nights perform better than others even with the same numbers.
The Algorithm Inputs
The dialer does not run on a fixed timer. Instead, it recalculates every time a job determines that more numbers need to be dialed -- typically because agents are waiting and available. Each time that happens, the following inputs are evaluated for that job:
- Drop Rate (Actual vs. Target) -- The dialer tracks a configured drop threshold expressed as a value per 10,000 connects. A setting of 350, for example, means the system will tolerate up to 3.5% of connects resulting in a drop. The dialer does not simply try to stay under this number -- it actively tries to dial as aggressively as possible while landing just below the drop target. The live drop rate updates every time the algorithm fires.
When the drop rate exceeds the configured target, the dialer does not make a small adjustment -- it throttles back aggressively, dropping to near 1:1 dialing until the drop rate falls back below the threshold. Once recovered, it begins climbing back toward the 3:1 cap again. This recovery behavior can cause noticeable slowdowns on the floor and is why sustained high drop rates are worth monitoring closely.
- Number of Available Agents -- The dialer evaluates how many agents are waiting and not currently on a call for that job. This is what triggers the recalculation in the first place. No waiting agents means no new dials.
- Real-Time Connect Rate -- The connect rate also updates every time the algorithm fires. When the contact rate is high, agents are busy more often, the dialer does not need to push as hard to keep them occupied, and drop risk is lower. When the contact rate is low, agents are idle more often, the dialer pushes closer to the 3:1 cap to compensate, and the chance of a drop increases.
- Capacity Settings (Two Hard Limits) -- Regardless of what the algorithm calculates, two hard caps always apply together:
- Max 3 calls per waiting agent
- Max 30 calls per second system-wide
Each job runs this calculation independently for itself. The shared 375-channel pool only becomes a factor if the combined math across all running jobs -- total active agents across all jobs multiplied by 3 -- would push past the 375-channel ceiling. In most normal operating conditions, that ceiling is never reached, and each job dials freely without any competition from other jobs.
What a "Drop" Actually Means
This is one of the most commonly misunderstood parts of how the dialer works.
A dropped call is NOT a respondent who picks up and then hangs up before reaching an agent. A dropped call is the dialer itself hanging up early -- before the call is ever answered -- because the algorithm has determined there is a risk that no agent will be available if the respondent picks up.
Even if the project is configured for 4 rings before abandoning, the dialer may cut a call off at 1, 2, or 3 rings if it calculates that sending that call through to a live pickup would create an agent availability problem. The respondent's phone may ring once or twice with no connection ever made from their perspective, and the dialer has already moved on.
This is intentional behavior. The dialer is constantly protecting the agent pool from being overwhelmed by live contacts with no one to handle them. And rather than simply avoiding drops, the algorithm actively hunts for the highest possible contact rate it can sustain while keeping drops just under the configured threshold.
Session Capacity and the 375-Channel Ceiling
Maximum Research has 375 concurrent call channels provided by the telco. Think of these as 375 phone lines that can be active at the same time across all dialing activity.
However, in normal operations, the 375-channel ceiling is rarely the actual constraint. The real practical limit is the "3 calls per waiting agent" rule combined with the 30 calls per second cap. Both apply at all times.
Example:
- 30 agents on the floor x 3 calls each = 90 channels maximum
- 375 channels available from telco
- 285 channels sitting completely idle
This is by design. The 3:1 rule was set because at our peak staffing of 100 to 110 agents, the math works out to:
- 110 agents x 3 calls = 330 channels needed at peak
- 375 available from telco
- 45-channel buffer (about 14% headroom)
This ensures that even on our busiest possible night, we never hit the telco ceiling and create a bottleneck.
Why Fewer Agents Can Mean More Dials Per Agent
This is counterintuitive but important. When fewer agents are working, the drop rate risk is lower because fewer calls are connecting overall, which allows the algorithm to dial more aggressively per agent.
Example comparison:
Night A -- 38 agents, high connect rate (7%)
- 38 x 3 = 114 max calls at once
- High connect rate means agents are busy -- dialer does not need to push as hard
- Drop risk is lower, but so is the need to dial aggressively
- Result: roughly 326 calls per hour
Night B -- 29 agents, lower connect rate (6.4%)
- 29 x 3 = 87 max calls at once
- Low connect rate means agents are idle more often -- dialer pushes closer to 3:1
- Greater drop risk, but algorithm pushes hard to stay just under the target
- Result: roughly 350 calls per hour
Night B made more calls per hour despite fewer agents. The algorithm pushing closer to the 3:1 cap to compensate for the lower contact rate was the deciding factor.
How Multiple Jobs Share Channels
Each job calculates its own dialing needs independently. In most cases, multiple jobs running simultaneously have no meaningful impact on each other, because the combined agent count across all jobs multiplied by 3 stays well under the 375-channel ceiling.
Channel competition only becomes a real factor if total active agents across all running jobs would push the combined demand past 375. If that threshold were approached, jobs with more agents would carry more weight in claiming available channels, and the per-job drop rate and connect rate at that moment would further influence how many channels each job actually receives.
Under normal staffing conditions at Maximum Research, this ceiling is not a practical concern.
What This Means Operationally
- Early shift behavior is aggressive, not conservative. Because connect rate and drop rate values start at zero, the dialer has nothing to constrain it and immediately pushes toward the 3:1 cap. The result is that the majority of dropped calls typically occur early in a shift, with large swings between the actual drop rate and the target until enough call volume accumulates for the pattern to normalize.
- Staffing level directly affects dialing behavior. More agents means more channels consumed, but a higher contact rate also means agents are busier and the dialer does not need to push as hard. There is a sweet spot -- typically around 25 to 35 agents for a single job -- where the algorithm can push closest to the drop threshold while maximizing contacts.
- Two jobs running simultaneously is not a problem under normal staffing. Each job manages its own dialing independently and draws from the shared channel pool without conflict, as long as combined session demand stays under 375.
- The 30 calls per second cap is a hard system limit that exists independently of everything else. On a typical night we do not come close to it, but it is there as a safeguard against runaway dialing.
A Note on the Dashboard
The Survox dialer dashboard updates its displayed statistics every 10 to 15 seconds. This is intentional -- frequent screen refreshes create overhead, and the dashboard is a reporting display, not the calculation engine. The dialer itself is recalculating and firing far faster than what the dashboard reflects. Do not assume that what you see on the dashboard represents the dialer's current state at that exact moment.
Summary
The Survox predictive dialer is a self-regulating system. It is event-driven -- each job recalculates independently every time its agents are waiting and more dials are needed -- rather than running on a fixed clock. Its goal is not simply to stay within the configured drop threshold, but to find the highest possible contact rate it can sustain while landing just below that threshold.
Because of this, the dialer is always running as fast as the current conditions allow for each job. If a job is already hitting the 3:1 capacity ceiling and the drop target is not being exceeded, raising the drop target will have no effect -- the dialer is already at maximum speed and the drop rate simply reflects the contact conditions that exist.
Multiple jobs running simultaneously operate independently without interfering with each other, unless combined session demand across all jobs approaches the 375-channel ceiling -- a situation that does not occur under normal staffing conditions at Maximum Research.
Reference Material - Standard Phone Disposition (Dispo) Codes
About Disposition Codes
Every time the Survox phone system touches a sample record - whether the dialer places the call, an interviewer speaks to someone, or the server processes a number behind the scenes - a disposition code is written to that record. This code is the system's way of recording exactly what happened and what should happen next.
Disposition codes control the entire lifecycle of a phone number through a study. They determine whether a record gets redialed, sits in a hold area, or is permanently closed out. Understanding them is essential for anyone managing a study, troubleshooting a sample, or interpreting production reports.
By default, Survox stores the last 12 calls made to a number, and each of those calls will contain one of these codes shown. The call result is stored in two spots of the phone numbers associated record. [6003.3] holds the "last attempt made" while 6103.3 is the first attempt, 6203.3 is the second attempt, 6303.3 is third and so on up until 7203.3 for the 12th attempt.
The below table uses two flags for each code:
Connect? Whether a live person (or at minimum, a live phone connection) was reached. Yes means the call got through in some form.
Resolved? Whether the record is permanently closed. Yes means Survox will not attempt this number again. No means the record remains eligible for future dial attempts, subject to study settings.
Codes are organized by number range, each group representing where in the system that outcome originated: manual interviewer action, the predictive dialer, or internal server/system logic.
Complete Disposition Code Reference
|
Code |
Definition |
Connect? |
Resolved? |
|
001-099 | Standard Outcome Codes (set by interviewer or survey logic) |
|||
|
001 |
Complete |
Yes |
Yes |
|
002 |
Not Currently Used |
Yes |
Yes |
|
003 |
Language Barrier (Non-Spanish) |
Yes |
Yes |
|
004 |
Not Currently Used |
Yes |
Yes |
|
005 |
Non-Working Number |
No |
Yes |
|
006 |
Business/Government Number |
Yes |
Yes |
|
007 |
Not Currently Used |
Yes |
Yes |
|
009 |
Fax/CPU Tone Number |
No |
Yes |
|
010 |
INTV Coded as Duplicate Number |
Yes |
Yes |
|
011 |
No Such Person / Wrong Number |
Yes |
Yes |
|
012 |
Not Currently Used |
No |
Yes |
|
013 |
Against Company Policy |
Yes |
Yes |
|
014 |
Number Added to DNC List |
Yes |
Yes |
|
015 |
Respondent Hard Refusal or 2x Soft Refusal |
Yes |
Yes |
|
016 |
Not Currently Used |
No |
Yes |
|
017 |
Over Quota - Question Driven |
Yes |
Yes |
|
018 |
Suspend -> Over Quota |
Yes |
Yes |
|
019 |
Not Currently Used |
No |
Yes |
|
020 |
Qualified Refusal |
Yes |
Yes |
|
021 |
Question Terminate (see Statcode in QPX) |
Yes |
Yes |
|
022 |
Question Terminate (see Statcode in QPX) |
Yes |
Yes |
|
... |
includes all codes between 21-60 |
Yes |
Yes |
|
060 |
Question Terminate (see Statcode in QPX) |
Yes |
Yes |
|
069 |
Complete Pulled Up by INTV |
No |
Yes |
|
099 |
Dialer Got 4 No Answers in a Row |
No |
Yes |
|
Code |
Definition |
Connect? |
Resolved? |
|
101-213 | Active / Live Codes (record remains available for redialing) |
|||
|
101 |
No Answer |
No |
No |
|
102 |
Busy |
No |
No |
|
103 |
Busy Changed to No Answer (2 busy in a row become No Answer) |
No |
No |
|
104 |
Callback (Specified date/time) |
Yes |
No |
|
105 |
Callback (Unspecified) |
Yes |
No |
|
106 |
Callback (Tomorrow) |
Yes |
No |
|
107 |
Answering Machine / Voicemail |
Yes |
No |
|
121 |
Dialer Dead Air / Sent No One |
No |
No |
|
152 |
Spam Busy |
No |
No |
|
156 |
Get Specific Stack (pull by search only) |
No |
No |
|
182 |
Busy Forced to No Answer (retry was outside calling hours) |
No |
No |
|
183 |
Not Currently Used |
No |
No |
|
185 |
Respondent Hung Up in Intro (Bucket 9 / Hold Area) |
Yes |
No |
|
187 |
All Targeted Attempts Made |
No |
No |
|
189 |
Soft Refusal (Bucket 9 / Hold Area) |
Yes |
No |
|
191 |
Special Status 1 - Spanish Speaking |
Yes |
No |
|
192 |
Special Status 2 |
No |
No |
|
193 |
Special Status 3 |
No |
No |
|
194 |
Special Status 4 - Terminate in Middle / Dead Suspend |
Yes |
No |
|
195 |
Special Status 5 |
No |
No |
|
196 |
Special Status 6 |
No |
No |
|
197 |
Special Status 7 - "Dead" Suspend (TERM_IN_MID) |
Yes |
No |
|
198 |
Special Status 8 |
No |
No |
|
199 |
Special Status 9 - Respondent Not Available for Study Duration |
Yes |
No |
|
211 |
Put Back - Top of List |
No |
No |
|
212 |
Put Back - Bottom of List |
No |
No |
|
213 |
Send to Hidden Bucket |
No |
No |
|
Code |
Definition |
Connect? |
Resolved? |
|
801-821 | Dialer - Resolved (dialer-assigned, record is closed) |
|||
|
801 |
Dialer: Number Not Dialed |
No |
Yes |
|
802 |
Dialer: Timed Number Not Dialed |
No |
Yes |
|
803 |
Dialer: Unknown Number |
No |
Yes |
|
804 |
Not Currently Used |
No |
Yes |
|
807 |
Dialer: Bad Number |
No |
Yes |
|
808 |
Dialer: Modem Answered |
No |
Yes |
|
809 |
Dialer: Disconnected |
No |
Yes |
|
810 |
Dialer: Forced Resolved |
No |
Yes |
|
811 |
Not Currently Used |
No |
Yes |
|
812 |
Dialer: Changed Number |
No |
Yes |
|
815 |
Dialer: Number Too Old to Call |
No |
Yes |
|
818 |
Dialer: SIP Non-Working |
No |
Yes |
|
819 |
Dialer: No Connect |
No |
Yes |
|
821 |
Dialer: INTV Disconnect |
No |
Yes |
|
Code |
Definition |
Connect? |
Resolved? |
|
851-875 | Dialer - Active (dialer-assigned, record remains in play) |
|||
|
851 |
Dialer: No Answer |
No |
No |
|
852 |
Dialer: Busy |
No |
No |
|
853 |
Dialer: Busy to No Answer |
No |
No |
|
854 |
Dialer: Trunk-Line Busy |
No |
No |
|
855 |
Dialer: Incomplete Callback |
No |
No |
|
856 |
Dialer: Nuisance (Dropped) Call |
No |
No |
|
857 |
Dialer: Answering Machine |
No |
No |
|
859 |
Dialer: Hung Up Phone |
No |
No |
|
860 |
Not Currently Used |
No |
No |
|
861 |
Dialer: Connect then Abort |
No |
No |
|
862 |
Not Currently Used |
No |
No |
|
863 |
Dialer: No Ringback |
No |
No |
|
864 |
Dialer: Connected ATD |
No |
No |
|
870 |
Dialer: Rejected Call |
No |
No |
|
871 |
Dialer: No User Responding |
No |
No |
|
872 |
Dialer: Channel Unavailable |
No |
No |
|
873 |
Dialer: Temp Failure |
No |
No |
|
875 |
Network Bad (likely temporary failure) |
No |
No |
|
Code |
Definition |
Connect? |
Resolved? |
|
900-908 | Survent / Station Codes (set by the interviewer station or survey engine) |
|||
|
900 |
Number 'In the Air' (at the interviewer station) |
No |
No |
|
901 |
Survent: Blow Error |
No |
No |
|
902 |
Survent: SIGHUP / Terminal Abort / Suspend-Callback in 24 hrs |
No |
No |
|
903 |
Survent: Auto-Suspended (web survey) |
No |
No |
|
904 |
Not Currently Used |
No |
No |
|
905 |
Survent: Suspended Due to Max Idle Time |
No |
No |
|
906 |
Not Currently Used |
No |
No |
|
907 |
Phone Quota Retry (was 997 - rescheduled like a busy) |
No |
No |
|
908 |
Phone Cluster Retry (was 998 - rescheduled like a busy) |
No |
No |
|
Code |
Definition |
Connect? |
Resolved? |
|
950-999 | Server / System Codes (assigned by server logic, not interviewer action) |
|||
|
950 |
Not Currently Used |
No |
No |
|
951 |
Server: Duplicate Number Found - Do Not Call |
No |
Yes |
|
952 |
Server: Number in DNC Prefix List - Do Not Call |
No |
Yes |
|
953 |
Server: Number in DNC List - Do Not Call |
No |
Yes |
|
954 |
Number Completed by Validator |
No |
No |
|
955 |
Phone Number Killed by Foneutil or Super/Boss |
No |
Yes |
|
956 |
Server: Number in DNC Email List - Do Not Call |
No |
Yes |
|
971 |
Forced Resolved by Dialer |
No |
No |
|
972 |
Not Currently Used |
No |
No |
|
973 |
Max Calls Limit Reached |
No |
No |
|
974 |
Max Calls Ever Reached |
No |
No |
|
975 |
Over Phone Quota - Resolved |
No |
No |
|
976 |
Over Quota Percent - Resolved |
No |
No |
|
977 |
Dialer Failed Transfer to Validator |
No |
No |
|
978 |
Server Failed Transfer to Validator |
No |
No |
|
979 |
Not Currently Used |
No |
No |
|
980 |
Bad Status Set |
No |
No |
|
983 |
Bad Phone Record |
No |
No |
|
984 |
Dialer Status Returned with No Corresponding CfMC Status |
No |
No |
|
985 |
Invalid Time in Timed Callback |
No |
No |
|
986 |
Bad 'Putfone' With Zero in Field |
No |
No |
|
987 |
Bad Stuff in Phone Record |
No |
No |
|
988 |
Unknown Status |
No |
No |
|
989 |
Bad Special Interviewer Type Value |
No |
No |
|
990 |
No Stack Found |
No |
No |
|
991 |
Max History Check Error |
No |
No |
|
992 |
No Next Bucket |
No |
No |
|
993 |
Bad 'Putfone' |
No |
No |
|
994 |
Number Identified as an "Error Record" |
No |
Yes |
|
999 |
Reserved - !phone,s (use status in specified location) |
No |
No |
Notes on Code Usage
*Question Terminates (021-060): These codes are set programmatically within the survey itself. What each one means depends entirely on how the programmer set up the QPX statcode logic for that specific study. There is no universal meaning - always refer to the study's QPX file to interpret these.
**Special Statuses (191-199): General-purpose hold codes whose meaning is defined at the study level. Codes 191, 194, 197 and 199 are the most commonly assigned with consistent meaning: mid-interview termination and extended respondent unavailability, respectively.
***Not Currently Used: These code slots exist in the system but are not actively assigned. They should not appear in normal study logs. If encountered, it typically indicates a system anomaly or a very old study configuration.
****Missing Codes: Some codes are explicitly missing from the list, as they are either "reserved" for future use, or specific to a dialer other than the Survox Dialer.
*****Dialer: Rejected Code: These are a newer code that has started to appear, as a result of carriers implementing call screening services. While survox treats these as system numbers, and tries calling them back on the normal system callback times, carriers have identified they are being rejected and are either invalid or spam blocked, and thus never going to reach a respondent. If a large quantity of these start appearing, you can ask DP to "kill" them, so they no longer get redialed.
******Error Records: These are the last great mystery of Survox sample management... MOST OF THE TIME they are simply a disconnected number, but the code the end carrier sent back is not one the dialer knows how to handle, so it just dumps them into the "Error Status" stack. In theory, these could be zapped and tried again but would most likely result in the same status being sent back again. There are also rare occasions where a number gets somehow "corrupted" via strange callback times, or other system issues. This happens very infrequently though and should be investigated when it happens. Note: When dialing in 1:1 mode, these are "changed" to normal disconnected.
*******Killing Numbers: At times, it may be required to "kill" numbers, assigning a status "955" and removing them from dialing completely. This can be done similar to hiding/revealing, in a super/boss using the phone_kill jobname select <enter> or in the Console under Manage, Manage Sample, Resolve Numbers, and putting in the select statement.
Dashboard Overview - Shop Report
The Shop Report
What Is the Shop Report?
The Shop Report is a PhoneOps dashboard available through the MAXWell Portal under PhoneOps Dashboards in the left-hand navigation menu. It provides a shift-level overview of agent and project performance for the current workday.
The report is a static webpage that refreshes every 5 minutes, from 9:00 AM through 2:00 AM. Those viewing the page need to manually refresh to see updates, it is not automatic. All data displayed reflects two things:
- Point-in-time snapshot -- the numbers shown are as of the last time the report ran
- Cumulative totals -- figures accumulate across the full shift from open to that snapshot
Important: The Shop Report is a shift overview tool only. It is not intended for calculating production targets, incidence rates, dialer settings, or productivity metrics. Use the appropriate dedicated tools for those purposes.
Table of Contents
At the top of every Shop Report is a clickable Table of Contents. Each entry is a hyperlink that will jump your browser directly to that section of the report. This is useful when the report is long -- particularly on heavy shift days with many active projects and agents. Rather than scrolling through the entire page, use the Table of Contents to navigate directly to the project or agent you want to review.
Report Layout
The Shop Report is organized into three sections, in this order:
1. Overall Project Summary
The first section is a pre-job summary that rolls up all agents working the shift into a single combined row per project. No individual agent breakdown is shown here -- it is a top-level view of each project's collective numbers before drilling into the detail tables below.

2. By-Project Tables (Broken Down by Agent)
Following the summary, there is one table for each active project. Each project table lists every agent/interviewer who worked that project during the shift, with their individual stats in each column. This view is useful when you want to evaluate how a specific project is performing and which agents are contributing to -- or dragging on -- that project's numbers.

3. By-Agent Tables (Broken Down by Project)
After all project tables, the report switches perspective. There is one table for each agent/interviewer who worked during the shift, showing their stats broken down by each project they touched. This view is useful when evaluating an individual agent's overall shift performance across all work they did that day.

Column Definitions
All tables -- whether by project or by agent -- share the same set of column headers. Definitions for each are below.
Time Columns
Total Logged In Time
The total amount of time the agent was logged into the system during the shift. This is the "clock in / clock out" window and includes all activity -- dialing, interviews, breaks, lunch, meetings, and idle time.
Time Between Interviews
The total time spent between interview attempts. This includes Break, Lunch, and Meeting time. A high value here relative to Total Logged In Time may warrant a closer look at how the agent is spending non-interview time.
SOYA Time (Sitting On Your Ass)
SOYA is a term for agents who are logged in and idle -- not actively dialing, not in an interview, and not on a logged Break, Lunch, or Meeting. In plain terms: they are on the clock but not working. SOYA time explicitly excludes Break, Lunch, and Meeting time, so there is no ambiguity -- if an agent has SOYA time, they were sitting idle with no legitimate reason logged. Supervisors should pay attention to agents with elevated SOYA values.
Time In Interviews
The total time the agent spent in the full interview cycle -- from the moment dialing began, through the live call, through to disposition. This includes Time Before Phone Call (waiting/dialing) and Time Live Interview, and covers both completed and non-completed interviews.
Time Before Phone Call
The total time the agent spent in a waiting or dialing state before a call was connected. This reflects dialer queue and ring time.
Time Live Interview
The total time the agent spent actively talking during interviews. This is the "on the phone" time only -- not wrap-up or disposition time.
Time On Completes
The total time spent on interviews that resulted in a completed survey.
Time On Non-Completes
The total time spent on interviews that did not result in a completed survey (refusals, screen-outs, disconnects, etc.).
Practice Time (Mins)
The total number of minutes the agent spent in practice/training mode interviews. Practice calls are separate from live production dialing.
Break Time (Mins)
Time logged under the Break status. This covers short departures -- bathroom breaks, grabbing a drink, stepping away briefly. This is not for extended breaks.
Lunch Time (Mins)
Time logged under the Lunch status, intended for longer break periods. Note: Many agents simply log out and log back in for lunch rather than using the Lunch status, so this value may underreport actual lunch time taken.
Meeting Time (Mins)
Time logged under the Meeting status. This is used when an agent is in a virtual meeting with a supervisor, or is conducting a post-call review with a team member (such as going over a monitoring report). It is a legitimate and expected status for quality control workflows.
Interview Count Columns
Interviews Started
The total number of interviews the agent started during the shift. An interview is considered "started" as soon as a call connects to the agent -- regardless of outcome. This includes any call that made it through to the agent/interviewer.
Interviews Completed
The number of interviews that were finished and resulted in a completed survey.
Interviews Not Completed
The number of interviews that started but did not result in a completion (refusals, screen-outs, early disconnects, etc.).
Practice Interviews
The number of interviews completed while in practice/training mode.
Calculated Columns
Average LOI (Mins)
An approximation of the average Length of Interview, in minutes, for completed surveys. It is calculated as:
Time On Completes / Interviews Completed
Because this uses total time on completes (which includes dialing and any pre-intro time), it will report higher than the official internal LOI figure, which measures only from the survey intro through the last question. Do not use this value as your authoritative LOI -- use it only as a general reference.
Dials Per Hour
This is not a true calls-per-hour metric. It is calculated as:
Interviews Started / Time In Interviews (in hours)
The denominator is Time In Interviews only -- SOYA, Break, Lunch, and Meeting time are excluded. Since "Interviews Started" only counts calls that connected to an agent -- not all dial attempts -- this figure reflects connected call rate per active interview hour, not raw dial volume.
Quick Reference -- What This Report Is and Is Not
| The Shop Report IS... | The Shop Report is NOT... |
|---|---|
| A shift-level overview of agent and project activity | A production calculation tool |
| A way to spot idle agents (SOYA) | A dialer performance or settings tool |
| A way to compare agent time usage across a shift | An incidence rate calculator |
| Updated every 5 minutes (9am - 2am) | Real-time (data is always up to 5 min behind) |
| Cumulative from shift open to last refresh | A historical or multi-day report |
Accessing Historical Snapshots
End-of-day snapshots of the Shop Report are saved automatically and archived for future reference. These are not browsable -- there is no list or calendar to click through. To access a specific date, you need to manually edit the URL in your browser's address bar.
The live report URL ends in /report.html. To load a saved snapshot, append an underscore followed by the date in YYMMDD format:
| Report | URL Format | Example |
|---|---|---|
| Live (current day) | /report.html |
/report.html |
| Specific date snapshot | /report_YYMMDD.html |
/report_250314.html (March 14, 2025) |
Simply replace YYMMDD with the two-digit year, two-digit month, and two-digit day of the date you want to view.
Troubleshooting
A job is not appearing in the report
If a project just started in the last 4 or so minutes, the report may not have refreshed yet to include it. Wait for the next 5-minute update cycle and reload the page manually.
The report is showing yesterday's data
This means no projects have run yet today. The report will continue to display the previous day's data until activity begins for the current shift.
The math looks off on an agent's row
This can happen when an agent does not properly quit out of the system at the end of their session. When this occurs, the system may still consider them active, and the final counters for that session do not get updated correctly -- resulting in calculation errors. The data shown reflects what the system recorded up to that point. Adjust your interpretation of that agent's numbers accordingly.
Data does not seem to be updating
The page does not auto-refresh in your browser. You must manually refresh the page to see the latest data. The report updates its underlying data every 5 minutes, but you will not see those updates until you reload.
In Closing
The Shop Report is one of the most frequently referenced tools available to shift supervisors. Used correctly, it gives you a fast, reliable read on how the shop is running -- who is working, who isn't, how projects are pacing, and where time is being spent. Keep in mind its core limitations: it is a snapshot, not a live feed; it is a shift overview, not a production or dialer analysis tool; and some figures (LOI, Dials Per Hour) are approximations by design. As long as you are reading it in that context, it is an effective and efficient part of your shift management workflow.
For questions about the Shop Report or to report a data issue, contact IT.
Dashboard Overview - Dialer Dashboard Report
The Dialer Dashboard is a real-time view of dialing activity across all active projects. It is accessible through the MAXWell Portal via the PhoneOps Dashboard option in the left-side navigation menu.
The dashboard refreshes automatically every 15 seconds and is active between 9:00 AM and 2:00 AM daily, covering the full span of dialing operations.
Dashboard Layout
The dashboard is organized into two main sections:
Overall Study Summary
The top section displays a single rolled-up row per project, combining the activity of all agents currently working that project into one summary line. This gives ops staff and PDs a quick at-a-glance view of how each project is performing across the floor without having to dig into individual agent detail.

Per-Project Breakdown
Below the summary, each project is displayed individually with its own table. Each table lists one row per agent currently working that project, identified by their numeric Agent ID in the leftmost column. At the bottom of each table is a row labeled SRVR, which represents calls that were dispositioned automatically by the dialer before ever reaching an agent -- interviewers do not see these calls.

Call Results Details
Next to each project name in the per-project breakdown is a "Click here to see Call Results Details" link. Clicking it opens a small pop-up window listing every call result code recorded for that project since the start of the current day, along with its count.
This is particularly useful when the Resolved column shows a high number -- the pop-up lets you quickly see which specific resolved codes are driving that count (for example, a spike in disconnected numbers, wrong numbers, or fax tones) without having to pull a separate report.
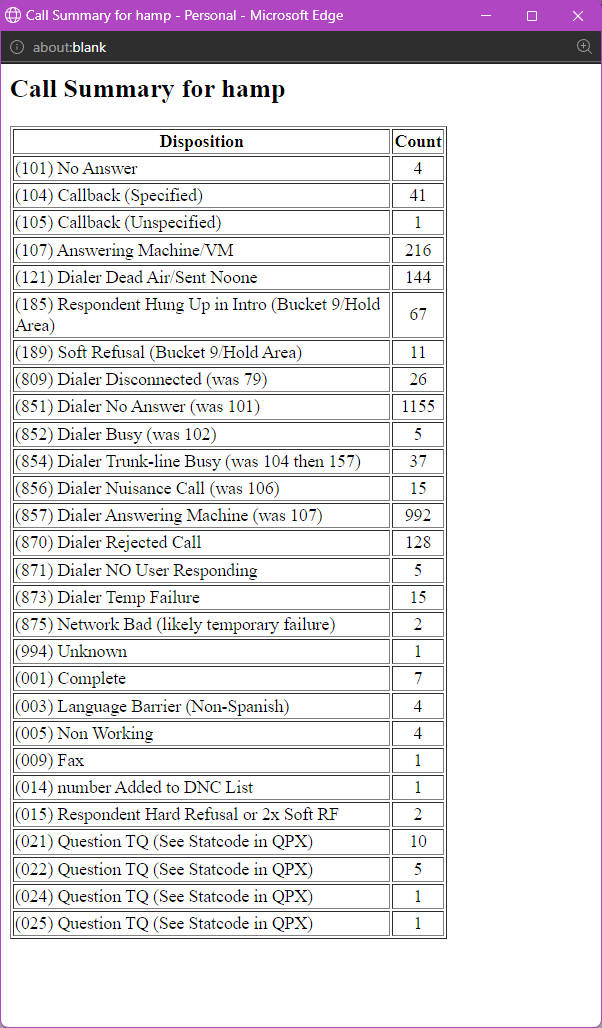
Column Sets
Every row -- whether in the summary or the per-project breakdown -- displays three sets of columns: Total, Current Hour, and Last Hour. All three sets share the same column definitions, described below.
Column Definitions
The following columns appear under each of the three time-period sets.
Dialed
The total number of phone numbers attempted by the dialer or agents in 1:1 mode, regardless of how the call ended. Any number the system touched counts here.
Connected
The number of calls where a connection was established and the call was passed to an agent or interviewer to handle. A connected call means a live respondent (or answering machine) was reached and handed off.
Dropped / DNO1
A combined count of two related non-productive outcomes:
- Dropped -- calls where the dialer hung up before reaching 4 rings (dialer-initiated drop).
- DNO1 (Dialer Sent No One) -- calls where the respondent answered but hung up before the call could be connected to an available agent/interviewer. *These are a gray area, and could be confused with Respondent Hung Up During Intro
Refusals
A combined count of respondents who declined participation, covering four specific disposition codes:
- RHU -- Respondent Hung Up during the introduction or screener text. *These are a gray area, and could be confused with Dialer Sent No One
- SRF -- Soft Refusal (respondent declined but may be re-contacted).
- HRF -- Hard Refusal (respondent declined and should not be re-contacted).
- DNC -- Do Not Call (respondent requested to be added to the internal DNS/suppression list).
Resolved
The total count of numbers that have reached a final, non-productive outcome -- meaning the number is effectively dead and will not be redialed. This includes any disposition where no further contact attempt would be made, such as: Completes, Terms, Over Quotas, disconnected numbers, language barriers, fax/computer tones, wrong numbers, and similar unworkable results.
Complete
The number of interviews that were fully completed by a respondent who qualified and finished the entire survey.
Terms
Respondents who were screened out (terminated) during the interview because they did not qualify for the study based on the screener criteria.
Over Quota (OQ)
Respondents who qualified and would have completed the interview, but were terminated because the quota cell they fell into was already full at the time of their call.
Incidence
A calculated percentage representing the rate at which willing respondents qualify and complete the survey. The formula is:
Incidence = Completes / (Completes + Terms + Over Quotas)
A higher incidence percentage means a larger share of respondents who engage with the survey are making it through to a complete. A lower incidence typically indicates heavy screening requirements or a difficult-to-reach target population.
Usage Notes
- This dashboard is intended for monitoring active dialing sessions. It is not a replacement for end-of-day or end-of-project reporting.
- Because the data refreshes every 15 seconds, numbers will shift during active calling hours -- especially in the Current Hour columns.
- The Last Hour columns provide a stable recent snapshot and can be useful for spotting trends or sudden changes in call patterns.
- If a project does not appear on the dashboard, confirm with programming staff that the project is actively loaded and dialing.
Dashboard Overview - INTV Realtime Report
Overview
The Interviewer Dashboard (INTVDash) is a real-time monitoring tool that displays live calling activity broken down by interviewer, for every active project currently running on the phone room floor. It is accessible to anyone on the internal network and requires no login.
INTVDash is located in the Maxwell Portal, under PhoneOps Dashboard in the left-hand navigation menu.
How It Works
The dashboard automatically refreshes every 15 seconds and is active daily from 9:00 AM to 2:00 AM. When multiple projects are running simultaneously, each project appears as its own table on the same page, stacked vertically. A last update timestamp is displayed at the top of the page, reflecting the most recent data received from the system.
If you need to pause and review the numbers more closely, a Pause Refresh drop-down is available at the top of the page. Clicking it stops the auto-refresh until you resume it.
Reading the Dashboard
Each project table is labeled with its Job Name and contains one row per interviewer currently or recently assigned to that project. The first row is always a Shift Total, which provides a rolled-up summary across all interviewers for that project.
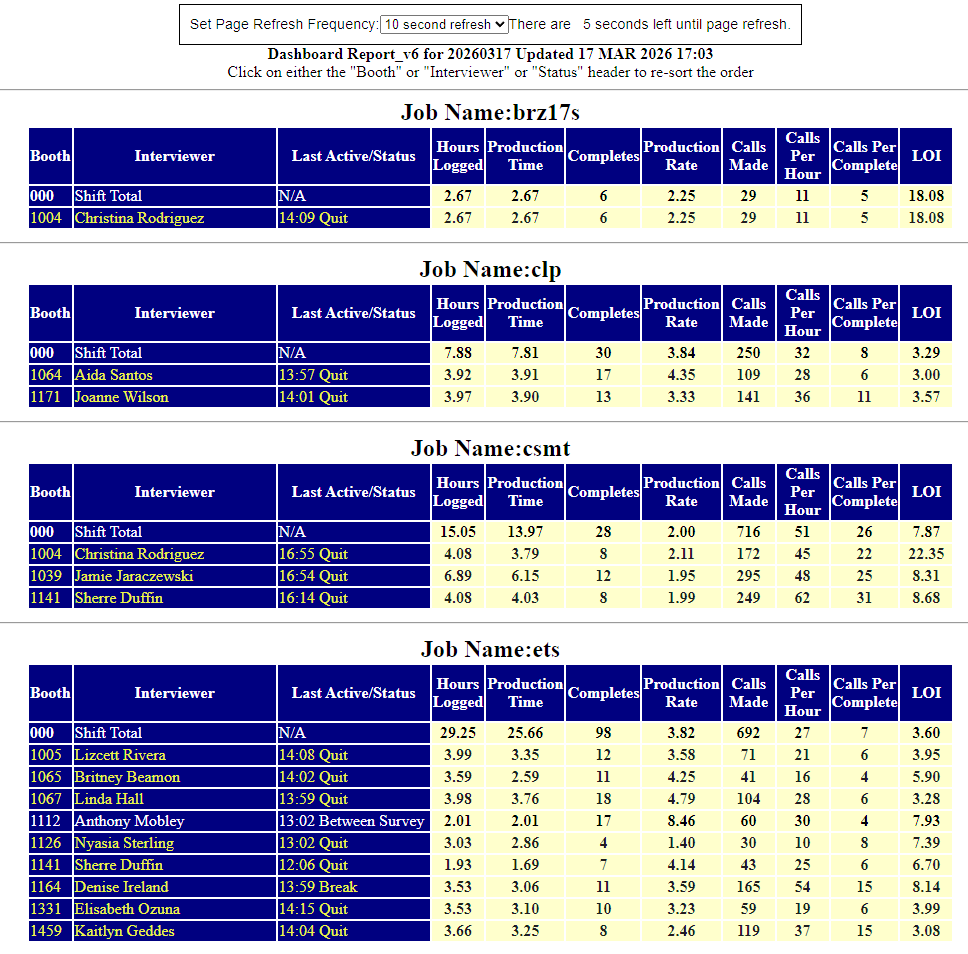
Column Definitions
| Column | Description |
|---|---|
| Booth | The interviewer's assigned booth number in the system. |
| Interviewer | The interviewer's name. |
| Last Active / Status | A timestamp and status code reflecting the last update received from that interviewer. See Status Codes below. |
| Hours Logged | Total hours the interviewer has been logged into the system during the current shift. |
| Production Time | Time spent actively in productive calling (excludes breaks, meetings, etc.). |
| Completes | Number of completed surveys recorded for this interviewer on this project. |
| Production Rate | Completes per production hour. |
| Calls Made | Total number of outbound calls placed by this interviewer. |
| Calls Per Hour | Average calls placed per production hour. |
| Calls Per Complete | Average number of calls required to achieve one complete. |
| LOI | Length of Interview -- the average duration (in minutes) of completed surveys for this interviewer. |
Viewing Historical Reports
At the bottom of every INTVDash page, two navigation links are available:

- Yesterday's Report (yyyymmdd) -- Loads the report for the previous day. The date is shown in the link label so you always know which day you are navigating to.
- Back to Most Current Report -- Returns you to today's live, auto-refreshing dashboard.
Historical data is available going back weeks to months. If you want to jump directly to a specific date rather than clicking through day by day, you can manually enter the date into the browser's address bar using the following format:
/dashboard_report_20260315.html
Replace 20260315 with the date you want to view in YYYYMMDD format.
Row Color Coding
A dash ( - ) in any numeric column indicates a zero or null value -- no data recorded for that interviewer in that category yet.
- White row -- Interviewer is currently logged in and active on the project.
- Yellow row -- Interviewer has logged out.
Status Codes
The Last Active / Status column displays the time of the last system update alongside one of the following status codes:
| Status | Meaning |
|---|---|
| Dialing | Interviewer is actively dialing outbound calls. |
| Screening | Interviewer is on a call and going through the screener portion of the survey. |
| In Interview | Interviewer is actively conducting a survey interview. |
| Wrap Up | Interviewer has finished a call and is completing any post-call wrap-up steps before dialing again. |
| Between Survey | Interviewer is between calls, waiting to be connected to the next dial attempt. |
| Quit | Interviewer has exited the project. Row will appear yellow. |
| Unknown Status | Typically happens when an interviewer logs in, and immediate back out. The dashboard looks for information sent via the survey script, to fill the status. If they never load a survey, Unknown Status will be shown. |
| Meeting | Interviewer is in a meeting and temporarily away from dialing. |
| Lunch | Interviewer is on a lunch break. |
| Break | Interviewer is on a short break. |
Dashboard Overview - Production Report
Realtime Production Report
The Realtime Production Report is the primary supervisory tool for monitoring project and interviewer performance during an active calling shift. It is the digital equivalent of walking the floor every hour to check on each interviewer's production -- except it updates automatically every 5 minutes.
The report runs daily from 9:00 AM to 2:00 AM and auto-refreshes every 310 seconds (5 minutes plus a 10-second buffer to allow for compile time) from the moment the page is first loaded.
This report is available to all Portal users.
Accessing the Report
The Realtime Production Report can be accessed two ways:
- Directly via browser URL
- Through the MAXWell Portal dashboard link
Page Layout Overview
The report is organized into two levels: an Overall Summary at the top of the page, followed by individual Per-Project Tables for each active study.
Overall Summary Table
The top table displays a rolled-up view of all active projects combined, with one row per study plus a grand Total row. This gives supervisors an at-a-glance picture of how the entire shift is performing.
The Overall Summary shows every hour of the day across its hourly columns -- one column group per hour, from the start of the shift through the current time.
Clicking on a Project's name will jump you down to that project's agent specific table.
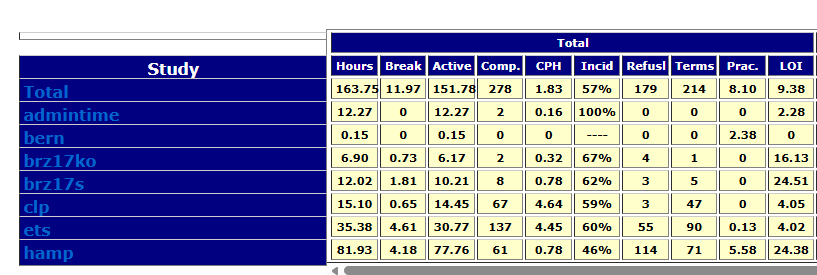
Per-Project Tables
Below the summary, each active project has its own table. These tables break down production to the individual interviewer level.
Within each project table, there are three category rows before the individual agent listings:
- Total -- Combined stats for all agents on the project (active and inactive)
- Active* -- Agents currently connected to this project
- Inactive -- Agents who have either switched to a different project or ended their shift for the day
Individual agent rows follow, sorted alphabetically by last name (displayed as Last, First). Each agent row is prefixed with the station number they logged into, enclosed in parentheses -- for example: (1116*) Reyes Andrew.
An asterisk (*) next to the station number indicates the agent is currently connected to the project.
On larger projects, the column header row will repeat after every 15th agent to make scrolling through long tables easier.
Project tables remain on the page for the full shift even after all agents on that project go inactive. The table will stop adding hourly columns at the last hour the project saw activity.
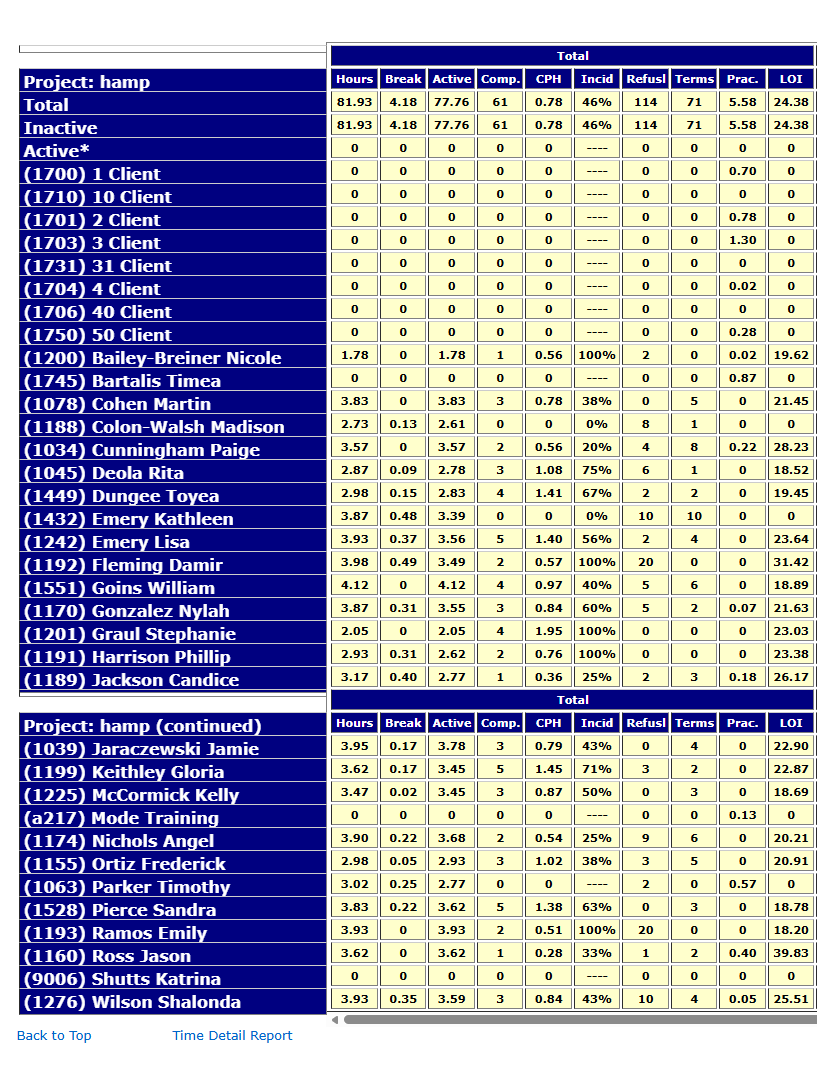
Column Definitions
Each table contains a Total column group (cumulative for the full day) followed by individual hourly column groups -- one per hour the project was active. Both the Total and hourly groups share the same columns, with one exception noted below.
Hourly columns are arranged with the most recent hour on the left, scrolling right into earlier hours. This ensures the most current data is always visible when the page loads without scrolling.
Cells displaying ---- indicate there is no data available to calculate that value for that period.
| Column | Description | Total | Hourly |
|---|---|---|---|
| Hours | Total hours logged. Includes both active time and break time. | Yes | Yes |
| Break | Time logged as Break, Lunch, or Meeting. | Yes | Yes |
| Active | Actual working time. Calculated as Hours minus Break. | Yes | Yes |
| Comp. | Number of completed surveys. | Yes | Yes |
| CPH | Completes Per Hour. Based on active (working) hours, not total hours logged. | Yes | Yes |
| Incid | Incidence rate. The percentage of contacts that resulted in a complete, calculated as: Completes / (Completes + Terminates + Over Quota). | Yes | Yes |
| Refusl | Total refusals of all types -- Soft Refusal, Hard Refusal, RHU (Refusal Hang-Up), and DNC (Do Not Call). | Yes | Yes |
| Terms | Survey terminates -- respondents who qualified to start the survey but did not complete it. | Yes | Yes |
| Prac. | Practice minutes logged. Reflects time an interviewer spent in practice/training mode. | Yes | Yes |
| LOI | Average Length of Interview, in minutes. Based on completed surveys only. Measures true survey time from introduction to last question -- does not include dialing or wrap-up time. Total section only -- not shown in the hourly columns. | Yes | No |
Navigating Wide Tables
Because each project table grows a new column group for every active hour, tables can become quite wide -- especially later in the shift. A horizontal scrollbar appears beneath each table, allowing you to scroll right to view earlier hours. The most recent hour is always visible on the left without scrolling.
Day Shift / Night Shift Breakdown
On weekdays after 5:00 PM, the report will automatically add two additional subtotal column sections to the overall summary table (not the individual per-project tables):
- Day Shift -- Production from 9:00 AM through 4:59 PM
- Night Shift -- Production from 5:00 PM onward
This is useful for comparing how each shift performed independently, without needing to manually separate the numbers.

Historical Navigation
Below the overall summary table, the page provides links to browse to previous or next day reports:
- Yesterday's Report -- navigates one day back
- Next Day Report -- navigates one day forward (when available)
- Return to the most current report -- jumps back to today
Previous day reports can also be accessed directly via URL. The format is:
report_YYYYMMDD_v2.html
For example, to view the report for March 17, 2026, you would navigate to:
report_20260317_v2.html
Time Detail Report
At the bottom of each per-project table is a link labeled Time Detail Report. Clicking this opens a new browser window showing a detailed punch card view for every agent on that project.
Each agent's Time Detail section includes:
- Login time
- Logout time
- Total minutes logged
- Break/Lunch minutes
- Completes during that session
- Any practice time during the login/logout window
- A total row summarizing all sessions for that agent
All login/logout sessions for a single agent are grouped together in succession, followed by a total row for that agent, before moving on to the next agent. The report is not sorted by time across all agents -- it is organized agent by agent.
Known Behaviors and Quirks
Station Number vs. Agent ID
The number shown in parentheses before an agent's name is their station number -- the workstation or dial position they logged into -- not their agent ID number. While agents are generally expected to log into their assigned station, exceptions can occur due to file locks or login errors.
This is important to keep in mind if you use the browser's Find (Ctrl+F) to search for a specific agent ID and do not get a match. The report displays station numbers, not agent IDs.
Hour-Boundary Carry-Over
Because of how the report compiles session data, an agent who is mid-survey at the top of an hour may have their time split across two hourly buckets. For example, a session that starts at 1:51 PM and ends at 2:04 PM may show 49 minutes in the 1:00 PM column and 11 minutes in the 2:00 PM column. This can cause hourly CPH figures to appear slightly off.
This is expected behavior. The overall totals will balance correctly by end of shift.
Agent Sort Order
Agents are sorted alphabetically by last name and displayed in Last, First format.
Troubleshooting and Tips
A project is not showing up on the report
If a project just went active, it may not appear yet. The report compiles on a 5-minute cycle -- wait for the next refresh and check again.
The report shows no projects, or is showing old projects from a previous day
The shift has likely not started yet. The report does not clear until the new day's shift begins at 9:00 AM. Before that time, the previous day's report will still be displayed.
A note on LOI accuracy
The LOI (Length of Interview) value shown on the report is an average of averages, not a true weighted average. Each agent's average LOI is calculated individually, and those averages are then averaged together at the project level. This means the report LOI will typically be within 1-2 minutes of the true LOI, but will not exactly match the figures in nightly production reports.
Example:
Suppose two agents complete surveys:
- Agent A completes 10 surveys averaging 8 minutes each
- Agent B completes 2 surveys averaging 14 minutes each
True average: (10 x 8) + (2 x 14) = 80 + 28 = 108 total minutes / 12 surveys = 9.0 minutes
Average of averages (what the report shows): (8 + 14) / 2 = 11.0 minutes
The difference is most noticeable when agents have significantly different survey volumes. For general monitoring purposes during a shift, the report LOI is a useful reference -- just don't use it as the authoritative figure for deliverables or client reporting.
How To: Caller ID/LCP Settings & Call Interceptor Program
CallerIDs/LCP & Call Interceptor System:
A How To Guide for PDs
The Realtime CallerID Adjustment System is the single, authoritative source for managing the outbound CallerID numbers used on your studies -- no more dropping or relaunching a job just to update the number list, and no separate Survox or MAXWell setup steps required.
When active on a study, this system controls the CallerID used on outbound calls in real time. Changes made here take effect on the very next call -- instantly, with no reload required.
Five modes are available per study, switchable any time:
- Use List -- Rotates through the phone numbers you type in below, one per call, in the order you entered them.
- Use LCP -- Automatically picks a number that shares the same area code as the number being dialed, from the shared master list. No numbers to type in -- this list is maintained outside the portal.
- Use TF -- Rotates through the toll-free numbers in the shared master list. This is NOT a brand-new random pick on every call -- one random starting point is chosen, then it moves through the toll-free list in straight round-robin order call after call, the same way List mode does.
- Use Random -- Rotates through the non-toll-free numbers in the shared master list. Same as TF above -- NOT a brand-new random pick every call, just a random starting point followed by straight round-robin rotation through that list.
- Disable (Use Survox List) -- Turns rotation off for this study. Warning: this does not simply turn rotation off and leave your old CallerID behavior in place -- it will cause 856-874-9001 to be used as the CallerID for ALL calls in this study, unless a different number or list is set in the study's Dialer Config screen in Survox AND the study is reloaded.
Note: If a job does not exist yet in the Realtime CallerID Adjustment System, it will automatically be created once a call is dialed on it, and defaulted to LCP mode until it is set up with a different mode.
Switching between modes preserves your existing list in the background, so you can flip back and forth without losing your work.
Using the Realtime CallerID Adjustment System
In MAXWell, click on the "Realtime CallerID Adjustment System" menu/box.
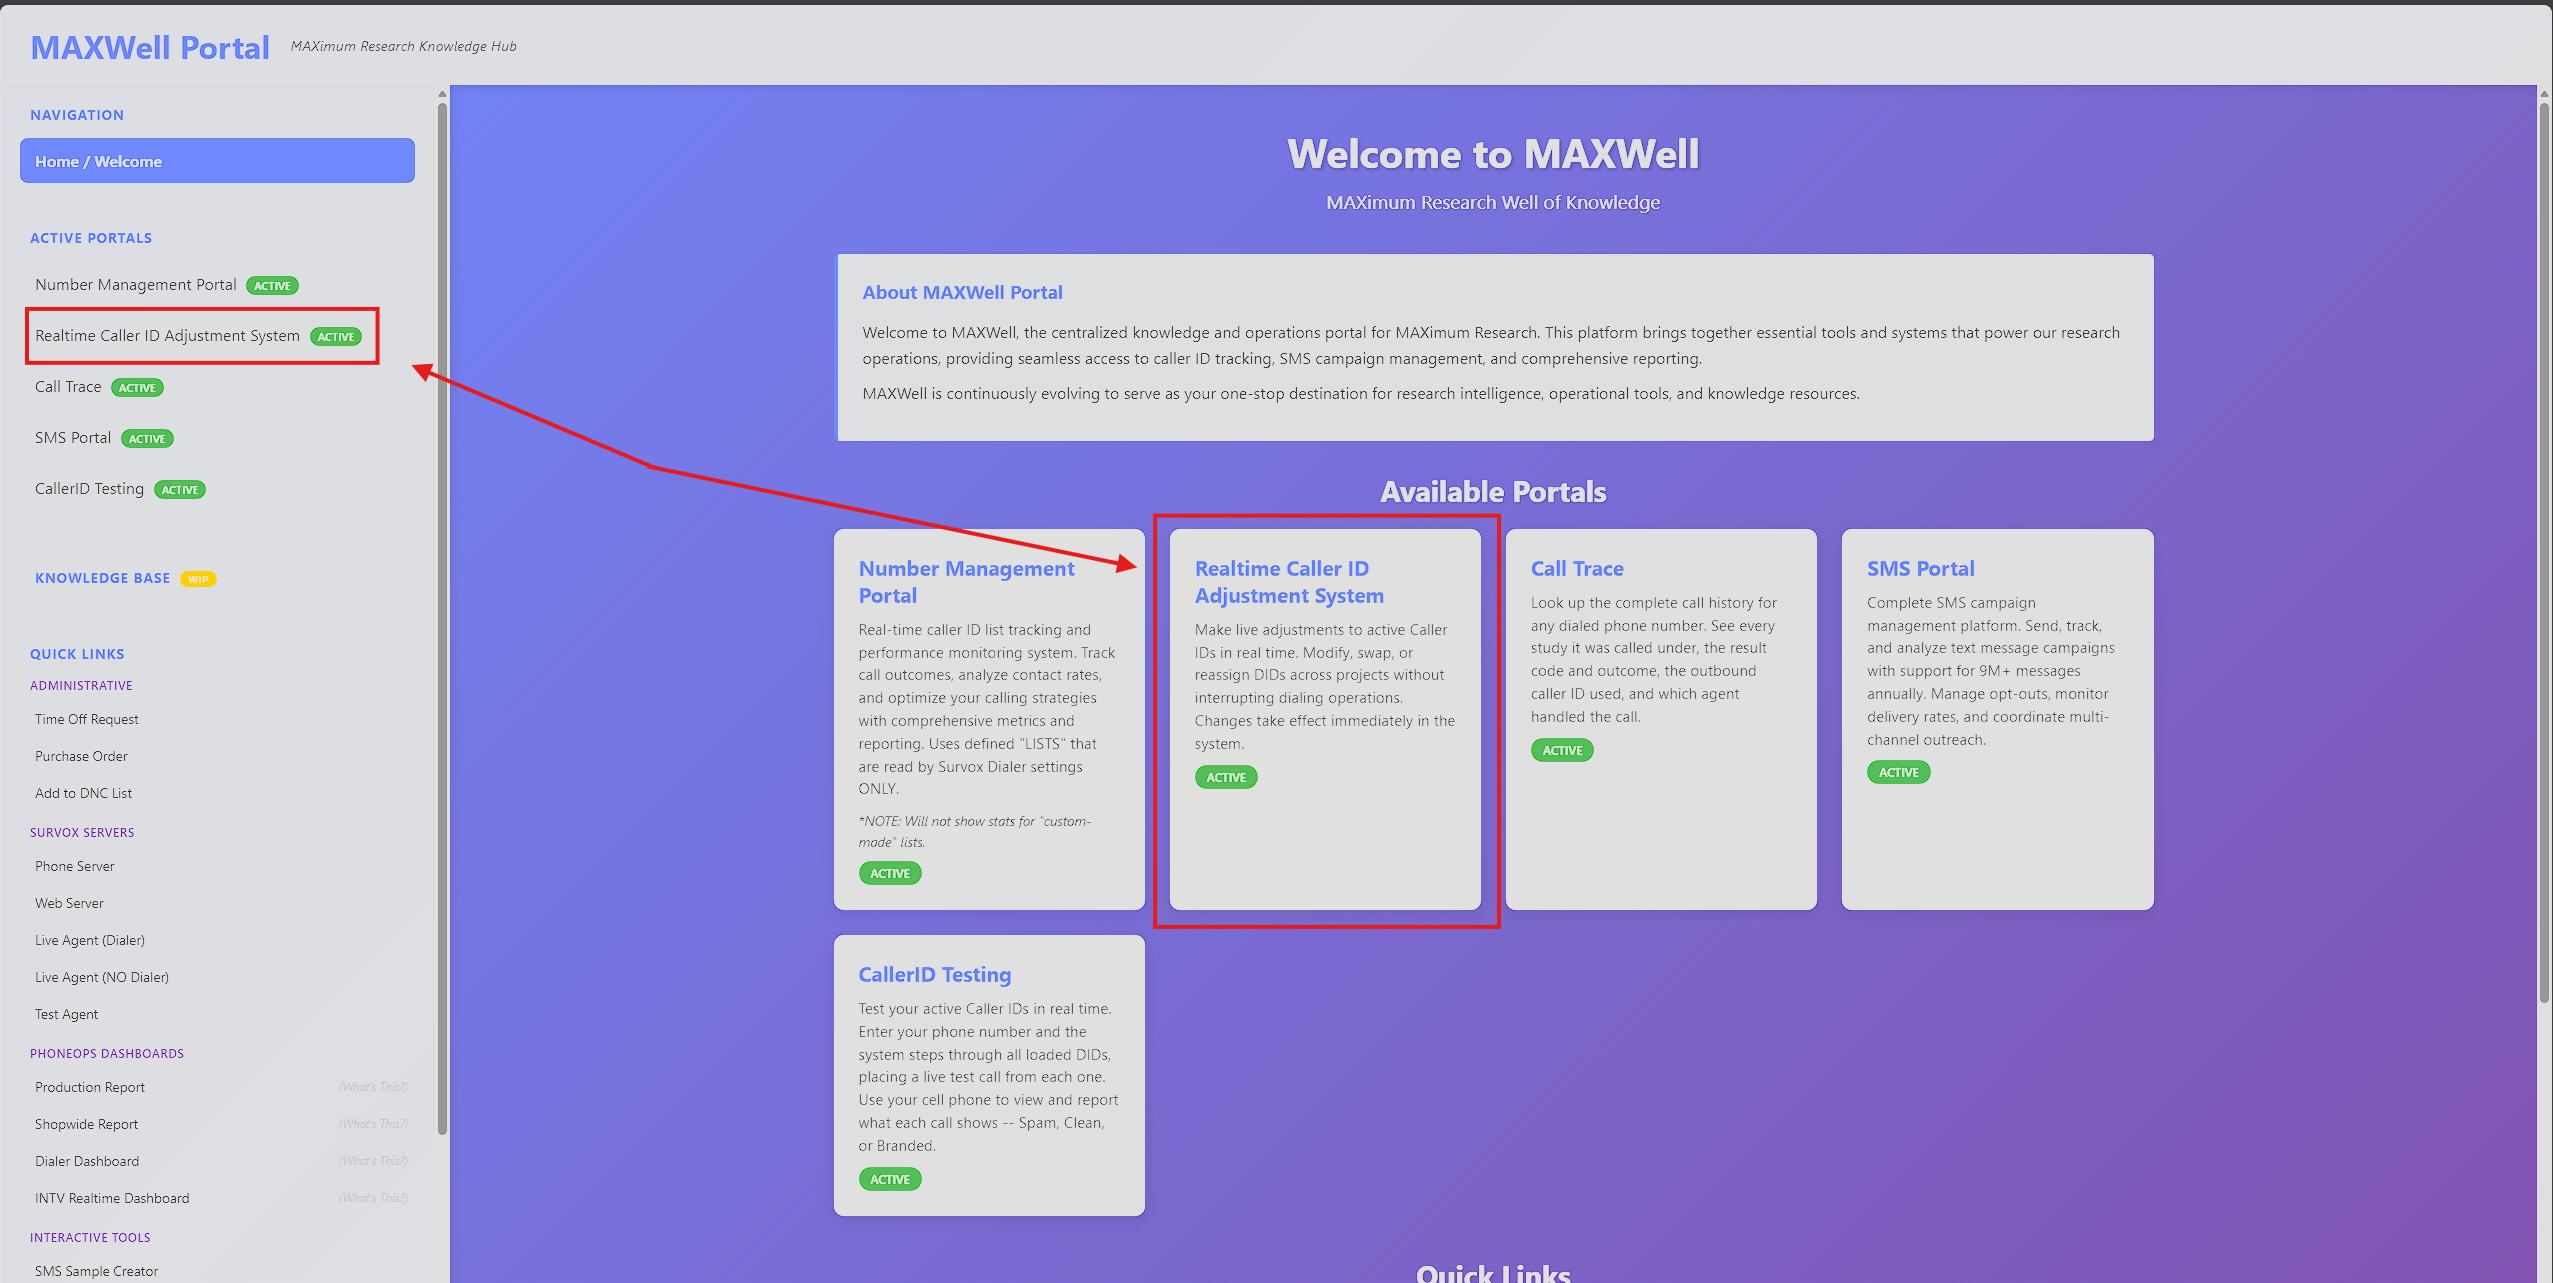
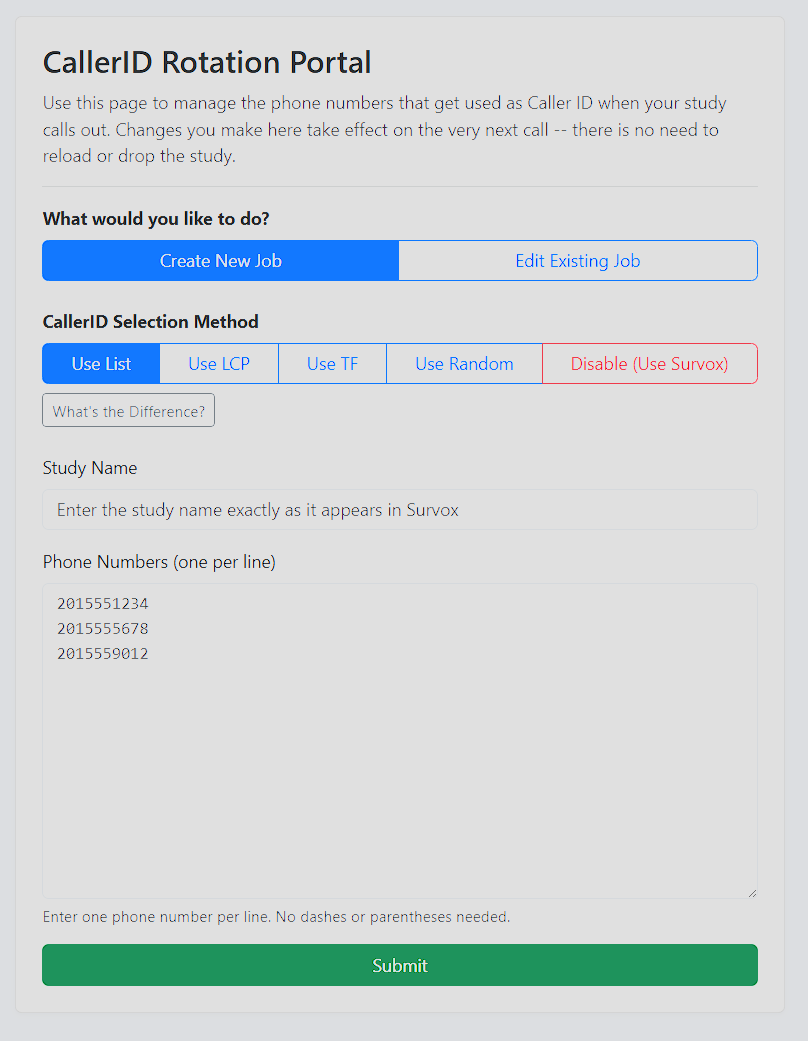
Create New Job / Edit Existing Job
Self-explanatory -- choose whichever applies to your situation. If your job does not exist yet in the system, it will be created automatically once a call is dialed on it, and defaulted to LCP mode until you set it up with a different mode.
Mode Selection
Choose the mode for the study: Use List, Use LCP, Use TF, Use Random, or Disable. See the mode descriptions above for details on each.
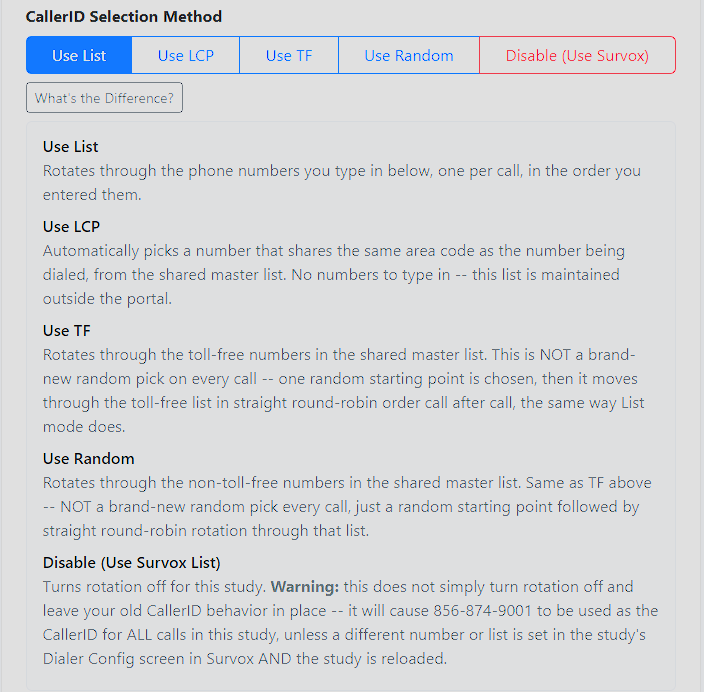
Study Name
This field MUST match the Survox study name letter for letter. Case does not matter.
If the Study Name does not match exactly, the system won't recognize it as the same job. Since the Interceptor auto-creates a job the moment a call is dialed, a mismatch results in TWO jobs existing for the same study -- the one you manually created, and a separate auto-generated one (defaulted to LCP) under the name Survox is actually sending. For example, if you create a job called "oh_state" but the Survox study name is actually "ohstate," you will end up with two separate jobs listed: your "oh_state" job, and an auto-generated "ohstate" job.
Phone Numbers
Paste in the actual numbers you want to use, one per row. This field is only valid if using "Use List" mode.
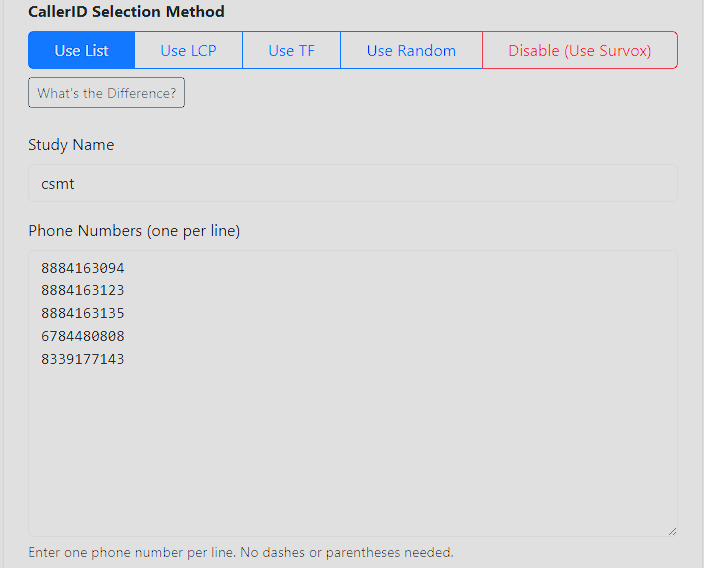
When you are happy with your selections, click the green "Submit" button at the bottom. Your new Interceptor task will be created and active immediately.
Edit Existing Job
The only real difference here is that the Study Name type-in box becomes a dropdown, letting you select an existing project. All other steps and notes covered above are the same.
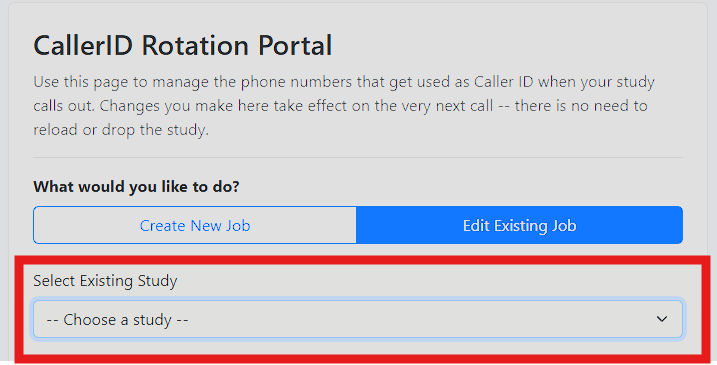
There are 2 additional options available when editing an existing job:
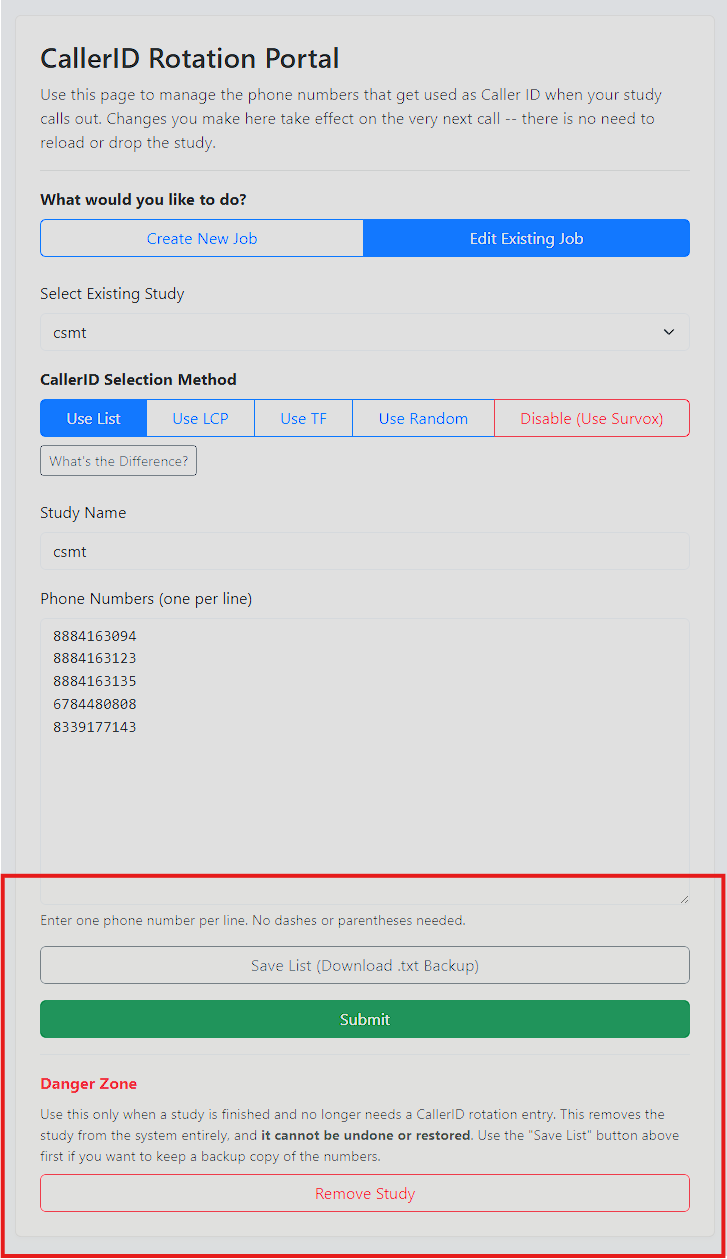
If you plan to remove a study, it's recommended to use Download List right beforehand to save a record of the settings -- though this is completely optional.
- Download List -- Creates a txt file for you to save when a project is done, so you can store the settings for later reference, should the job come back, or if someone asks how it was set up.
- Remove Study -- Completely DELETES the project from the Interceptor program. This should ONLY be done after a project has concluded fielding and is billed. Doing so helps keep the database at a minimum and running smoothly. Note: If a study is removed prematurely, the system will only recreate the job (defaulting it back to LCP mode) once a call is actually dialed on it afterward.
Notes
- Numbers and Mode changes are INSTANT, starting with the very next call.
- All changes are logged and stored for historic reference (Brian access needed to view logs).
- Adding a number into a list multiple times "weights" it, so it gets used more frequently.
Verifying Your Changes
To check your changes are working, you can view the Realtime Dashboard from MAXWell's Number Management Portal. You should see the changes reflected within a few minutes.
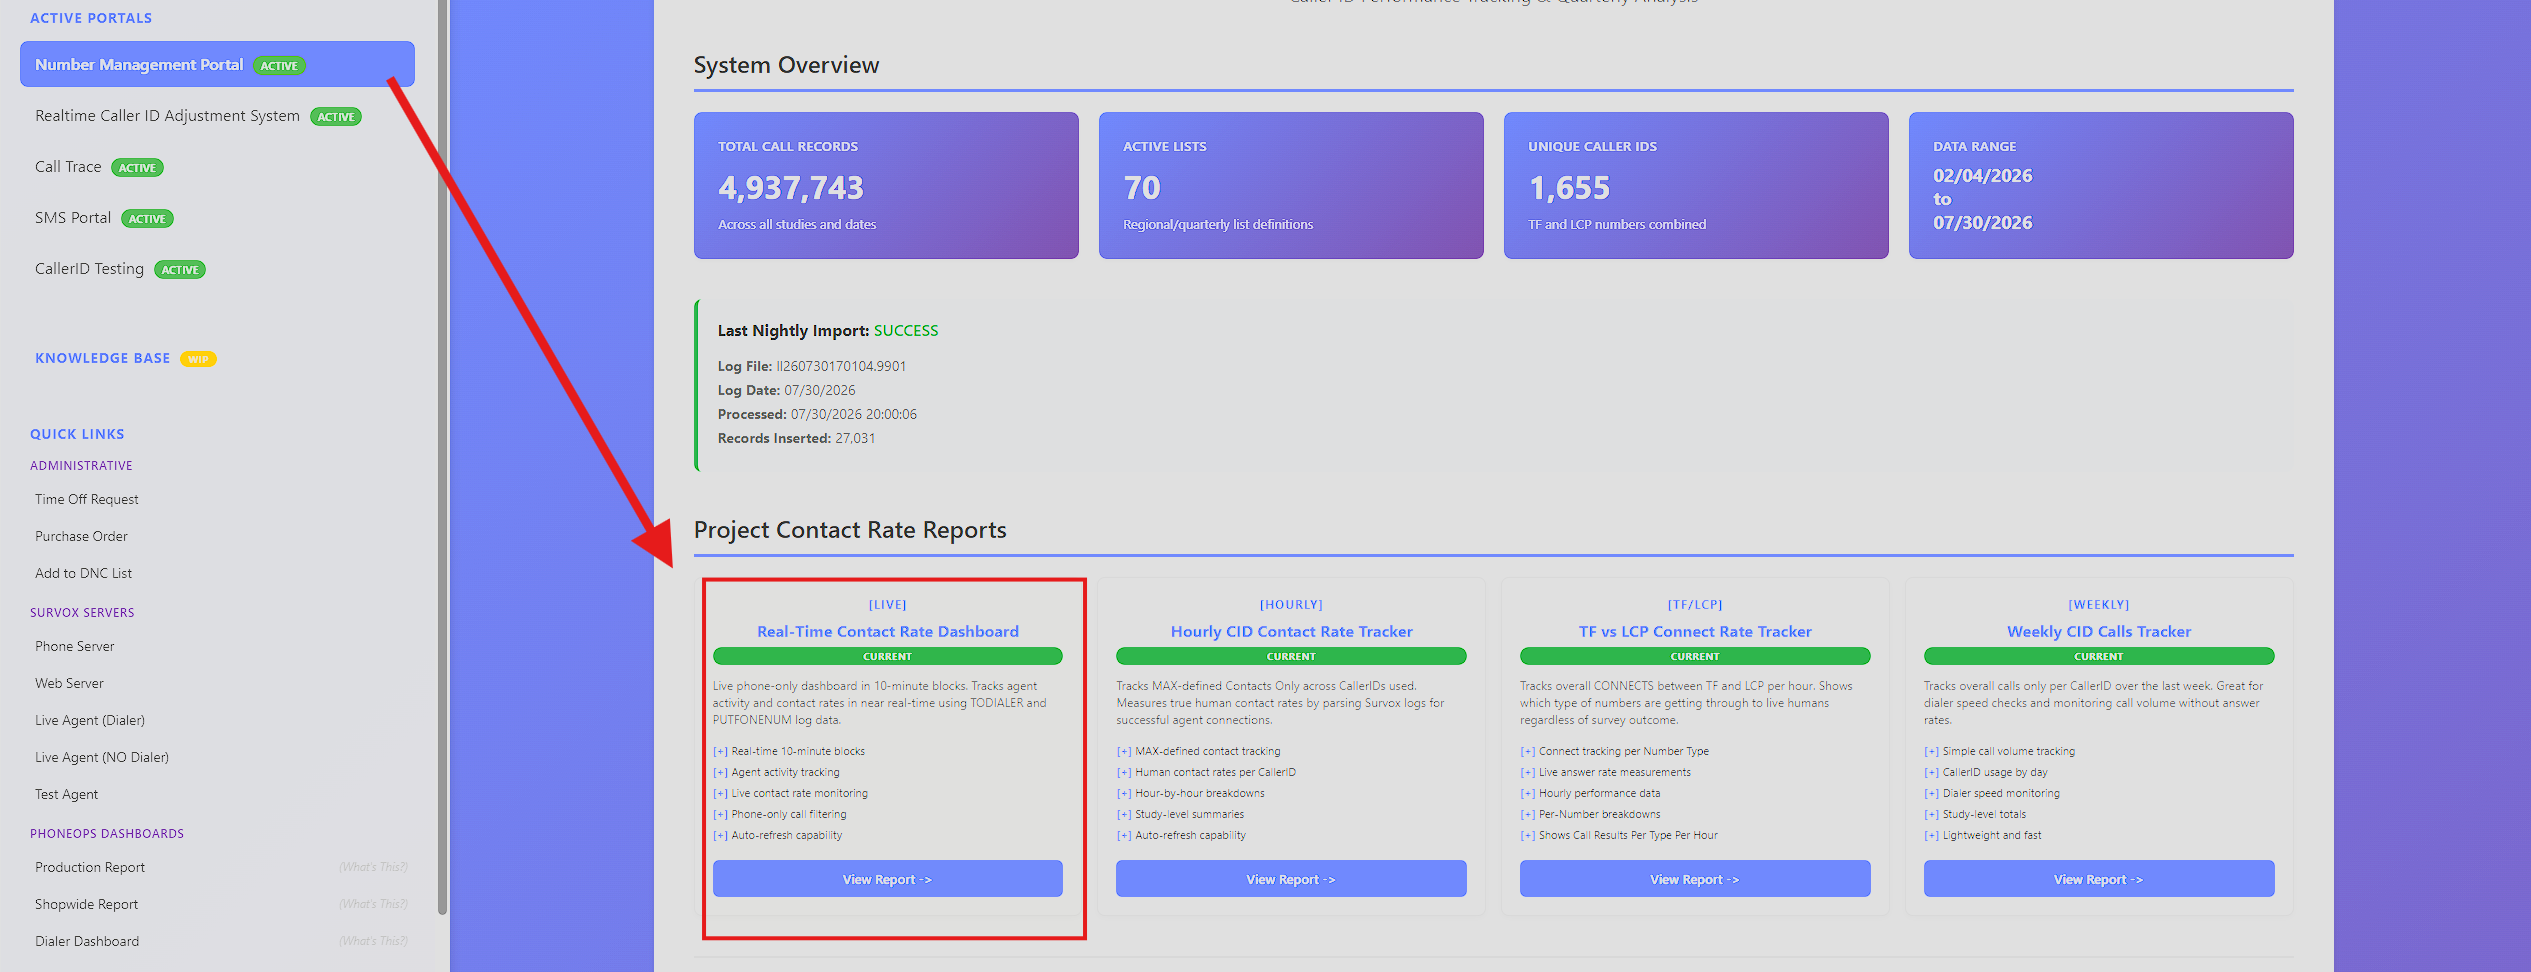
- If you switched modes or added new numbers to a List, you should start seeing new numbers appear with calls from them in the table for the study.
- If you removed a number from a List, or switched away from a mode, the numbers no longer in use should stop incrementing shortly (calls still live from before the change can still cause minor increases).
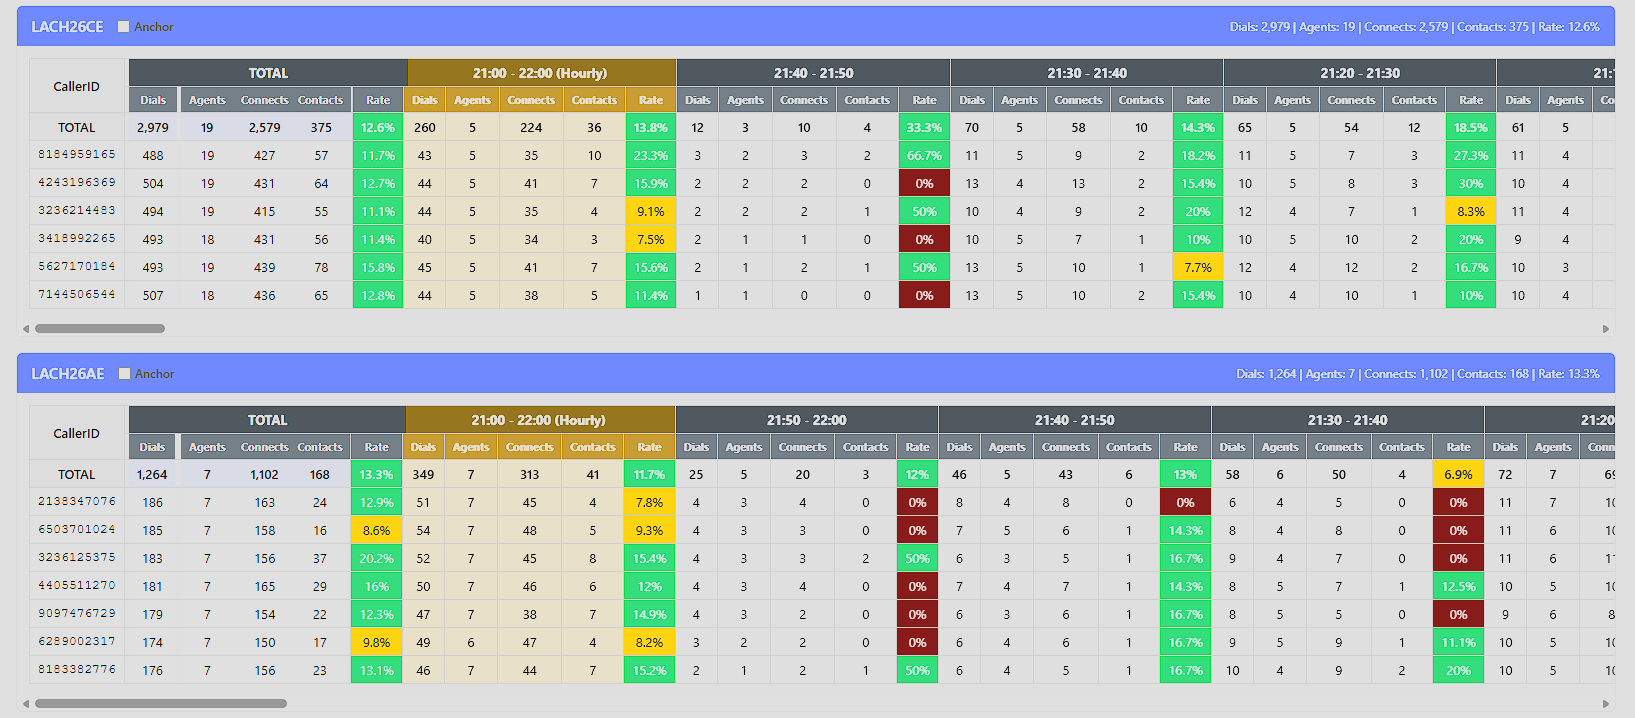
Common Problems Q&A
Q: I created a job, but the calls are still using the wrong CallerIDs. What happened?
A: This is almost always a Study Name mismatch. Since the system auto-creates a job the moment a call is dialed, a mismatch results in TWO jobs existing for the study -- the one you manually created, and a separate auto-generated one (defaulted to LCP) under the name Survox is actually sending. Double check the dropdown/job list for a similarly-named duplicate job.
Q: What actually happens if I use Disable mode?
A: All calls on that study will use 856-874-9001 as the CallerID -- this is not the same as "leaving CallerID behavior alone." This should be avoided in almost all cases. If you do need to use it intentionally, a list must also be set in the study's Dialer Config screen in Survox, AND the study must be reloaded, or every call will go out on 856-874-9001.
Q: What's the difference between Use TF and Use Random?
A: Use TF rotates through the toll-free numbers in the shared master list; Use Random rotates through the non-toll-free numbers in that same list. Neither one picks a brand-new random number on every call -- each picks one random starting point, then moves through its list in straight round-robin order from there, the same way List mode does. Note: switching modes resets the last number used, so if you switch back to either of these modes later, it could start at a different spot in the list.
Q: When should I use Remove Study?
A: Only after a project has finished fielding and has been billed. It's a good idea to use Download List first to save a copy of the settings before removing. If a study is removed prematurely, the system will simply recreate the job (defaulted back to LCP mode) the next time a call is actually dialed on it.
Q: When should I create my Study?
A: Unlike survox, you can make these projects at anytime, as long as you know what the programmer is using as the studycode.